IBM 2498-B40 User Guide - Page 44
Synchronizing local time using NTP, timezone_fmt, tsTimeZone, Ctrl+D, tsClockServer
 |
View all IBM 2498-B40 manuals
Add to My Manuals
Save this manual to your list of manuals |
Page 44 highlights
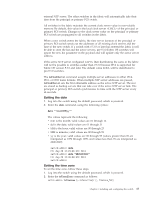
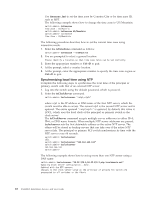
Use timezone_fmt to set the time zone by Country/City or by time zone ID, such as MST. The following example shows how to change the time zone to US/Mountain. switch:admin> tstimezone Time Zone : US/Pacific switch:admin> tstimezone US/Mountain switch:admin> tstimezone Time Zone : US/Mountain The following procedure describes how to set the current time zone using interactive mode. 1. Enter the tsTimeZone command as follows: switch:admin> tstimezone --interactive 2. You are prompted to select a general location. Please identify a location so that time zone rules can be set correctly. 3. Enter the appropriate number or Ctrl+D to quit. 4. At the prompt, select a country location. 5. At the prompt, enter the appropriate number to specify the time zone region or Ctrl+D to quit. Synchronizing local time using NTP Complete the following steps to synchronize the local time of the principal or primary switch with that of an external NTP server. 1. Log into the switch using the default password, which is password. 2. Enter the tsClockServer command. switch:admin> tsclockserver "" where ntp1 is the IP address or DNS name of the first NTP server, which the switch must be able to access. The second ntp2 is the second NTP server and is optional. The entire operand "" is optional; by default, this value is LOCL, which uses the local clock of the principal or primary switch as the clock server. The tsClockServer command accepts multiple server addresses in either IPv4, IPv6, or DNS name formats. When multiple NTP server addresses are passed, tsclockserver sets the first obtainable address as the active NTP server. The others will be stored as backup servers that can take over if the active NTP server fails. The principal or primary FCS switch synchronizes its time with the NTP server every 64 seconds. switch:admin> tsclockserver LOCL switch:admin> tsclockserver "132.163.135.131" switch:admin> tsclockserver 132.163.135.131 switch:admin> The following example shows how to set up more than one NTP server using a DNS name: switch:admin> tsclockserver "10.32.170.1;10.32.170.2;ntp.localdomain.net" Updating Clock Server configuration...done. Updated with the NTP servers Changes to the clock server value on the principal or primary FCS switch are propagated to all switches in the fabric 18 SAN48B-5 Installation, Service, and User Guide
-
 1
1 -
2
-
3
-
4
-
5
-
6
-
7
-
8
-
9
-
10
-
11
-
12
-
13
-
14
-
15
-
16
-
17
-
18
-
19
-
20
-
21
-
22
-
23
-
24
-
25
-
26
-
27
-
28
-
29
-
30
-
31
-
32
-
33
-
34
-
35
-
36
-
37
-
38
-
 39
39 -
 40
40 -
 41
41 -
 42
42 -
 43
43 -
 44
44 -
 45
45 -
 46
46 -
 47
47 -
 48
48 -
 49
49 -
50
-
51
-
52
-
53
-
54
-
55
-
56
-
57
-
58
-
59
-
60
-
61
-
62
-
63
-
64
-
65
-
66
-
67
-
68
-
69
-
70
-
71
-
72
-
73
-
74
-
75
-
76
-
77
-
78
 |
 |
