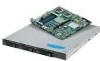
Intel SR1530HCLRNA User Guide - Page 70
Installing a Hot-Swap SAS/SATA Drive SR1530HCL, SR1530HCLS and SR1530HCLR/SR1530HCLSR
 |
UPC - 735858197274
View all Intel SR1530HCLRNA manuals
Add to My Manuals
Save this manual to your list of manuals |
Page 70 highlights
Installing a Hot-Swap SAS/SATA Drive (SR1530HCL/ SR1530HCLS and SR1530HCLR/SR1530HCLSR) 1. Remove the front bezel if it is installed. For instructions, see "Removing the Front Bezel" on page 26. 2. Locate the drive position you want to use. See the following figure for drive positions. HDD 0 HDD 1 HDD 2 AF001619 Figure 42. Locating Drive Positions (SR1530HCL/SR1530HCLS and SR1530HCLR/SR1530HCLSR) 3. Open the latch at the front of the hard drive carrier. See letter "A" in the following figure. A AF001620 Figure 43. Removing the Drive Carrier (SR1530HCL/SR1530HCLS and SR1530HCLR/SR1530HCLSR) 48 Server System User Guide
-
 1
1 -
2
-
3
-
4
-
5
-
6
-
7
-
8
-
9
-
10
-
11
-
12
-
13
-
14
-
15
-
16
-
17
-
18
-
19
-
20
-
21
-
22
-
23
-
24
-
25
-
26
-
27
-
28
-
29
-
30
-
31
-
32
-
33
-
34
-
35
-
36
-
37
-
38
-
39
-
40
-
41
-
42
-
43
-
44
-
45
-
46
-
47
-
48
-
49
-
50
-
51
-
52
-
53
-
54
-
55
-
56
-
57
-
58
-
59
-
60
-
61
-
62
-
63
-
64
-
 65
65 -
 66
66 -
 67
67 -
 68
68 -
 69
69 -
 70
70 -
 71
71 -
 72
72 -
 73
73 -
 74
74 -
 75
75 -
76
-
77
-
78
-
79
-
80
-
81
-
82
-
83
-
84
-
85
-
86
-
87
-
88
-
89
-
90
-
91
-
92
-
93
-
94
-
95
-
96
-
97
-
98
-
99
-
100
-
101
-
102
-
103
-
104
-
105
-
106
-
107
-
108
-
109
-
110
-
111
-
112
-
113
-
114
-
115
-
116
-
117
-
118
-
119
-
120
-
121
-
122
-
123
-
124
-
125
-
126
-
127
-
128
-
129
-
130
-
131
-
132
-
133
-
134
-
135
-
136
-
137
-
138
-
139
-
140
-
141
-
142
-
143
-
144
-
145
-
146
-
147
-
148
-
149
-
150
-
151
-
152
-
153
-
154
-
155
-
156
-
157
-
158
-
159
-
160
-
161
-
162
-
163
-
164
-
165
-
166
-
167
-
168
-
169
-
170
-
171
-
172
-
173
-
174
-
175
-
176
-
177
-
178
-
179
-
180
-
181
-
182
-
183
-
184
-
185
-
186
-
187
-
188
-
189
-
190
-
191
-
192
-
193
-
194
 |
 |

48
Server System User Guide
Installing a Hot-Swap SAS/SATA Drive (SR1530HCL/
SR1530HCLS and SR1530HCLR/SR1530HCLSR)
1.
Remove the front bezel if it is installed. For instructions, see
“Removing the Front
Bezel” on page 26
.
2.
Locate the drive position you want to use. See the following figure for drive
positions.
Figure 42. Locating Drive Positions (SR1530HCL/SR1530HCLS and
SR1530HCLR/SR1530HCLSR)
3.
Open the latch at the front of the hard drive carrier. See letter “A” in the following
figure.
Figure 43. Removing the Drive Carrier (SR1530HCL/SR1530HCLS and
SR1530HCLR/SR1530HCLSR)
AF001619
HDD 0
HDD 1
HDD 2
A
AF001620