Invacare SOLARA3G Owners Manual - Page 63
Adjusting the Locking Cantilever Arm Angle, 100°, 110°, 120°
 |
View all Invacare SOLARA3G manuals
Add to My Manuals
Save this manual to your list of manuals |
Page 63 highlights
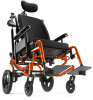
8 ARMS Adjusting the Locking Cantilever Arm Angle This adjustment is recommended if the back angle has been changed to keep arm parallel to the ground/floor. 1. Flip the cantilever arm up and out of the way. 2. Remove the locknut that secures the locking pin to the arm adjustment plate. 3. Determine the mounting hole in the arm adjustment plate that will be used to correspond to the back angle. 4. Securely tighten the locking pin and washer to the adjustment plate with a locknut. 5. Repeat STEPS 1-4 for the opposite side, if necessary. Back Angle Bracket Arm Adjustment Plate Back Angle Bracket Arm Adjustment Plate Arm Adjustment 90° Plate Locking Pin Locknut 100° Washer Back Angle Bracket 110° Arm Adjustment Plate Back Angle Bracket 120° Arm Adjustment Plate Part No 1154295 FIGURE 13 Adjusting the Locking Cantilever Arm Angle 63 Invacare® Solara®3G/Spree 3G Wheelchair
-
 1
1 -
2
-
3
-
4
-
5
-
6
-
7
-
8
-
9
-
10
-
11
-
12
-
13
-
14
-
15
-
16
-
17
-
18
-
19
-
20
-
21
-
22
-
23
-
24
-
25
-
26
-
27
-
28
-
29
-
30
-
31
-
32
-
33
-
34
-
35
-
36
-
37
-
38
-
39
-
40
-
41
-
42
-
43
-
44
-
45
-
46
-
47
-
48
-
49
-
50
-
51
-
52
-
53
-
54
-
55
-
56
-
57
-
 58
58 -
 59
59 -
 60
60 -
 61
61 -
 62
62 -
 63
63 -
 64
64 -
 65
65 -
 66
66 -
 67
67 -
 68
68 -
69
-
70
-
71
-
72
-
73
-
74
-
75
-
76
-
77
-
78
-
79
-
80
-
81
-
82
-
83
-
84
-
85
-
86
-
87
-
88
-
89
-
90
-
91
-
92
-
93
-
94
-
95
-
96
-
97
-
98
-
99
-
100
-
101
-
102
-
103
-
104
-
105
-
106
-
107
-
108
-
109
-
110
-
111
-
112
-
113
-
114
-
115
-
116
-
117
-
118
-
119
-
120
-
121
-
122
-
123
-
124
 |
 |
