Kenwood DNX690HD Instruction Manual - Page 6
Turning on the Unit, Initial setup - install
 |
View all Kenwood DNX690HD manuals
Add to My Manuals
Save this manual to your list of manuals |
Page 6 highlights
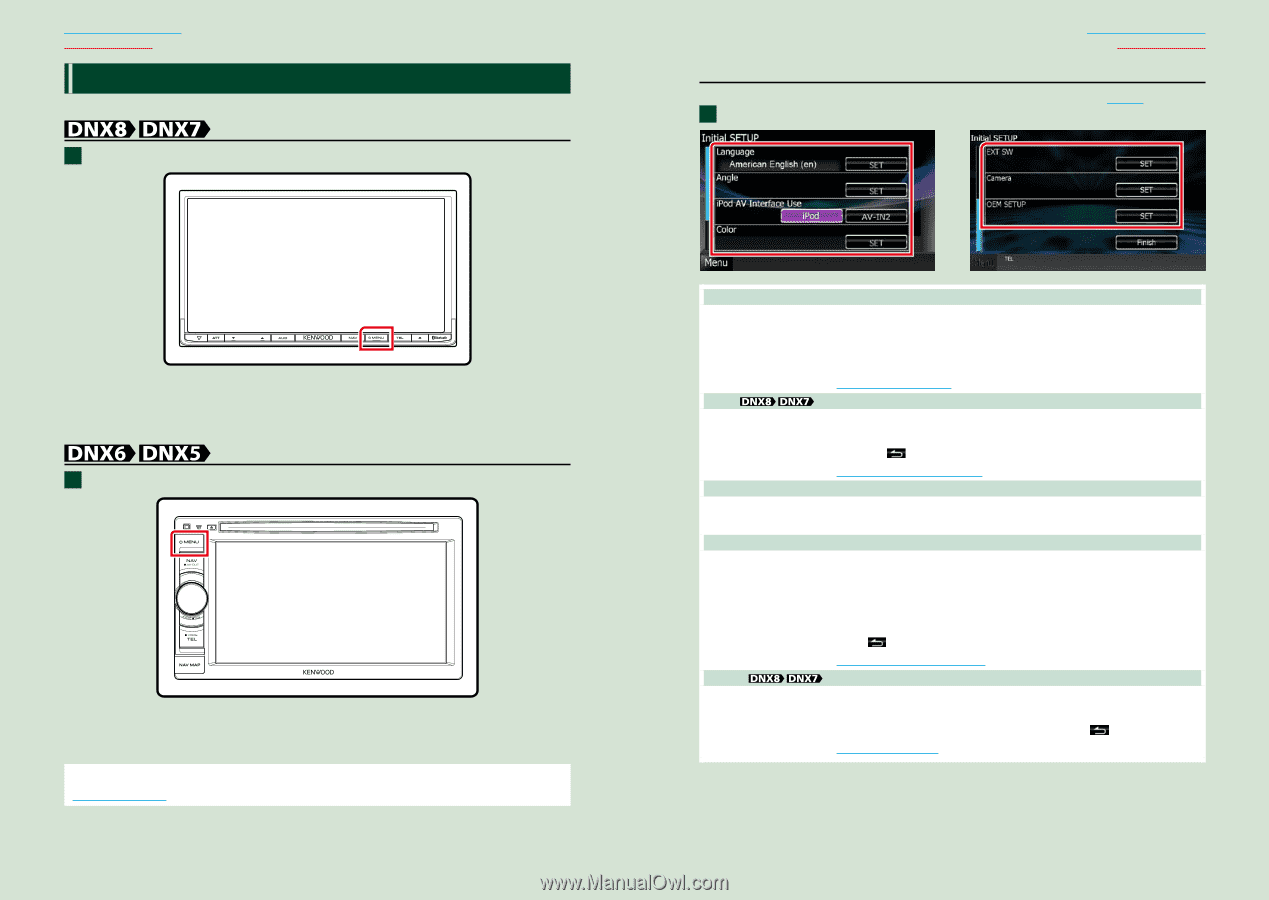
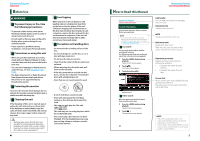
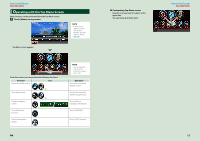
Return to the Top page Basic Operations Turning on the Unit The method of turning on is different depending on the model. 1 Press the button. The unit is turned on. ●●To turn off the unit: Press the button for 1 second. 1 Press the button. The unit is turned on. ●●To turn off the unit: Press the button for 1 second. If it is your first time turning the unit on after installation, it will be necessary to perform Initial setup (P.11). 10 Return to the Top page Basic Operations Initial setup Perform this setup when you use this unit first time or when you reset the unit (P.119). 1 Set each item as follows. Language Select the language used for the control screen and setting items. Default is "American English (en)". 1 Touch [SET]. 2 Touch [2] or [3] to select the desired language. 3 Touch [Enter]. For detailed operation, see Language setup (P.89). Angle Adjust the position of the monitor. Default is "0". 1 Touch [SET]. 2 Touch desired angle number and [ ]. For detailed operation, see Monitor angle control (P.92). iPod AV Interface Use Set the terminal which your iPod is connected to. Default is "iPod". 1 Touch [iPod] or [AV-IN2]. Color Set the screen and button illumination color. You can select whether to allow color scan operation or select a fixed color for operation. 1 Touch [SET]. 2 Touch [ON] or [OFF] of [Panel Color Scan]. 3 If you want to change color, touch [SET] of [Panel Color Coordinate]. 4 Touch your desired color and [ ]. For detailed operation, see Panel color coordinate (P.92). EXT SW Control the external devices. 1 Touch [SET]. 2 Set device name, output pattern, and pulse set for each device. Then, touch [ ]. For detailed operation, see EXT SW setup (P.90). Continued 11
-
 1
1 -
 2
2 -
 3
3 -
 4
4 -
 5
5 -
 6
6 -
 7
7 -
 8
8 -
 9
9 -
 10
10 -
 11
11 -
 12
12 -
13
-
14
-
15
-
16
-
17
-
18
-
19
-
20
-
21
-
22
-
23
-
24
-
25
-
26
-
27
-
28
-
29
-
30
-
31
-
32
-
33
-
34
-
35
-
36
-
37
-
38
-
39
-
40
-
41
-
42
-
43
-
44
-
45
-
46
-
47
-
48
-
49
-
50
-
51
-
52
-
53
-
54
-
55
-
56
-
57
-
58
-
59
-
60
-
61
-
62
-
63
-
64
-
65
-
66
-
67
-
68
 |
 |