Kodak ESP9 User Manual - Page 19
Using the control panel, Adjusting the control panel position - printers
 |
UPC - 041771349479
View all Kodak ESP9 manuals
Add to My Manuals
Save this manual to your list of manuals |
Page 19 highlights
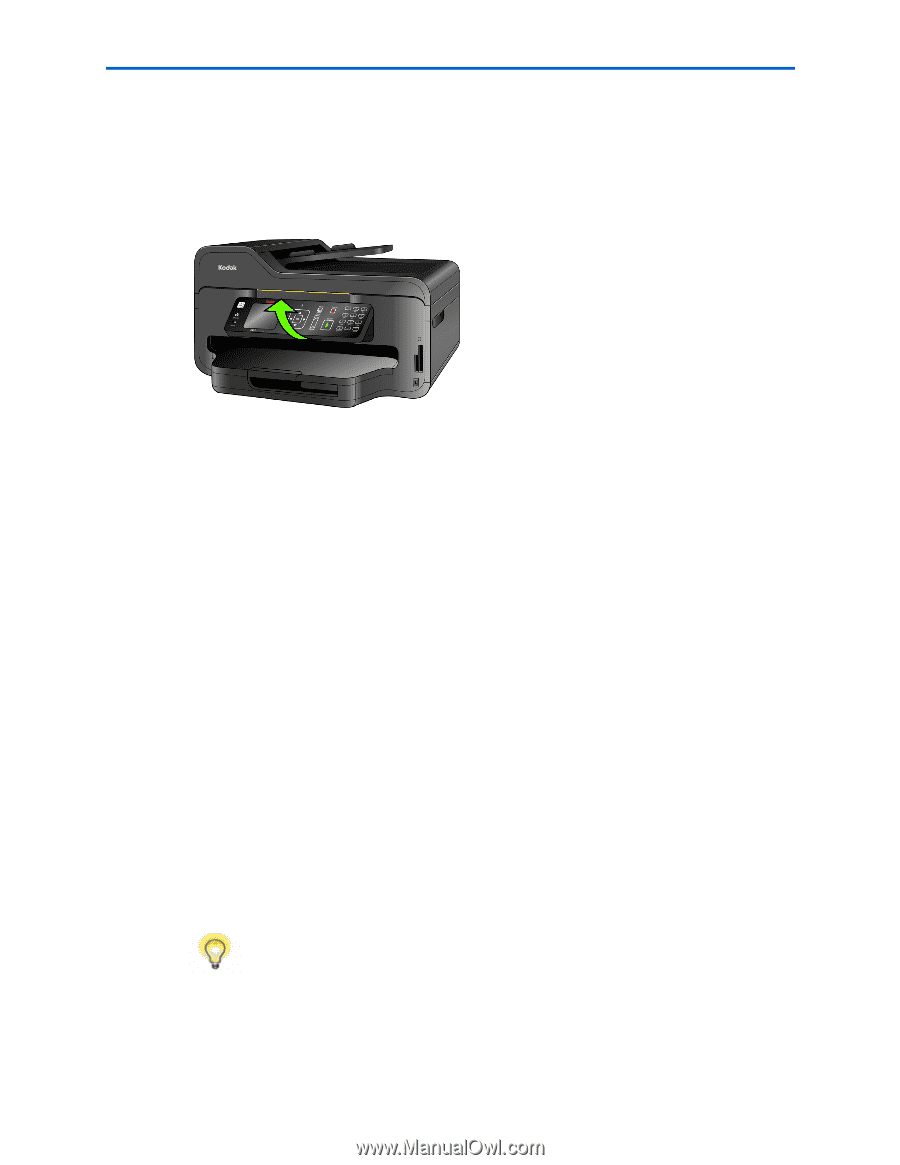
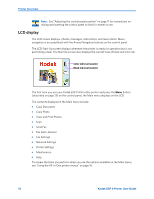
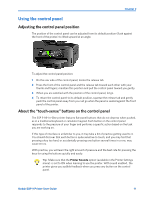
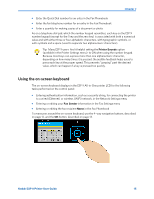
Chapter 2 Using the control panel Adjusting the control panel position The position of the control panel can be adjusted from its default position (flush against the front of the printer) to lifted upward at an angle. To adjust the control panel position: 1 On the rear side of the control panel, locate the release tab. 2 Press the front of the control panel and the release tab toward each other with your thumb and fingers; maintain this position and pull the control panel toward you gently. 3 When you are satisfied with the position of the control panel, let go. 4 To return the control panel to its default position, squeeze the release tab and gently push the control panel away from you. Let go when the panel is seated against the front panel of the printer. About the "touch-sense" buttons on the control panel The ESP 9 All-in-One printer features flat-panel buttons that do not depress when pushed, as in a traditional keyboard or calculator keypad. Each button on the control panel responds to the pressure of your finger and performs a specific action based on the task you are working on. If this type of interface is unfamiliar to you, it may take a bit of practice getting used to it. You should discover that each button is quite sensitive to touch, and you may find that pressing a key too hard, or accidentally pressing one button several times in a row, may cause errors. With practice, you will learn the right amount of pressure and the best rate for pressing the keys for using the buttons quickly and easily. Tip: Make sure that the Printer Sounds option (available in the Printer Settings menu) is set to ON when learning to use the printer. With sound enabled, the printer gives you audible feedback when you press any button on the control panel. Kodak ESP 9 Printer User Guide 11
-
 1
1 -
2
-
3
-
4
-
5
-
6
-
7
-
8
-
9
-
10
-
11
-
12
-
13
-
 14
14 -
 15
15 -
 16
16 -
 17
17 -
 18
18 -
 19
19 -
 20
20 -
 21
21 -
 22
22 -
 23
23 -
 24
24 -
25
-
26
-
27
-
28
-
29
-
30
-
31
-
32
-
33
-
34
-
35
-
36
-
37
-
38
-
39
-
40
-
41
-
42
-
43
-
44
-
45
-
46
-
47
-
48
-
49
-
50
-
51
-
52
-
53
-
54
-
55
-
56
-
57
-
58
-
59
-
60
-
61
-
62
-
63
-
64
-
65
-
66
-
67
-
68
-
69
-
70
-
71
-
72
-
73
-
74
-
75
-
76
-
77
-
78
-
79
-
80
-
81
-
82
-
83
-
84
-
85
-
86
-
87
-
88
-
89
-
90
-
91
-
92
-
93
-
94
-
95
-
96
-
97
-
98
-
99
-
100
-
101
-
102
-
103
-
104
-
105
-
106
-
107
-
108
-
109
-
110
-
111
-
112
-
113
-
114
-
115
-
116
-
117
-
118
-
119
-
120
-
121
-
122
-
123
-
124
-
125
-
126
-
127
-
128
-
129
-
130
-
131
-
132
-
133
-
134
-
135
-
136
-
137
-
138
-
139
-
140
-
141
 |
 |