Konica Minolta AccurioPress C14000 Watkiss PowerSquare 224 Offline User Manual
Konica Minolta AccurioPress C14000 Manual
 |
View all Konica Minolta AccurioPress C14000 manuals
Add to My Manuals
Save this manual to your list of manuals |
Konica Minolta AccurioPress C14000 manual content summary:
- Konica Minolta AccurioPress C14000 | Watkiss PowerSquare 224 Offline User Manual - Page 1
Watkiss PowerSquare™224 User Manual Offline Model English, Issue 5, June 2013 - Konica Minolta AccurioPress C14000 | Watkiss PowerSquare 224 Offline User Manual - Page 2
© Watkiss Automation Limited 2013 All Rights Reserved. Reproduction, adaptation, or translation without prior written permission is prohibited, except as allowed under the copyright laws. Warranty The information contained in this document is subject to change without notice. Watkiss Automation - Konica Minolta AccurioPress C14000 | Watkiss PowerSquare 224 Offline User Manual - Page 3
29 Lift the PowerSquare Main Deck 30 Empty the Trim Bin 32 Open the Stitch-Wire Cabinet 33 Adjust the Stacker 34 continued . . . User Manual for Watkiss PowerSquare™224 English, Issue 5, June 2013. Watkiss Part No. 960-931 Effective Serial No. WA/PSQ/0800 onwards Watkiss PowerSquare™224 User - Konica Minolta AccurioPress C14000 | Watkiss PowerSquare 224 Offline User Manual - Page 4
40 Book Quality Problems 41 Message List 52 Paper Jams 59 Clear a Stitch-wire Jam 65 Clear a Stitch Head Jam 67 Calibrate the Touch Screen 70 Change the Fuses - PowerSquare 70 Change the Fuses - Book Stacker 71 Manually park the Shuttle 72 6. Maintenance 75 Service Interval 75 Operator - Konica Minolta AccurioPress C14000 | Watkiss PowerSquare 224 Offline User Manual - Page 5
and Caution Messages The warning and caution messages used in this manual are shown below. WARNING: A WARNING message tells you that a procedure or operation can be dangerous. To prevent injury, you must follow the instructions. CAUTION: A CAUTION message tells you that a procedure or operation can - Konica Minolta AccurioPress C14000 | Watkiss PowerSquare 224 Offline User Manual - Page 6
PowerSquare Installation Your PowerSquare must be installed by a Watkiss service engineer. Special knowledge is needed to install the machine. CAUTION you have any questions or problems, refer to the problem solving section in this manual (see "Error Conditions, Problems and Solutions" on page 39 - Konica Minolta AccurioPress C14000 | Watkiss PowerSquare 224 Offline User Manual - Page 7
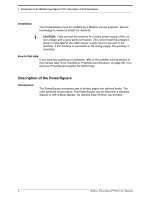
the finished books.(See Figure 1). The book stacker is optional. It is a high-capacity stacker for the finished books (See Figure 2). Watkiss PowerSquare™224 User Manual 3 - Konica Minolta AccurioPress C14000 | Watkiss PowerSquare 224 Offline User Manual - Page 8
holds the spool of stitch-wire. The trim bin collects the paper that is trimmed from the edge of the book. 4 Watkiss PowerSquare™224 User Manual - Konica Minolta AccurioPress C14000 | Watkiss PowerSquare 224 Offline User Manual - Page 9
the PowerSquare, the current settings are stored. The fuses make sure the operator and the machine are protected if there is an electrical problem or short circuit. The voltage label is fitted to the PowerSquare during the installation procedure. The voltage label displays the selected voltage. The - Konica Minolta AccurioPress C14000 | Watkiss PowerSquare 224 Offline User Manual - Page 10
Book Stacker or turns OFF the Book Stacker. 5 Fuses The fuses make sure the operator and the machine are protected if there is an electrical problem or short circuit. 6 Watkiss PowerSquare™224 User Manual - Konica Minolta AccurioPress C14000 | Watkiss PowerSquare 224 Offline User Manual - Page 11
13. Information about standard procedures, for example opening covers to clear a paper jam, is included in "Standard Tasks" on page 25. Watkiss PowerSquare™224 User Manual 7 - Konica Minolta AccurioPress C14000 | Watkiss PowerSquare 224 Offline User Manual - Page 12
Before You Begin Before You Begin Paper and Book Quality Instructions • The size of paper and the thickness of the the different paper types are all the same size. See "Book Quality Problems" on page 41 for further information. Turn On the PowerSquare Procedure 1. PowerSquare™224 User Manual - Konica Minolta AccurioPress C14000 | Watkiss PowerSquare 224 Offline User Manual - Page 13
STITCHES and enter the number of stitches. If needed, the stitch pitch can be changed. See "STITCH PITCH" on page 18. Watkiss PowerSquare™224 User Manual 9 - Konica Minolta AccurioPress C14000 | Watkiss PowerSquare 224 Offline User Manual - Page 14
message 'SHUTTLE MOTOR ERROR' is displayed in the message list. See "Light Guard Interruption" on page 39. Procedure 1. Touch START . 10 Watkiss PowerSquare™224 User Manual - Konica Minolta AccurioPress C14000 | Watkiss PowerSquare 224 Offline User Manual - Page 15
the quality of the first book. 5. If the quality is not acceptable, make adjustments. See "Book Quality Problems" on page 41 for further information. During the job • Unload books from the stacker before the stacker is See "Empty the Trim Bin" on page 32. Watkiss PowerSquare™224 User Manual 11 - Konica Minolta AccurioPress C14000 | Watkiss PowerSquare 224 Offline User Manual - Page 16
2 - How to Run the PowerSquare - Run the Job 12 Watkiss PowerSquare™224 User Manual - Konica Minolta AccurioPress C14000 | Watkiss PowerSquare 224 Offline User Manual - Page 17
operate the touch screen, the selected function is not available. Some functions are not available when the machine is in operation. Watkiss PowerSquare™224 User Manual 13 - Konica Minolta AccurioPress C14000 | Watkiss PowerSquare 224 Offline User Manual - Page 18
restore the normal brightness. The touch screen takes two or three minutes to reach full brightness. FIGURE 7. The Touch Screen 14 Watkiss PowerSquare™224 User Manual - Konica Minolta AccurioPress C14000 | Watkiss PowerSquare 224 Offline User Manual - Page 19
made. 8 The counter is reset to zero when the PowerSquare is turned off. Touch 'C' to reset the book counter to zero. Watkiss PowerSquare™224 User Manual 15 - Konica Minolta AccurioPress C14000 | Watkiss PowerSquare 224 Offline User Manual - Page 20
stitch pitch is shown only when a non-standard setting is selected. 3 Set Thickness The set thickness, in mm, is shown. 16 Watkiss PowerSquare™224 User Manual - Konica Minolta AccurioPress C14000 | Watkiss PowerSquare 224 Offline User Manual - Page 21
that the form function is not active. The trim setting is displayed. A red X shows that the trim function is not active. Watkiss PowerSquare™224 User Manual 17 - Konica Minolta AccurioPress C14000 | Watkiss PowerSquare 224 Offline User Manual - Page 22
-standard stitch pitch is needed, use STITCH PITCH to make the adjustment. - AUTO Touch AUTO to select the default stitch pitch. FORM To make the square spine of the book, pressure is applied to the spine. This process form, according to the set thickness. 18 Watkiss PowerSquare™224 User Manual - Konica Minolta AccurioPress C14000 | Watkiss PowerSquare 224 Offline User Manual - Page 23
of spine form. Touch - to decrease the amount of spine form. The range is -9 to +9. The default setting is 0. Use THRESHOLD to choose if a square spine is formed. If the SET THICKNESS value is thinner turned off. Touch AUTO to select the default trim position. Watkiss PowerSquare™224 User Manual 19 - Konica Minolta AccurioPress C14000 | Watkiss PowerSquare 224 Offline User Manual - Page 24
appears. The red line fills from left to right. Hold DELETE until the red line reaches the right-hand side. 20 Watkiss PowerSquare™224 User Manual - Konica Minolta AccurioPress C14000 | Watkiss PowerSquare 224 Offline User Manual - Page 25
the list. Touch BY INDEX to list jobs in numerical order. the machine gives a number to all jobs that are saved. Watkiss PowerSquare™224 User Manual 21 - Konica Minolta AccurioPress C14000 | Watkiss PowerSquare 224 Offline User Manual - Page 26
the MAKE BOOK button will operate. For safety reasons, this function is disabled when the gathering area cover is open. 22 Watkiss PowerSquare™224 User Manual - Konica Minolta AccurioPress C14000 | Watkiss PowerSquare 224 Offline User Manual - Page 27
checks for stitches. Touch STITCH SENSOR to turn the stitch sensor on or off. The default setting is ON. - PRESET PAPER SIZES The preset paper sizes can be either ISO A used by the service engineer. FORM SETUP This button is used by the service engineer. Watkiss PowerSquare™224 User Manual 23 - Konica Minolta AccurioPress C14000 | Watkiss PowerSquare 224 Offline User Manual - Page 28
. Supervisor access level is needed for this function. Other functions on this button are used by the service engineer. Touch BRIDGE to re-reference the bridge axes. Supervisor access level is needed for this function. the red line reaches the right-hand side. 24 Watkiss PowerSquare™224 User Manual - Konica Minolta AccurioPress C14000 | Watkiss PowerSquare 224 Offline User Manual - Page 29
CHAPTER 4 Standard Tasks Introduction This chapter describes the standard tasks that are needed in the day-to-day operation of your PowerSquare. Watkiss PowerSquare™224 User Manual 25 - Konica Minolta AccurioPress C14000 | Watkiss PowerSquare 224 Offline User Manual - Page 30
the memory and reloaded for use again at a later date. Load the 'Default Job Template' to reset the PowerSquare to normal settings. Save a job 1. has made the adjustments. Reset the PowerSquare to default settings 1. Touch LOAD & SAVE . 2. Select the Default Job Template from the list of jobs. 3. - Konica Minolta AccurioPress C14000 | Watkiss PowerSquare 224 Offline User Manual - Page 31
STITCHES to close the window. The stitch pitch value is not displayed in the job mimic or on the STITCHES button. Watkiss PowerSquare™224 User Manual 27 - Konica Minolta AccurioPress C14000 | Watkiss PowerSquare 224 Offline User Manual - Page 32
). 1. Lower the folder cover. 2. Turn the handle through 90° to lock. 3. Close the locking handle to lock the folder cover. 28 Watkiss PowerSquare™224 User Manual - Konica Minolta AccurioPress C14000 | Watkiss PowerSquare 224 Offline User Manual - Page 33
towards the middle of the machine. If necessary, lift and rotate the locking-handle to a new position. 4. Close the folder cover. Watkiss PowerSquare™224 User Manual 29 - Konica Minolta AccurioPress C14000 | Watkiss PowerSquare 224 Offline User Manual - Page 34
: If the error message is not displayed: Open the folder cover, remove any paper, close the folder cover. Touch START , then follow the instructions on the screen. Wait for the message to clear. Then continue with the procedure below. Continue with the procedure below. Procedure Step 1 Action - Konica Minolta AccurioPress C14000 | Watkiss PowerSquare 224 Offline User Manual - Page 35
main deck. Information See "Lift the Clincher Frame" on page 29. The main deck lifts to approximately 60°. The weight of the main deck is supported by a gas strut. Let the gas strut control the movement of the main deck. Watkiss PowerSquare™224 User - Konica Minolta AccurioPress C14000 | Watkiss PowerSquare 224 Offline User Manual - Page 36
bin 4. Fit the bottom of the trim bin over the mounting rail. 5. Push the trim bin closed at the top. 32 Watkiss PowerSquare™224 User Manual - Konica Minolta AccurioPress C14000 | Watkiss PowerSquare 224 Offline User Manual - Page 37
open Procedure FIGURE 15. Stitch-wire Cabinet 1. Open the stitch-wire cabinet cover. The cover is held closed by a magnetic catch. Watkiss PowerSquare™224 User Manual 33 - Konica Minolta AccurioPress C14000 | Watkiss PowerSquare 224 Offline User Manual - Page 38
) These settings are recommendations. The settings can change with the size, thickness and material of book. Make further adjustment if necessary. Watkiss PowerSquare™224 User Manual - Konica Minolta AccurioPress C14000 | Watkiss PowerSquare 224 Offline User Manual - Page 39
support to the left Magnetic paper guide Procedure FIGURE 19. The magnetic paper guide for thin books 1. Before you use the Book Stacker, make sure the book support the magnetic paper guide above the book outfeed on the PowerSquare. Insert the loose end of the magnetic paper guide into the slot - Konica Minolta AccurioPress C14000 | Watkiss PowerSquare 224 Offline User Manual - Page 40
stack does not slip while you unload the books. 2. Remove the books. 3. Push the book support completely to the left (See Figure 18). 4. Remove the book divider until it is needed. Store the book divider on the right-hand end of the guide rail of the stacker. 36 Watkiss PowerSquare™224 User - Konica Minolta AccurioPress C14000 | Watkiss PowerSquare 224 Offline User Manual - Page 41
the power and communication cables. 3. When needed, rotate the Book Stacker back to the docked position, the latch will click closed. Watkiss PowerSquare™224 User Manual 37 - Konica Minolta AccurioPress C14000 | Watkiss PowerSquare 224 Offline User Manual - Page 42
4 - Standard Tasks - Move the Book Stacker 38 Watkiss PowerSquare™224 User Manual - Konica Minolta AccurioPress C14000 | Watkiss PowerSquare 224 Offline User Manual - Page 43
This chapter describes how to correct problems that can occur on your PowerSquare. If a problem continues, contact your Watkiss service engineer. PowerSquare Error If a displayed in the message list. Procedure 1. Press STOP . 2. Open the folder cover and remove the book. 3. Close the folder cover - Konica Minolta AccurioPress C14000 | Watkiss PowerSquare 224 Offline User Manual - Page 44
the fuse at the mains input. See "Change the Fuses PowerSquare" on page 70 If the problem continues, then call your service engineer. Connect the PowerSquare to the mains supply of the correct type and voltage and then "Calibrate the Touch Screen" on page 70. 40 Watkiss PowerSquare™224 User Manual - Konica Minolta AccurioPress C14000 | Watkiss PowerSquare 224 Offline User Manual - Page 45
5 - Error Conditions, Problems and Solutions - Book Quality Problems Book Quality Problems Paper Size and Book Quality Instructions • Careful measurement of the paper size and set thickness is important. • maximum of +/- 1mm when the machine is in operation. Watkiss PowerSquare™224 User Manual 41 - Konica Minolta AccurioPress C14000 | Watkiss PowerSquare 224 Offline User Manual - Page 46
and Solutions - Book Quality Problems Untidy book problem • The finished book is not tidy • The sheets are not aligned • > RE-REF > RE-REF to re-reference the machine. Does the problem continue? Yes No Further action is not needed. Call your service engineer 42 Watkiss PowerSquare™224 User Manual - Konica Minolta AccurioPress C14000 | Watkiss PowerSquare 224 Offline User Manual - Page 47
Problems Spine form problems in the touch screen. Does the problem continue? Yes No Further action THRESHOLD if needed. Does the problem continue? Yes No Further action less spine-form. Does the problem continue? Yes No Further problem continue? Yes No Further action is not needed. Load a Default - Konica Minolta AccurioPress C14000 | Watkiss PowerSquare 224 Offline User Manual - Page 48
not needed. Call your service engineer. Stitching problems - the book is not stitched FIGURE 22. Pulling stitch-wire FIGURE 23. Stitch-wire jam Stitch-wire cabinet Stitch-wire Accessory bag Middle wire-tube Large feed gear Stitch-wire jam Small feed gear 44 Watkiss PowerSquare™224 User Manual - Konica Minolta AccurioPress C14000 | Watkiss PowerSquare 224 Offline User Manual - Page 49
and Solutions - Book Quality Problems Is the number of STITCHES set between 1 and 6? Yes No Select STITCHES 1 - stitch head. See "Lubricate the Stitch Head" on page 83. Does the problem continue? Yes No Further action is not needed. Call your service engineer Watkiss PowerSquare™224 User Manual 45 - Konica Minolta AccurioPress C14000 | Watkiss PowerSquare 224 Offline User Manual - Page 50
and Solutions - Book Quality Problems Stitching problems - the book is badly stitched A correctly formed stitch -REF to re-reference the machine. Does the problem continue? Yes No Further action is not needed. Call your service engineer Further action is not needed. 46 Watkiss PowerSquare™224 User - Konica Minolta AccurioPress C14000 | Watkiss PowerSquare 224 Offline User Manual - Page 51
AUTO turned off in the TRIM window? No Yes Set TRIM to AUTO. Does the problem continue? Yes No Further action is not needed. If you need to use a the machine. Does the problem continue? Yes No Further action is not needed. Call your service engineer. Watkiss PowerSquare™224 User Manual 47 - Konica Minolta AccurioPress C14000 | Watkiss PowerSquare 224 Offline User Manual - Page 52
from the trim stop" on page 92. Is the trim stop clear of paper trimmings? Yes No Clear paper from the trim stop. Does the problem continue? Yes No No further action is needed. Call your service engineer 48 Watkiss PowerSquare™224 User Manual - Konica Minolta AccurioPress C14000 | Watkiss PowerSquare 224 Offline User Manual - Page 53
and Solutions - Book Quality Problems Trimming problem - poor trim quality The trim process uses a double-edge blade to cut thick books. the trimmed edge other than the blade witness mark? No Yes Call your service engineer No further action is needed Blade damage mark Watkiss PowerSquare™224 User - Konica Minolta AccurioPress C14000 | Watkiss PowerSquare 224 Offline User Manual - Page 54
5 - Error Conditions, Problems and Solutions - Book Quality Problems Dirty marks on book Are there dirty marks on the spine? Marks on the there dirty marks on the book, that are not described above? No Yes Call your service engineer. No further action is needed. 50 Watkiss PowerSquare™224 User - Konica Minolta AccurioPress C14000 | Watkiss PowerSquare 224 Offline User Manual - Page 55
continue? Yes No The problem is caused by the cover material or the finish. Change the cover material. Call your service engineer. Is there damage on the book, that is not described above? No Yes Call your service engineer. No further action is needed. Watkiss PowerSquare™224 User Manual 51 - Konica Minolta AccurioPress C14000 | Watkiss PowerSquare 224 Offline User Manual - Page 56
error can happen when you insert books into the stacker by hand. Press the reset button on the stacker. If the problem continues, then call your service engineer. CHECK PAPER SIZE Remember to check the paper size. To to clear the message from the screen. 52 Watkiss PowerSquare™224 User Manual - Konica Minolta AccurioPress C14000 | Watkiss PowerSquare 224 Offline User Manual - Page 57
Problems turn the machine ON. If the problem continues, then call your service engineer. ERROR IN TRIM AREA There the machine ON. If the problem continues, then call your service engineer. FLOW ERROR FORMER There page 59. If the problem continues, then call your service engineer. Fold blade axis - Konica Minolta AccurioPress C14000 | Watkiss PowerSquare 224 Offline User Manual - Page 58
the paper, close the folder cover. Touch START , then follow the instructions on the screen. FOLD - No comms Use the mains ON/OFF switch. Turn the machine OFF, then turn the machine ON. If the problem continues, then call your service engineer. FORM CLAMP CLOSED The form clamp is in the wrong - Konica Minolta AccurioPress C14000 | Watkiss PowerSquare 224 Offline User Manual - Page 59
. MAIN CONTROL - No comms Use the mains ON/OFF switch. Turn the machine OFF, then turn the machine ON. If the problem continues, then call your service engineer. MANUALLY PARK SHUTTLE The shuttle is not parked correctly. Open the folder cover and move the shuttle to the park position. Close the - Konica Minolta AccurioPress C14000 | Watkiss PowerSquare 224 Offline User Manual - Page 60
, then call your service engineer. The stacker is full. Unload the books from the stacker. Check that the stacker power input is connected. Check that the stacker mains ON/ OFF switch is ON. If the problem continues, then call your service engineer. 56 Watkiss PowerSquare™224 User Manual - Konica Minolta AccurioPress C14000 | Watkiss PowerSquare 224 Offline User Manual - Page 61
machine ON. If the problem continues, then call your service engineer. Stitch position adjusting ON. If the problem continues, then call your service engineer. SYSTEM ERROR 39.xx Press the reset button on pads. If the problem continues, then call your Watkiss service engineer. Touch START - Konica Minolta AccurioPress C14000 | Watkiss PowerSquare 224 Offline User Manual - Page 62
is in the wrong position. Touch START to reset the position. Follow the instructions on the screen. Use the mains ON/OFF switch. Turn the machine OFF, then turn the machine ON. If the problem continues, then call your service engineer. The user has touched the STOP button while the machine is in - Konica Minolta AccurioPress C14000 | Watkiss PowerSquare 224 Offline User Manual - Page 63
5 - Error Conditions, Problems and Solutions - Paper Jams Paper Jams Stitch Area Fold in the clincher area. Man- ually operate the clincher to clear any stitches that are jammed. Press to manually operate the clincher. 5 Lower the clincher frame. 6 Close the folder cover. See "Lift and - Konica Minolta AccurioPress C14000 | Watkiss PowerSquare 224 Offline User Manual - Page 64
5 - Error Conditions, Problems and Solutions - Paper Jams Jam before the Trimmer The error message JAM BEFORE TRIMMER is displayed. This error can be • a book jammed deck. 2 Remove the trim bin. Information See "Lift the PowerSquare Main Deck" on page 30 60 Watkiss PowerSquare™224 User Manual - Konica Minolta AccurioPress C14000 | Watkiss PowerSquare 224 Offline User Manual - Page 65
5 - Error Conditions, Problems and Solutions - Paper Jams Step Action Information 3 Loosen the trimmer infeed The procedure can be seen from the top of engages with the drive pin. 7 Fit the trim bin. 8 Close the PowerSquare main deck and covers. Watkiss PowerSquare™224 User Manual 61 - Konica Minolta AccurioPress C14000 | Watkiss PowerSquare 224 Offline User Manual - Page 66
5 - Error Conditions, Problems and Solutions - Paper Jams Jam in the Trim Area Orange Plastic Hand Screw Locking Plate Trim Stop Guard FIGURE 27. Trim Stop . See Figure 28. Small pieces of paper trimmings can cover the sensor and cause an error message. 62 Watkiss PowerSquare™224 User Manual - Konica Minolta AccurioPress C14000 | Watkiss PowerSquare 224 Offline User Manual - Page 67
5 - Error Conditions, Problems and Solutions - Paper Jams Step 5 Action Close the trim stop guard. 6 the book. 2. If you are making thin books, attach the magnetic paper guide. See "Adjust the Book Stacker" on page 35. 3. Press the reset button on the stacker. Watkiss PowerSquare™224 User - Konica Minolta AccurioPress C14000 | Watkiss PowerSquare 224 Offline User Manual - Page 68
- Error Conditions, Problems and Solutions - book, if present. 2. Check for paper-trimmings and remove them, if present. 3. Press the reset button on the stacker. If the pusher is in the forward position so them, if present. 4. Press the reset button on the stacker. 64 Watkiss PowerSquare™224 User - Konica Minolta AccurioPress C14000 | Watkiss PowerSquare 224 Offline User Manual - Page 69
5 - Error Conditions, Problems and Solutions - Clear a Stitch-wire Jam Clear a Stitch-wire Jam Before You Begin Lift the PowerSquare main deck. See "Lift the location of Middle Wire Tube Middle Wire Tube Metal Spring Clip Feed Gears FIGURE 32. Stitch Head Watkiss PowerSquare™224 User Manual 65 - Konica Minolta AccurioPress C14000 | Watkiss PowerSquare 224 Offline User Manual - Page 70
, Problems and Solutions - Clear a Stitch-wire Jam Clear the Jammed Wire Step 1 Action Cut the stitch-wire at position 'A', approximately 50mm (2-inches) from where the stitch-wire leaves the stitch-wire guide. into the head. Stitch Head" on page 90. 66 Watkiss PowerSquare™224 User Manual - Konica Minolta AccurioPress C14000 | Watkiss PowerSquare 224 Offline User Manual - Page 71
5 - Error Conditions, Problems and Solutions - Clear a Stitch Head Jam Clear a Stitch Head in the clincher area. Man- ually operate the clincher to clear any stitches that are jammed. Press to manually operate the clincher. 5 Lower the clincher frame. See "Lift and Lower the Clincher Frame" on - Konica Minolta AccurioPress C14000 | Watkiss PowerSquare 224 Offline User Manual - Page 72
Problems and Solutions - Clear a Stitch Head Jam Procedure 2 Stitch head Wire-holder Wire-holder retaining spring FIGURE 33. Remove the stitch head wire-holder Inspect this area for pieces of stitch-wire. Wire guide the machine. • Flat blade screwdriver 68 Watkiss PowerSquare™224 User Manual - Konica Minolta AccurioPress C14000 | Watkiss PowerSquare 224 Offline User Manual - Page 73
held in position, use a screw driver to help the removal of the wire-holder from the stitch head. CAUTION - Do not apply force to the wire guide bars or the pivot block. See one time. If the problem continues, then contact your Watkiss service engineer. Watkiss PowerSquare™224 User Manual 69 - Konica Minolta AccurioPress C14000 | Watkiss PowerSquare 224 Offline User Manual - Page 74
Error Conditions, Problems and Solutions - objects damage the screen. Procedure 1. Touch the STOP button 5 times. 2. Follow the instructions on the touch screen. You must touch the screen, where shown, as accurately as then call your Watkiss service engineer. 70 Watkiss PowerSquare™224 User Manual - Konica Minolta AccurioPress C14000 | Watkiss PowerSquare 224 Offline User Manual - Page 75
5 - Error Conditions, Problems and Solutions - Change the Fuses - Book Stacker Change the Fuses - Book Stacker Introduction The Book with a fuse of the correct specification. Result If the fuse breaks again, then call your Watkiss service engineer. . Watkiss PowerSquare™224 User Manual 71 - Konica Minolta AccurioPress C14000 | Watkiss PowerSquare 224 Offline User Manual - Page 76
5 - Error Conditions, Problems and Solutions - Manually park the Shuttle Manually park the Shuttle When to do The error messages MANUALLY PARK SHUTTLE and SHUTTLE NOT PARKED are displayed. Illustrations C B A FIGURE 55. Shuttle Assembly Position - CORRECT FIGURE 56. Pick-up fingers Pick-up - Konica Minolta AccurioPress C14000 | Watkiss PowerSquare 224 Offline User Manual - Page 77
5 - Error Conditions, Problems and Solutions - Manually park the Shuttle Procedure Result Step 1 2 3 4 Action correct position. Repeat Step 2 if necessary. Close the folder cover. The error message MANUALLY PARK SHUTTLE is cleared from the screen. The shuttle axis re-references and the message - Konica Minolta AccurioPress C14000 | Watkiss PowerSquare 224 Offline User Manual - Page 78
5 - Error Conditions, Problems and Solutions - Manually park the Shuttle 74 Watkiss PowerSquare™224 User Manual - Konica Minolta AccurioPress C14000 | Watkiss PowerSquare 224 Offline User Manual - Page 79
a Watkiss service engineer can service the PowerSquare. Contact your supplier for further information. Operator Maintenance Correct maintenance by the operator makes sure that • The machine operates correctly • The machine makes high quality books • The machine is safe to use • Small problems can be - Konica Minolta AccurioPress C14000 | Watkiss PowerSquare 224 Offline User Manual - Page 80
to remove surface dust. CAUTION: Only clean the machine with materials that are recommended in this manual. Do not use other chemicals or abrasive material. Outside of the PowerSquare Use a moist cloth to remove fingerprints. Do not use too much force. 76 Watkiss PowerSquare™224 User Manual - Konica Minolta AccurioPress C14000 | Watkiss PowerSquare 224 Offline User Manual - Page 81
displayed on the screen. • Clean the former roller if the spines of the books are dirty. Ink and toner can collect on the former roller. FIGURE 37. Dirty marks on the spine Materials needed Clean, plain paper that the procedure until the book spine is clean. Watkiss PowerSquare™224 User Manual 77 - Konica Minolta AccurioPress C14000 | Watkiss PowerSquare 224 Offline User Manual - Page 82
if there are dirty marks near the spine on the front and back cover of the book. Ink and toner can collect on these parts, especially when you make thin books. FIGURE 38. Dirty marks beside the spine FIGURE 39. Polyurethane strips Polyurethane Strip 78 Watkiss PowerSquare™224 User Manual - Konica Minolta AccurioPress C14000 | Watkiss PowerSquare 224 Offline User Manual - Page 83
is a polyurethane strip on the face of each side of the clamp. Repeat this step until the polyurethane strips are clean. Watkiss PowerSquare™224 User Manual 79 - Konica Minolta AccurioPress C14000 | Watkiss PowerSquare 224 Offline User Manual - Page 84
screen. • Clean the trimmings-removal fingers if there are small, dirty marks on the book. Ink and toner can collect on the trimmings-removal fingers and cause marks on the book. FIGURE 40. Curved marks on the 42. Trimmer infeed conveyor viewed from above_2 80 Watkiss PowerSquare™224 User Manual - Konica Minolta AccurioPress C14000 | Watkiss PowerSquare 224 Offline User Manual - Page 85
protective gloves when you removal fingers with an alcohol use the alcohol wipe. wipe. 6 Fit the trim bin. 7 Close the PowerSquare. Watkiss PowerSquare™224 User Manual 81 - Konica Minolta AccurioPress C14000 | Watkiss PowerSquare 224 Offline User Manual - Page 86
" on page 29. Clean grease from the sides of the stitch head. 5 Lower the clincher frame. 6 Close the folder cover. 82 Watkiss PowerSquare™224 User Manual - Konica Minolta AccurioPress C14000 | Watkiss PowerSquare 224 Offline User Manual - Page 87
is shorter. Materials needed • Klüber Isoflex NBU15 Grease, 50g • Air duster CAUTION : Only use the grease shown in this manual. Correct lubrication extends the performance and service life of the stitch head. Other types of grease do not protect the stitch head. Only apply the grease as shown - Konica Minolta AccurioPress C14000 | Watkiss PowerSquare 224 Offline User Manual - Page 88
the wire holder from the stitch head: Move the wire holder retaining spring 'A' to the right. Remove the wire holder 'B'. B A B 84 Watkiss PowerSquare™224 User Manual - Konica Minolta AccurioPress C14000 | Watkiss PowerSquare 224 Offline User Manual - Page 89
6 - Maintenance - Lubricate the Stitch Head Apply the Grease to the Driver Bar Driver 20mm FIGURE 45. Driver bar Apply grease here Driver bar Stop Start FIGURE 46. Apply the Grease to the Driver Bar Watkiss PowerSquare™224 User Manual 85 - Konica Minolta AccurioPress C14000 | Watkiss PowerSquare 224 Offline User Manual - Page 90
from the See FIGURE 45. tube, 20mm long, to the visible surface of the driver bar. The line of grease must be a maximum of 0.5mm thick and as shown 45. Note: Apply the grease in an upward direction, from the bottom of the driver bar. 20mm long x 0.5mm thick Note: Only apply the grease as shown. - Konica Minolta AccurioPress C14000 | Watkiss PowerSquare 224 Offline User Manual - Page 91
. The red line fills from left to right. Hold RESET until the red line reaches the right-hand side. 3. Touch MENU. Watkiss PowerSquare™224 User Manual 87 - Konica Minolta AccurioPress C14000 | Watkiss PowerSquare 224 Offline User Manual - Page 92
the Stitch Head Stitch-wire Guide Block Stitch-wire Felt wire-cleaning pads FIGURE 48. Stitch-wire Guide Block Step 1 Action Cut the stitch-wire to the right of the stitch-wire guide block. Information Cut here 2 Pull the stitch-wire from the stitch- wire guide - Konica Minolta AccurioPress C14000 | Watkiss PowerSquare 224 Offline User Manual - Page 93
to damaged end of the stitch-wire. leave the end of the stitch-wire clean and straight. 7 Feed the stitch-wire through the stitch-wire guide. 8 Install the stitch-wire. See "Install the Stitch-wire into the Stitch Head" on page 90. Watkiss PowerSquare™224 User - Konica Minolta AccurioPress C14000 | Watkiss PowerSquare 224 Offline User Manual - Page 94
Action Information Pull the stitch-wire from the end of the stitch-wire guide. Make sure the stitch-wire runs behind the gas-strut. 3 Feed . Felt Wire-Cleaning Pads 4 Push the stitch-wire into the stitch- wire guide block. Push stitch-wire in direction of arrow 5 Push the stitch-wire as - Konica Minolta AccurioPress C14000 | Watkiss PowerSquare 224 Offline User Manual - Page 95
the procedure "Install the Stitchwire into the Stitch Head" on page 90. Reset the number of stitches on the touch screen. Watkiss PowerSquare™224 User Manual 91 - Konica Minolta AccurioPress C14000 | Watkiss PowerSquare 224 Offline User Manual - Page 96
stop guard into position. Hold the locking plates in position and tighten the orange hand screws. Attach the trim bin. 92 Watkiss PowerSquare™224 User Manual - Konica Minolta AccurioPress C14000 | Watkiss PowerSquare 224 Offline User Manual - Page 97
quality 1 - 6 stitches, evenly spaced on the spine of the book Stitches/spool: up to 291,500 Books*/spool: approximately 127,000 Watkiss PowerSquare™224 User Manual 93 - Konica Minolta AccurioPress C14000 | Watkiss PowerSquare 224 Offline User Manual - Page 98
improvement, the manufacturer reserves the right to alter the materials or specification of this product at any time without notice. 94 Watkiss PowerSquare™224 User Manual - Konica Minolta AccurioPress C14000 | Watkiss PowerSquare 224 Offline User Manual - Page 99
laws of Member States relating to electromagnetic compatibility'. EN55022:2010 Class A EN55024:2010 EN61000-3-2:2006 +A1:2009 + A2:2009 EN61000-3-3:2008 Watkiss PowerSquare™224 User Manual 95 - Konica Minolta AccurioPress C14000 | Watkiss PowerSquare 224 Offline User Manual - Page 100
8 - Declaration of Conformity - RoHS: WEEE: Reach: 2011/65/EC Council Directive 2002/96/EC Council Directive amended by 2008/34/EC and 2008/35/EC REGULATION (EC) No. 1907/2006 M C Watkiss Technical Director, Watkiss Automation Ltd. 21 May 2013 96 Watkiss PowerSquare™224 User Manual - Konica Minolta AccurioPress C14000 | Watkiss PowerSquare 224 Offline User Manual - Page 101
in 'booklet mode'. Alternatively, adjustment can be made in origination software (such as InDesign); or PDF pages can be adjusted before they are printed using imposition software (such as Quite Imposing). The amount in loss of image if no adjustment is made. Watkiss PowerSquare™224 User Manual 97 - Konica Minolta AccurioPress C14000 | Watkiss PowerSquare 224 Offline User Manual - Page 102
both moved 4mm towards the spine and the front and back page are both moved 4mm away from the spine. 98 Watkiss PowerSquare™224 User Manual - Konica Minolta AccurioPress C14000 | Watkiss PowerSquare 224 Offline User Manual - Page 103
- Konica Minolta AccurioPress C14000 | Watkiss PowerSquare 224 Offline User Manual - Page 104
Watkiss Automation Limited 1 Blaydon Road Middlefield Industrial Estate Sandy, Bedfordshire SG19 1RZ United Kingdom Tel: +44 (0)1767 685700 Fax: +44 (0)1767 689900 Email: [email protected]
-
 1
1 -
 2
2 -
 3
3 -
 4
4 -
 5
5 -
 6
6 -
 7
7 -
8
-
9
-
10
-
11
-
12
-
13
-
14
-
15
-
16
-
17
-
18
-
19
-
20
-
21
-
22
-
23
-
24
-
25
-
26
-
27
-
28
-
29
-
30
-
31
-
32
-
33
-
34
-
35
-
36
-
37
-
38
-
39
-
40
-
41
-
42
-
43
-
44
-
45
-
46
-
47
-
48
-
49
-
50
-
51
-
52
-
53
-
54
-
55
-
56
-
57
-
58
-
59
-
60
-
61
-
62
-
63
-
64
-
65
-
66
-
67
-
68
-
69
-
70
-
71
-
72
-
73
-
74
-
75
-
76
-
77
-
78
-
79
-
80
-
81
-
82
-
83
-
84
-
85
-
86
-
87
-
88
-
89
-
90
-
91
-
92
-
93
-
94
-
95
-
96
-
97
-
98
-
99
-
100
-
101
-
102
-
103
-
104
 |
 |

Watkiss PowerSquare™224
User Manual
Offline Model
English, Issue 5, June 2013