Konica Minolta AccurioPress C14000 Watkiss PowerSquare 224 Offline User Manual - Page 88
ADVANCED, STITCHER UP >, STITCHER UP' position.
 |
View all Konica Minolta AccurioPress C14000 manuals
Add to My Manuals
Save this manual to your list of manuals |
Page 88 highlights
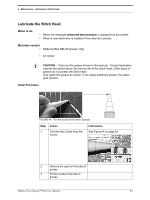
6 - Maintenance - Lubricate the Stitch Head Step 4 5 Action Information On the user interface, touch ADVANCED > STITCHER UP > STITCHER UP The folder cover must be closed. This action moves the stitch head to the correct position for lubrication. Lift the PowerSquare main deck. See "Lift the PowerSquare Main Deck" on page 30. You will see that the stitch head in the 'STITCHER UP' position. 6 Use the supplied air duster to remove dust from the stitch head. 7 Remove the wire holder from the stitch head: Move the wire holder retaining spring 'A' to the right. Remove the wire holder 'B'. B A B 84 Watkiss PowerSquare™224 User Manual
-
 1
1 -
2
-
3
-
4
-
5
-
6
-
7
-
8
-
9
-
10
-
11
-
12
-
13
-
14
-
15
-
16
-
17
-
18
-
19
-
20
-
21
-
22
-
23
-
24
-
25
-
26
-
27
-
28
-
29
-
30
-
31
-
32
-
33
-
34
-
35
-
36
-
37
-
38
-
39
-
40
-
41
-
42
-
43
-
44
-
45
-
46
-
47
-
48
-
49
-
50
-
51
-
52
-
53
-
54
-
55
-
56
-
57
-
58
-
59
-
60
-
61
-
62
-
63
-
64
-
65
-
66
-
67
-
68
-
69
-
70
-
71
-
72
-
73
-
74
-
75
-
76
-
77
-
78
-
79
-
80
-
81
-
82
-
 83
83 -
 84
84 -
 85
85 -
 86
86 -
 87
87 -
 88
88 -
 89
89 -
 90
90 -
 91
91 -
 92
92 -
 93
93 -
94
-
95
-
96
-
97
-
98
-
99
-
100
-
101
-
102
-
103
-
104
 |
 |
6 - Maintenance - Lubricate the Stitch Head
84
Watkiss PowerSquare™224 User Manual
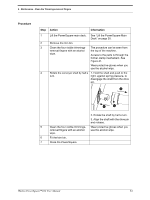
4
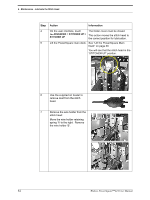
On the user interface, touch
ADVANCED
>
STITCHER UP >
STITCHER UP
The folder cover must be closed.
This action moves the stitch head to
the correct position for lubrication.
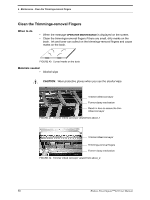
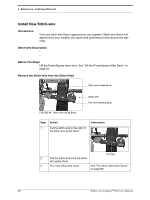
5
Lift the PowerSquare main deck.
See “Lift the PowerSquare Main
Deck” on page 30.
You will see that the stitch head in the
‘STITCHER UP’ position.
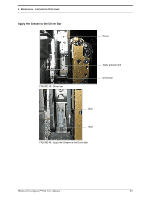
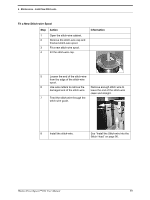
6
Use the supplied air duster to
remove dust from the stitch
head.
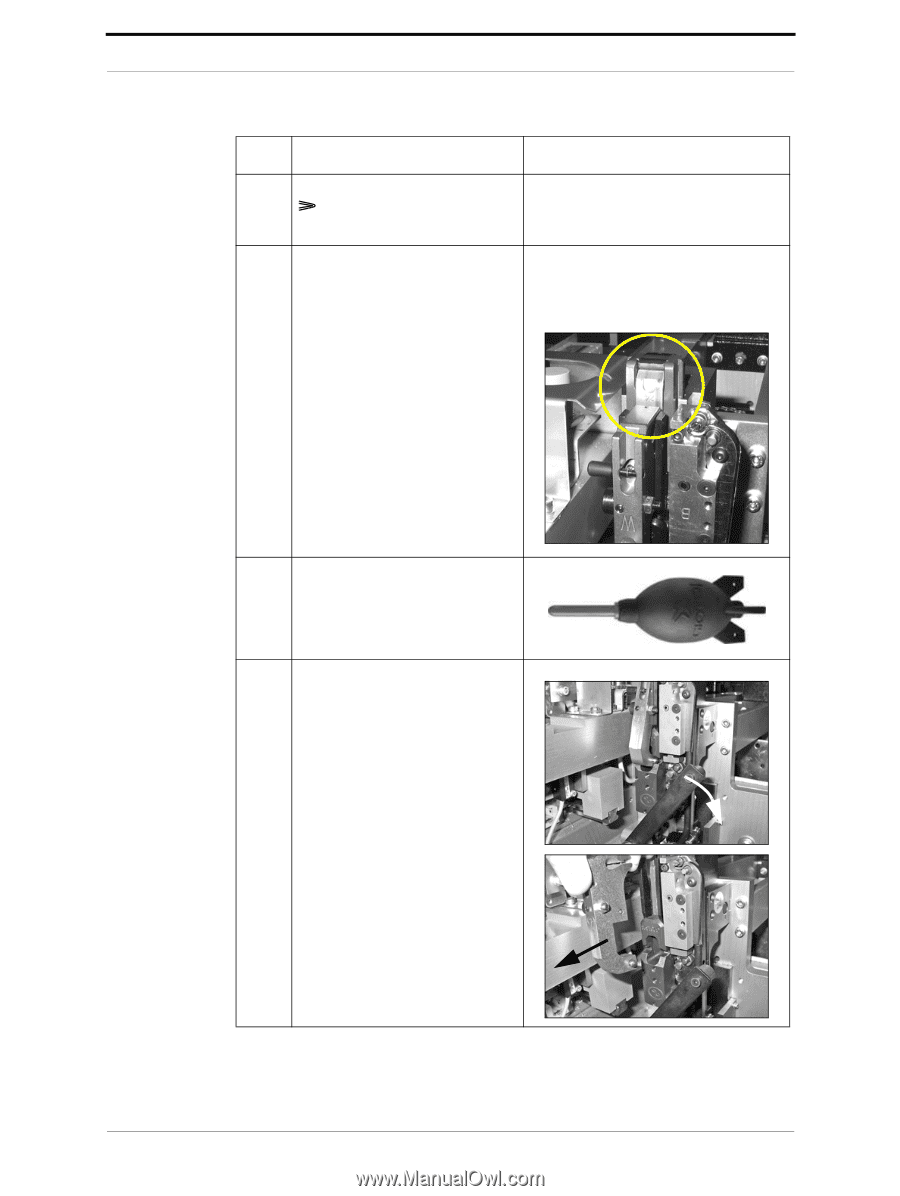
7
Remove the wire holder from the
stitch head:
Move the wire holder retaining
spring ‘A’ to the right.
Remove
the wire holder ‘B’.
Step
Action
Information
A
B
B