Konica Minolta Fujitsu fi-6400 Operation Guide - Page 16
Turning the Power ON/OFF
 |
View all Konica Minolta Fujitsu fi-6400 manuals
Add to My Manuals
Save this manual to your list of manuals |
Page 16 highlights
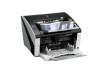
Chapter 1 Scanner Overview 1.3 Turning the Power ON/OFF This section explains how to power on/off the scanner. Turning the Power ON Turn on the power in the following procedure: When connected via SCSI, turn on the scanner and confirm that [Ready] is displayed on the LCD before you turn on the computer. 1 Press the "|" side of the main power switch on the back. OFF ON 2 Open the hopper. For information on how to open the hopper, refer to "1.4 Opening/ Closing the Hopper" (page 18). Make sure to open the hopper before you press the power button to turn on the scanner. 3 Press the power button on the front of the scanner. TOP Contents Index Introduction Scanner Overview Power Button The power is turned on, and the power button lights in blue. Note that the following screen is displayed on the operator panel LCD during initialization. How to Load Documents How to Use the Operator Panel Various Ways to Scan Daily Care When [Ready] is displayed on the LCD, the scanner is ready to start scanning. Replacing Consumables Troubleshooting Operational Settings Appendix Glossary 16
-
 1
1 -
2
-
3
-
4
-
5
-
6
-
7
-
8
-
9
-
10
-
 11
11 -
 12
12 -
 13
13 -
 14
14 -
 15
15 -
 16
16 -
 17
17 -
 18
18 -
 19
19 -
 20
20 -
 21
21 -
22
-
23
-
24
-
25
-
26
-
27
-
28
-
29
-
30
-
31
-
32
-
33
-
34
-
35
-
36
-
37
-
38
-
39
-
40
-
41
-
42
-
43
-
44
-
45
-
46
-
47
-
48
-
49
-
50
-
51
-
52
-
53
-
54
-
55
-
56
-
57
-
58
-
59
-
60
-
61
-
62
-
63
-
64
-
65
-
66
-
67
-
68
-
69
-
70
-
71
-
72
-
73
-
74
-
75
-
76
-
77
-
78
-
79
-
80
-
81
-
82
-
83
-
84
-
85
-
86
-
87
-
88
-
89
-
90
-
91
-
92
-
93
-
94
-
95
-
96
-
97
-
98
-
99
-
100
-
101
-
102
-
103
-
104
-
105
-
106
-
107
-
108
-
109
-
110
-
111
-
112
-
113
-
114
-
115
-
116
-
117
-
118
-
119
-
120
-
121
-
122
-
123
-
124
-
125
-
126
-
127
-
128
-
129
-
130
-
131
-
132
-
133
-
134
-
135
-
136
-
137
-
138
-
139
-
140
-
141
-
142
-
143
-
144
-
145
-
146
-
147
-
148
-
149
-
150
-
151
-
152
-
153
-
154
-
155
-
156
-
157
-
158
-
159
-
160
-
161
-
162
-
163
-
164
-
165
-
166
-
167
-
168
-
169
-
170
-
171
-
172
-
173
-
174
-
175
-
176
-
177
-
178
-
179
-
180
-
181
-
182
-
183
-
184
-
185
-
186
-
187
-
188
-
189
-
190
-
191
-
192
-
193
-
194
-
195
-
196
-
197
-
198
-
199
-
200
-
201
-
202
-
203
-
204
-
205
-
206
 |
 |
