Konica Minolta bizhub 20 bizhub 20 Software User Guide - Page 11
Printing a document, KONICA MINOLTA bizhub 20 - windows 8 drivers
 |
View all Konica Minolta bizhub 20 manuals
Add to My Manuals
Save this manual to your list of manuals |
Page 11 highlights
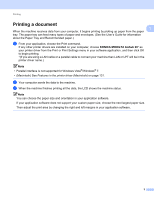
Printing Printing a document 1 1 When the machine receives data from your computer, it begins printing by picking up paper from the paper tray. The paper tray can feed many types of paper and envelopes. (See the User's Guide for information about the Paper Tray and Recommended paper.) a From your application, choose the Print command. If any other printer drivers are installed on your computer, choose KONICA MINOLTA bizhub 20* as your printer driver from the Print or Print Settings menu in your software application, and then click OK to begin printing. *(If you are using a LAN cable or a parallel cable to connect your machine then LAN or LPT will be in the printer driver name.) Note • Parallel interface is not supported for Windows Vista®/Windows® 7. • (Macintosh) See Features in the printer driver (Macintosh) on page 131. b Your computer sends the data to the machine. c When the machine finishes printing all the data, the LCD shows the machine status. Note You can choose the paper size and orientation in your application software. If your application software does not support your custom paper size, choose the next largest paper size. Then adjust the print area by changing the right and left margins in your application software. 3
-
 1
1 -
2
-
3
-
4
-
5
-
 6
6 -
 7
7 -
 8
8 -
 9
9 -
 10
10 -
 11
11 -
 12
12 -
 13
13 -
 14
14 -
 15
15 -
 16
16 -
17
-
18
-
19
-
20
-
21
-
22
-
23
-
24
-
25
-
26
-
27
-
28
-
29
-
30
-
31
-
32
-
33
-
34
-
35
-
36
-
37
-
38
-
39
-
40
-
41
-
42
-
43
-
44
-
45
-
46
-
47
-
48
-
49
-
50
-
51
-
52
-
53
-
54
-
55
-
56
-
57
-
58
-
59
-
60
-
61
-
62
-
63
-
64
-
65
-
66
-
67
-
68
-
69
-
70
-
71
-
72
-
73
-
74
-
75
-
76
-
77
-
78
-
79
-
80
-
81
-
82
-
83
-
84
-
85
-
86
-
87
-
88
-
89
-
90
-
91
-
92
-
93
-
94
-
95
-
96
-
97
-
98
-
99
-
100
-
101
-
102
-
103
-
104
-
105
-
106
-
107
-
108
-
109
-
110
-
111
-
112
-
113
-
114
-
115
-
116
-
117
-
118
-
119
-
120
-
121
-
122
-
123
-
124
-
125
-
126
-
127
-
128
-
129
-
130
-
131
-
132
-
133
-
134
-
135
-
136
-
137
-
138
-
139
-
140
-
141
-
142
-
143
-
144
-
145
-
146
-
147
-
148
-
149
-
150
-
151
-
152
-
153
-
154
-
155
-
156
-
157
-
158
-
159
-
160
-
161
-
162
-
163
-
164
-
165
-
166
-
167
-
168
-
169
-
170
-
171
-
172
-
173
-
174
-
175
-
176
-
177
-
178
-
179
-
180
-
181
-
182
-
183
-
184
-
185
-
186
-
187
-
188
-
189
-
190
-
191
-
192
-
193
-
194
-
195
-
196
-
197
-
198
-
199
-
200
-
201
-
202
-
203
-
204
-
205
-
206
-
207
-
208
-
209
-
210
-
211
-
212
-
213
-
214
-
215
-
216
-
217
-
218
-
219
-
220
-
221
-
222
-
223
-
224
-
225
-
226
-
227
 |
 |