Konica Minolta bizhub 20 bizhub 20 Software User Guide - Page 179
Changing the default file size, Clear/Back, Start, Stop/Exit
 |
View all Konica Minolta bizhub 20 manuals
Add to My Manuals
Save this manual to your list of manuals |
Page 179 highlights
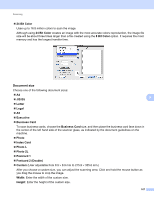
Scanning i The file name is set automatically. However, you can create a name of your choice using the dial pad. You can only change the first 6 digits of the file name. Press OK. Note Press Clear/Back to delete the letters you entered. j Press Start to start scanning. CAUTION The LCD shows Scanning while reading the data. DO NOT unplug the power cord or remove the USB Flash memory drive from the machine while it is reading the data. You could lose your data or damage the USB Flash memory drive. Changing the default file size 9 You can set your own default setting for the file size. For a higher quality scan, choose the large file size. For a smaller file size, choose the small file size. a Press Menu, 1. b Press a or b to choose Document Scan. Press OK. 9 c Press a or b to choose File Size. Press OK. d Press a or b to choose 1.Color or 2.Gray. Press OK. e Press a or b to choose Small, Middle or Large. Press OK. f Press Stop/Exit. Note You cannot choose the file size when you scan a document in black and white. Black and white documents will be stored in the TIFF file format and the data will not be compressed. 171
-
 1
1 -
2
-
3
-
4
-
5
-
6
-
7
-
8
-
9
-
10
-
11
-
12
-
13
-
14
-
15
-
16
-
17
-
18
-
19
-
20
-
21
-
22
-
23
-
24
-
25
-
26
-
27
-
28
-
29
-
30
-
31
-
32
-
33
-
34
-
35
-
36
-
37
-
38
-
39
-
40
-
41
-
42
-
43
-
44
-
45
-
46
-
47
-
48
-
49
-
50
-
51
-
52
-
53
-
54
-
55
-
56
-
57
-
58
-
59
-
60
-
61
-
62
-
63
-
64
-
65
-
66
-
67
-
68
-
69
-
70
-
71
-
72
-
73
-
74
-
75
-
76
-
77
-
78
-
79
-
80
-
81
-
82
-
83
-
84
-
85
-
86
-
87
-
88
-
89
-
90
-
91
-
92
-
93
-
94
-
95
-
96
-
97
-
98
-
99
-
100
-
101
-
102
-
103
-
104
-
105
-
106
-
107
-
108
-
109
-
110
-
111
-
112
-
113
-
114
-
115
-
116
-
117
-
118
-
119
-
120
-
121
-
122
-
123
-
124
-
125
-
126
-
127
-
128
-
129
-
130
-
131
-
132
-
133
-
134
-
135
-
136
-
137
-
138
-
139
-
140
-
141
-
142
-
143
-
144
-
145
-
146
-
147
-
148
-
149
-
150
-
151
-
152
-
153
-
154
-
155
-
156
-
157
-
158
-
159
-
160
-
161
-
162
-
163
-
164
-
165
-
166
-
167
-
168
-
169
-
170
-
171
-
172
-
173
-
 174
174 -
 175
175 -
 176
176 -
 177
177 -
 178
178 -
 179
179 -
 180
180 -
 181
181 -
 182
182 -
 183
183 -
 184
184 -
185
-
186
-
187
-
188
-
189
-
190
-
191
-
192
-
193
-
194
-
195
-
196
-
197
-
198
-
199
-
200
-
201
-
202
-
203
-
204
-
205
-
206
-
207
-
208
-
209
-
210
-
211
-
212
-
213
-
214
-
215
-
216
-
217
-
218
-
219
-
220
-
221
-
222
-
223
-
224
-
225
-
226
-
227
 |
 |
