Konica Minolta bizhub 42 bizhub 36/42 Print Operations User Guide - Page 62
Network connection OS X 10.2/10.3, Settings for the machine
 |
View all Konica Minolta bizhub 42 manuals
Add to My Manuals
Save this manual to your list of manuals |
Page 62 highlights
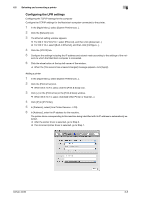
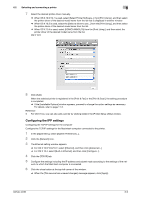
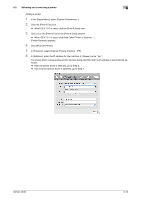
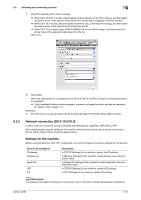
6.2 Selecting and connecting a printer 6 7 Select the desired printer driver manually. % When OS X 10.6/10.7 is used, select [Select printer software...] from [Print Using:], and then select the printer driver of the desired model name from the list that is displayed in another window. % When OS X 10.5 is used, select the [Select a driver to use...] from the [Print Using:], and then select the printer driver of the desired model name from the list. % When OS X 10.4 is used, select [KONICA MINOLTA] from the [Print Using:], and then select the printer driver of the desired model name from the list. OS X 10.5: 8 Click [Add]. When the selected printer is registered in the [Print & Fax] or the [Print & Scan], the setting procedure is completed. % If the [Installable Options] window appears, proceed to change the option settings as necessary. For details, refer to page 11-3. Reference - For OS X 10.4, you can also add a printer by clicking [Add] in the [Printer Setup Utility] window. 6.2.2 Network connection (OS X 10.2/10.3) In OS X 10.2/10.3, the printer can be connected with Rendezvous, AppleTalk, LPR (LPD), or IPP. After configuring the network setting for the machine, selecting this machine as the printer to be used in [Printer Setup Utility] or [Print Center] enables printing. Settings for the machine Before using Rendezvous, LPR, IPP, or AppleTalk, you must configure the network settings for the machine. Items to be configured IP address Rendezvous AppleTalk LPR IPP Description In [TCP/IP Settings] of the machine, specify the IP address. In [Bonjour Settings] of the machine, enable Bonjour and enter the printer name. In [AppleTalk Settings] of the machine, enable AppleTalk and enter the printer name. In [TCP/IP Settings] for the machine, enable LPD printing. In [IPP Settings] for the machine, enable IPP printing. d Reference For details on the network settings for the machine, refer to the [User's Guide Administrator Operations]. bizhub 42/36 6-11
-
 1
1 -
2
-
3
-
4
-
5
-
6
-
7
-
8
-
9
-
10
-
11
-
12
-
13
-
14
-
15
-
16
-
17
-
18
-
19
-
20
-
21
-
22
-
23
-
24
-
25
-
26
-
27
-
28
-
29
-
30
-
31
-
32
-
33
-
34
-
35
-
36
-
37
-
38
-
39
-
40
-
41
-
42
-
43
-
44
-
45
-
46
-
47
-
48
-
49
-
50
-
51
-
52
-
53
-
54
-
55
-
56
-
 57
57 -
 58
58 -
 59
59 -
 60
60 -
 61
61 -
 62
62 -
 63
63 -
 64
64 -
 65
65 -
 66
66 -
 67
67 -
68
-
69
-
70
-
71
-
72
-
73
-
74
-
75
-
76
-
77
-
78
-
79
-
80
-
81
-
82
-
83
-
84
-
85
-
86
-
87
-
88
-
89
-
90
-
91
-
92
-
93
-
94
-
95
-
96
-
97
-
98
-
99
-
100
-
101
-
102
-
103
-
104
-
105
-
106
-
107
-
108
-
109
-
110
-
111
-
112
-
113
-
114
-
115
-
116
-
117
-
118
-
119
-
120
-
121
-
122
-
123
-
124
-
125
-
126
-
127
-
128
-
129
-
130
-
131
-
132
-
133
-
134
-
135
-
136
-
137
-
138
-
139
-
140
-
141
-
142
-
143
-
144
-
145
-
146
-
147
-
148
-
149
-
150
-
151
-
152
-
153
-
154
-
155
-
156
-
157
-
158
-
159
-
160
-
161
-
162
-
163
-
164
-
165
-
166
-
167
-
168
-
169
-
170
-
171
-
172
-
173
-
174
-
175
-
176
-
177
-
178
-
179
-
180
-
181
-
182
-
183
-
184
-
185
-
186
-
187
-
188
-
189
-
190
-
191
-
192
-
193
-
194
-
195
-
196
-
197
-
198
 |
 |