Konica Minolta bizhub 42 bizhub 36/42 Print Operations User Guide - Page 94
Common Setting, Scope Web Connection, Item Name, Functions
 |
View all Konica Minolta bizhub 42 manuals
Add to My Manuals
Save this manual to your list of manuals |
Page 94 highlights
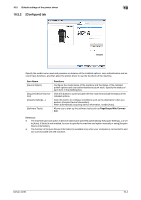
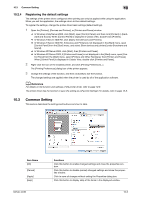
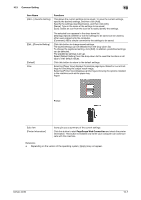
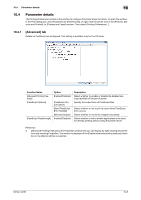
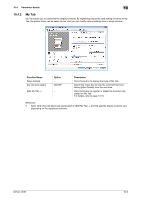
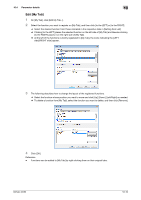
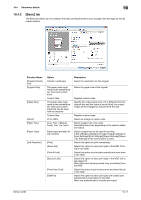
10.3 Common Setting 10 Item Name [Add...] (Favorite Setting) Functions This allows the current settings to be saved. To save the current settings, specify the desired settings, and then click [Add]. Specify the settings described below, and then click [OK]. [Name]: Type in the name of the settings to be saved. [Icon]: Select an icon from the icon list to easily identify the settings. [Edit...](Favorite Setting) [Default] View The selected icon appears in the drop-down list. [Sharing]: Specify whether or not the settings to be saved can be used by other users logged onto the computer. [Comment]: Add a simple comment to the settings to be saved. Click this button to change saved settings. The saved settings can be selected from the drop-down list. To change the registered setting, click [Edit]. In addition, predefined settings can be selected. The predefined settings is [2-up]. Select [Default Setting] from the drop-down list to reset the functions in all tabs to their default values. Click this button to return to the default settings. Selecting [Paper View] displays the sample page layout based on current settings for checking the output result image. Selecting [Printer View] displays a printer figure showing the options installed in the machine such as the paper tray. Paper: Printer: Sub view [Printer Information] Icons give you a summary of the current settings. Click this button to start PageScope Web Connection and check the printer information. This button is enabled only when your computer can communicate with this machine. Reference - Depending on the version of the operating system, [Apply] may not appear. bizhub 42/36 10-7
-
 1
1 -
2
-
3
-
4
-
5
-
6
-
7
-
8
-
9
-
10
-
11
-
12
-
13
-
14
-
15
-
16
-
17
-
18
-
19
-
20
-
21
-
22
-
23
-
24
-
25
-
26
-
27
-
28
-
29
-
30
-
31
-
32
-
33
-
34
-
35
-
36
-
37
-
38
-
39
-
40
-
41
-
42
-
43
-
44
-
45
-
46
-
47
-
48
-
49
-
50
-
51
-
52
-
53
-
54
-
55
-
56
-
57
-
58
-
59
-
60
-
61
-
62
-
63
-
64
-
65
-
66
-
67
-
68
-
69
-
70
-
71
-
72
-
73
-
74
-
75
-
76
-
77
-
78
-
79
-
80
-
81
-
82
-
83
-
84
-
85
-
86
-
87
-
88
-
 89
89 -
 90
90 -
 91
91 -
 92
92 -
 93
93 -
 94
94 -
 95
95 -
 96
96 -
 97
97 -
 98
98 -
 99
99 -
100
-
101
-
102
-
103
-
104
-
105
-
106
-
107
-
108
-
109
-
110
-
111
-
112
-
113
-
114
-
115
-
116
-
117
-
118
-
119
-
120
-
121
-
122
-
123
-
124
-
125
-
126
-
127
-
128
-
129
-
130
-
131
-
132
-
133
-
134
-
135
-
136
-
137
-
138
-
139
-
140
-
141
-
142
-
143
-
144
-
145
-
146
-
147
-
148
-
149
-
150
-
151
-
152
-
153
-
154
-
155
-
156
-
157
-
158
-
159
-
160
-
161
-
162
-
163
-
164
-
165
-
166
-
167
-
168
-
169
-
170
-
171
-
172
-
173
-
174
-
175
-
176
-
177
-
178
-
179
-
180
-
181
-
182
-
183
-
184
-
185
-
186
-
187
-
188
-
189
-
190
-
191
-
192
-
193
-
194
-
195
-
196
-
197
-
198
 |
 |