Kyocera ECOSYS P2040dw ECOSYS M2635dw/M2040dn/M2540dw/M2640idw/P2040dw/P2235dw - Page 14
Upgrade, Upgrading Driver Components, Maintenance, Optional Printer Components
 |
View all Kyocera ECOSYS P2040dw manuals
Add to My Manuals
Save this manual to your list of manuals |
Page 14 highlights
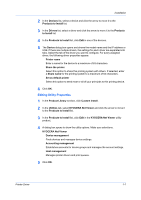
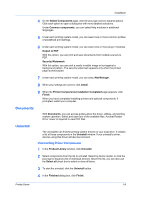
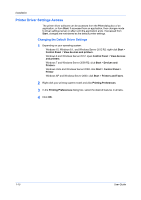
Installation Upgrade The installer can detect outdated driver or utility components on your computer. You can select driver or utility components and upgrade them to the most recent version. If there are upgrades available, a list appears when you click Upgrade. In a client/server environment, you cannot upgrade older drivers. Contact your printing system dealer for more information. Upgrading Driver Components 1 In the Product Library window, click Upgrade. 2 From the Upgrade list, select the drivers and utilities to upgrade on your computer. 3 To start the upgrade, click the Upgrade button. 4 In the Finished dialog box, click Finish. Maintenance With Maintenance, you can access utilities that provide useful features. Select and run any of the available utilities: Optional Printer Components You can expand functionality with Help modules in other languages, common printer profiles, plug-in modules, and the Net Manager application. Quick Network Setup You can configure the most common networking settings. Maintenance Menu You can adjust features such as print position and scan position. Configuration Tool You can modify the printing system's factory default settings. Wi-Fi Setup Tool You can configure the Wi-Fi settings. Optional Printer Components You can expand the functionality of your printer driver by installing optional components. For the XPS driver, only Common Profiles and Help Modules can be installed. Installing Optional Printer Components 1 Click Maintenance. 2 Select Optional Printer Components and click Run. 3 On the Select Printer page, select one or more printing systems and click Next. On any page you can click Back to correct any settings. 1-8 User Guide
-
 1
1 -
2
-
3
-
4
-
5
-
6
-
7
-
8
-
 9
9 -
 10
10 -
 11
11 -
 12
12 -
 13
13 -
 14
14 -
 15
15 -
 16
16 -
 17
17 -
 18
18 -
 19
19 -
20
-
21
-
22
-
23
-
24
-
25
-
26
-
27
-
28
-
29
-
30
-
31
-
32
-
33
-
34
-
35
-
36
-
37
-
38
-
39
-
40
-
41
-
42
-
43
-
44
-
45
-
46
-
47
-
48
-
49
-
50
-
51
-
52
-
53
-
54
-
55
-
56
-
57
-
58
-
59
-
60
-
61
-
62
-
63
-
64
-
65
-
66
-
67
-
68
-
69
-
70
-
71
-
72
-
73
-
74
-
75
-
76
-
77
-
78
-
79
-
80
-
81
-
82
-
83
-
84
-
85
-
86
-
87
-
88
-
89
-
90
-
91
-
92
-
93
 |
 |
