Kyocera ECOSYS P2040dw ECOSYS M2635dw/M2040dn/M2540dw/M2640idw/P2040dw/P2235dw - Page 31
Printing with Job Accounting, Net Manager
 |
View all Kyocera ECOSYS P2040dw manuals
Add to My Manuals
Save this manual to your list of manuals |
Page 31 highlights
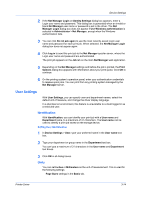
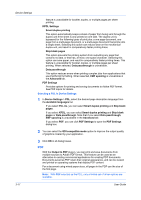
Device Settings 5 Click Add to add the name to the User names (computer) list. A maximum of 100 names can be added to each account ID. 6 To remove an account ID from the list, select it and click Delete. 7 Click OK. Printing with Job Accounting 1 In Device Settings > Administrator > Job Accounting, select Job accounting. 2 Select a Job Accounting option: Use specific account ID Prompt for account ID If you select the Use specific account ID or Prompt for account ID option, continue to step 5. Note: The remaining Job accounting options become available when you create an account ID list. 3 Next to the Account IDs list, click the buttons to view and manage the list. 4 Select from the remaining Job accounting options: Prompt for account ID and validate Display account ID list Validate user name (computer) or prompt for account ID 5 Click OK in all dialog boxes. 6 Print the document from the application. 7 For some options, when the Print Options or Identity Settings dialog box appears, type or select an account ID, and click OK. Net Manager Net Manager is a server-based application that provides centralized user authentication, authorization, user access control, and secure pull printing features. The Net Manager application must be installed separately. It is also necessary to make settings in the printer driver Device Settings > Administrator > Net Manager to integrate with Net Manager. This Net Manager driver feature is installed as an optional component of the driver. The XPS driver does not support Net Manager. For more information about Net Manager, please contact your printing system dealer. An administrator can set the Net Manager server and user information for users and groups to print according to defined policies. Printer Driver 3-12
-
 1
1 -
2
-
3
-
4
-
5
-
6
-
7
-
8
-
9
-
10
-
11
-
12
-
13
-
14
-
15
-
16
-
17
-
18
-
19
-
20
-
21
-
22
-
23
-
24
-
25
-
 26
26 -
 27
27 -
 28
28 -
 29
29 -
 30
30 -
 31
31 -
 32
32 -
 33
33 -
 34
34 -
 35
35 -
 36
36 -
37
-
38
-
39
-
40
-
41
-
42
-
43
-
44
-
45
-
46
-
47
-
48
-
49
-
50
-
51
-
52
-
53
-
54
-
55
-
56
-
57
-
58
-
59
-
60
-
61
-
62
-
63
-
64
-
65
-
66
-
67
-
68
-
69
-
70
-
71
-
72
-
73
-
74
-
75
-
76
-
77
-
78
-
79
-
80
-
81
-
82
-
83
-
84
-
85
-
86
-
87
-
88
-
89
-
90
-
91
-
92
-
93
 |
 |
