Kyocera FS-C5350DN FS-C5350DN Operation Guide (Advanced) - Page 42
Remove Device Removing the USB memory
 |
View all Kyocera FS-C5350DN manuals
Add to My Manuals
Save this manual to your list of manuals |
Page 42 highlights
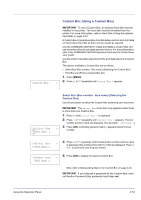
2-18 Copies Copies 001 6 Press [OK] again. Copies appears. 010 Copies (Number of copies) Sets the number of copies printed of the specified file in USB memory. IMPORTANT To use this feature, an optional hard disk must be installed in the printer or the RAM disk must be set to On. 1 While Copies in step 5 above is displayed, press U and V or Y and Z to display the number of copies. (E.g.: 10) Paper Source ? Cassette 1 Paper Source ? Cassette 2 >Remove Device ? 2 Press [OK]. Paper Source and a question mark (?) appears. Paper Source (Selecting the paper feed source) Sets the paper used for printing the specified file in USB memory. 1 While Paper Source in step 2 above is displayed, press U and V or Y and Z repeatedly until the paper source appears. (For example : Cassette 2) Note that menus shown in the list may vary depending on which optional units installed in the printer. 2 Press [OK]. The message Processing appears and the printer prints a file stored in a USB memory. Remove Device (Removing the USB memory) Specifies the setting for USB memory removal. 1 Press Z while USB Memory > is displayed. 2 Press U or V repeatedly until >Remove Device appears. 3 Press [OK]. A question mark (?) appears. >Print File List ? 4 Press [OK] again. Menu display ends and the USB memory device can be removed. Print File List (Printing a list of the files on a USB memory) This allows you to print a list of the files on a USB memory device. 1 Press Z while USB Memory > is displayed. 2 Press U or V repeatedly until >Print File List appears. 3 Press [OK]. A question mark (?) appears. 4 Press [OK] again. The message Processing appears and the printer prints a list of files stored in a USB memory. Using the Operation Panel
-
 1
1 -
2
-
3
-
4
-
5
-
6
-
7
-
8
-
9
-
10
-
11
-
12
-
13
-
14
-
15
-
16
-
17
-
18
-
19
-
20
-
21
-
22
-
23
-
24
-
25
-
26
-
27
-
28
-
29
-
30
-
31
-
32
-
33
-
34
-
35
-
36
-
 37
37 -
 38
38 -
 39
39 -
 40
40 -
 41
41 -
 42
42 -
 43
43 -
 44
44 -
 45
45 -
 46
46 -
 47
47 -
48
-
49
-
50
-
51
-
52
-
53
-
54
-
55
-
56
-
57
-
58
-
59
-
60
-
61
-
62
-
63
-
64
-
65
-
66
-
67
-
68
-
69
-
70
-
71
-
72
-
73
-
74
-
75
-
76
-
77
-
78
-
79
-
80
-
81
-
82
-
83
-
84
-
85
-
86
-
87
-
88
-
89
-
90
-
91
-
92
-
93
-
94
-
95
-
96
-
97
-
98
-
99
-
100
-
101
-
102
-
103
-
104
-
105
-
106
-
107
-
108
-
109
-
110
-
111
-
112
-
113
-
114
-
115
-
116
-
117
-
118
-
119
-
120
-
121
-
122
-
123
-
124
-
125
-
126
-
127
-
128
-
129
-
130
-
131
-
132
-
133
-
134
-
135
-
136
-
137
-
138
-
139
-
140
 |
 |