Kyocera FS-C5350DN FS-C5350DN Operation Guide (Advanced) - Page 81
Hard Disk Using the optional hard disk
 |
View all Kyocera FS-C5350DN manuals
Add to My Manuals
Save this manual to your list of manuals |
Page 81 highlights
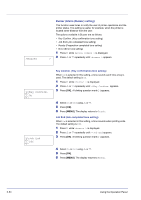
>>RAM Disk Size 119 MByte RAM Disk Size (Setting the RAM disk size) Use this procedure to set the amount of memory used for the RAM disk. IMPORTANT The RAM Disk Size menu option only appears when RAM Disk Mode is set to On. 1 Press Z while >RAM Disk Mode On > is displayed. 2 Press [OK]. The message display shows a blinking cursor (_). Press U or V to display the desired size. Definable RAM disk size is 001 to 512. Use Y and Z to move the cursor right and left. This range varies depending on the total memory size of the printer. 3 When the desired RAM disk size is displayed, press [OK]. 4 Press [MENU]. The display returns to Ready. Turn the printer off and then on again. The selected RAM disk size is activated after the printer is restarted. Hard Disk (Using the optional hard disk) Installing the optional hard disk into the printer allows you to perform the following operations on the hard disk. • Format (Formatting hard disk) When an optional hard disk is inserted into the printer for the first time, it must be formatted before use. This menu is displayed only when the optional hard disk is installed on the printer. Note If the optional hard disk is installed in the printer, the Custom Box and Job Box will be available. >Hard Disk 1 Press Z while Device Common > is displayed. > 2 Press U or V repeatedly until >Hard Disk > appears. Using the Operation Panel 2-57
-
 1
1 -
2
-
3
-
4
-
5
-
6
-
7
-
8
-
9
-
10
-
11
-
12
-
13
-
14
-
15
-
16
-
17
-
18
-
19
-
20
-
21
-
22
-
23
-
24
-
25
-
26
-
27
-
28
-
29
-
30
-
31
-
32
-
33
-
34
-
35
-
36
-
37
-
38
-
39
-
40
-
41
-
42
-
43
-
44
-
45
-
46
-
47
-
48
-
49
-
50
-
51
-
52
-
53
-
54
-
55
-
56
-
57
-
58
-
59
-
60
-
61
-
62
-
63
-
64
-
65
-
66
-
67
-
68
-
69
-
70
-
71
-
72
-
73
-
74
-
75
-
 76
76 -
 77
77 -
 78
78 -
 79
79 -
 80
80 -
 81
81 -
 82
82 -
 83
83 -
 84
84 -
 85
85 -
 86
86 -
87
-
88
-
89
-
90
-
91
-
92
-
93
-
94
-
95
-
96
-
97
-
98
-
99
-
100
-
101
-
102
-
103
-
104
-
105
-
106
-
107
-
108
-
109
-
110
-
111
-
112
-
113
-
114
-
115
-
116
-
117
-
118
-
119
-
120
-
121
-
122
-
123
-
124
-
125
-
126
-
127
-
128
-
129
-
130
-
131
-
132
-
133
-
134
-
135
-
136
-
137
-
138
-
139
-
140
 |
 |