Kyocera FS-C5350DN FS-C5350DN Operation Guide (Advanced) - Page 43
Custom Box Using a Custom Box
 |
View all Kyocera FS-C5350DN manuals
Add to My Manuals
Save this manual to your list of manuals |
Page 43 highlights
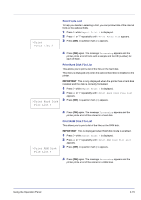
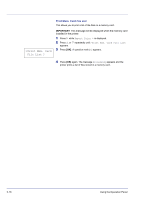
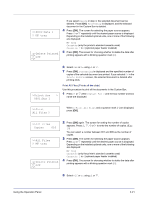
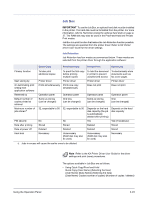
Custom Box Custom Box (Using a Custom Box) IMPORTANT To use a Custom Box, an optional hard disk must be installed in the printer. The hard disk must be formatted from the printer. For more information, refer to Hard Disk (Using the optional hard disk) on page 2-57. A Custom Box is general-purpose box that allows users to store print data on the printer's hard disk so that it can be reused as required. Use the COMMAND CENTER to create and delete a Custom Box, but use the printer driver to send data stored in the box. For more information, refer to the COMMAND CENTER Operation Guide and KX Printer Driver User Guide. Use the printer's operation panel to print the print data stored in a Custom Box. The options available in Custom Box are as follows: • Select Box (Box number : Box name) (Selecting the Custom Box) • Print Box List (Prints a Custom Box list) 1 Press [MENU]. > 2 Press U or V repeatedly until Custom Box > appears. >Select Box ?0001:Box 1 Select Box (Box number : Box name) (Selecting the Custom Box) Use this procedure to select the Custom Box containing your document. IMPORTANT The Select Box menu item only appears when there is more than one Custom Box. 1 Press Z while Custom Box > is displayed. 2 Press U or V repeatedly until >Select Box > appears. The box number and box name are displayed. (For example : 0001:Box 1) > 3 Press [OK]. A blinking question mark (?) appears before the box number. >Select Box ?0001:Box 1 4 Press U or V repeatedly until the desired box number and box name > is displayed. Box numbers from 0001 to 1000 are displayed. Press Y or Z to scroll and view long box names. >Select Box 0001:Box 1 > 5 Press [OK] to display the desired Custom Box. Next, refer to Manipulating Data in the Custom Box on page 2-20. IMPORTANT If you have set a password for the Custom Box, carry out the Box Password (Box password input) step next. Using the Operation Panel 2-19
-
 1
1 -
2
-
3
-
4
-
5
-
6
-
7
-
8
-
9
-
10
-
11
-
12
-
13
-
14
-
15
-
16
-
17
-
18
-
19
-
20
-
21
-
22
-
23
-
24
-
25
-
26
-
27
-
28
-
29
-
30
-
31
-
32
-
33
-
34
-
35
-
36
-
37
-
 38
38 -
 39
39 -
 40
40 -
 41
41 -
 42
42 -
 43
43 -
 44
44 -
 45
45 -
 46
46 -
 47
47 -
 48
48 -
49
-
50
-
51
-
52
-
53
-
54
-
55
-
56
-
57
-
58
-
59
-
60
-
61
-
62
-
63
-
64
-
65
-
66
-
67
-
68
-
69
-
70
-
71
-
72
-
73
-
74
-
75
-
76
-
77
-
78
-
79
-
80
-
81
-
82
-
83
-
84
-
85
-
86
-
87
-
88
-
89
-
90
-
91
-
92
-
93
-
94
-
95
-
96
-
97
-
98
-
99
-
100
-
101
-
102
-
103
-
104
-
105
-
106
-
107
-
108
-
109
-
110
-
111
-
112
-
113
-
114
-
115
-
116
-
117
-
118
-
119
-
120
-
121
-
122
-
123
-
124
-
125
-
126
-
127
-
128
-
129
-
130
-
131
-
132
-
133
-
134
-
135
-
136
-
137
-
138
-
139
-
140
 |
 |
