Lenovo ThinkPad 390X User's Reference: ThinkPad 390X - Page 70
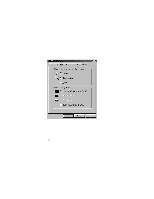
enter the BIOS Setup Utility.
 |
View all Lenovo ThinkPad 390X manuals
Add to My Manuals
Save this manual to your list of manuals |
Page 70 highlights
Increasing Memory 6. Replace the battery pack. 7. Turn the computer over again, power on the computer. 8. Confirm that the new memory size is detected: a. Press F1 while the IBM ThinkPad logo is being displayed to enter the BIOS Setup Utility. b. Select Config and press Enter. c. Verify the values in the memory section (see page 54). 9. You have finished installing the DIMM. Reconnect all cables. Notes: 1. If the total memory size is not the same as the value you calculated, power off the computer and go to page 52 to reinstall the DIMM. 2. If you changed the memory installed in the computer, you need to create a new hibernation file. To create the hibernation file, refer to "Creating the Hibernation Function" on page 55 or see the Online User's Guide. How to Calculate Total Memory Size Calculate your total memory size in kilobytes (KB) by adding the DIMM memory size to the base memory size (32384 KB for a computer with 32 MB base memory). Note: 384 KB is reserved by the system. For example, if you installed a 32MB DIMM to a computer with 32 MB base memory, you should have about 64 MB. 54 ThinkPad 390X User's Reference
-
 1
1 -
2
-
3
-
4
-
5
-
6
-
7
-
8
-
9
-
10
-
11
-
12
-
13
-
14
-
15
-
16
-
17
-
18
-
19
-
20
-
21
-
22
-
23
-
24
-
25
-
26
-
27
-
28
-
29
-
30
-
31
-
32
-
33
-
34
-
35
-
36
-
37
-
38
-
39
-
40
-
41
-
42
-
43
-
44
-
45
-
46
-
47
-
48
-
49
-
50
-
51
-
52
-
53
-
54
-
55
-
56
-
57
-
58
-
59
-
60
-
61
-
62
-
63
-
64
-
 65
65 -
 66
66 -
 67
67 -
 68
68 -
 69
69 -
 70
70 -
 71
71 -
 72
72 -
 73
73 -
 74
74 -
 75
75 -
76
-
77
-
78
-
79
-
80
-
81
-
82
-
83
-
84
-
85
-
86
-
87
-
88
-
89
-
90
-
91
-
92
-
93
-
94
-
95
-
96
-
97
-
98
-
99
-
100
-
101
-
102
-
103
-
104
-
105
-
106
-
107
-
108
-
109
-
110
-
111
-
112
-
113
-
114
-
115
-
116
-
117
-
118
-
119
-
120
-
121
-
122
-
123
-
124
-
125
-
126
-
127
-
128
-
129
-
130
-
131
-
132
-
133
-
134
-
135
-
136
-
137
-
138
-
139
-
140
-
141
-
142
-
143
-
144
-
145
-
146
-
147
-
148
-
149
-
150
-
151
-
152
-
153
-
154
-
155
-
156
-
157
-
158
-
159
-
160
-
161
-
162
-
163
-
164
-
165
-
166
-
167
-
168
-
169
-
170
-
171
-
172
-
173
-
174
-
175
-
176
-
177
-
178
-
179
-
180
-
181
-
182
-
183
-
184
-
185
-
186
-
187
-
188
-
189
-
190
 |
 |
