Lexmark C720 Setup Guide - Page 106
Change the zone and, printer name, MarkVision and Utilities CD. To do
 |
View all Lexmark C720 manuals
Add to My Manuals
Save this manual to your list of manuals |
Page 106 highlights
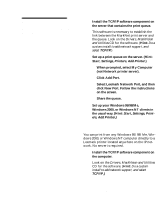
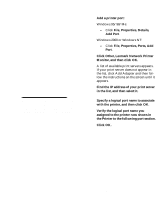
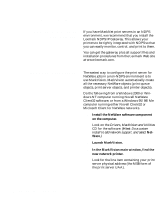
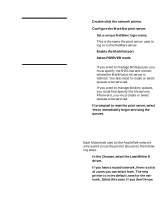
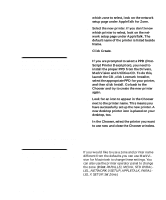
Note: A PPD describes the printer or printer family. For example, the PPD lists which options are valid for the printer. which zone to select, look on the network setup page under AppleTalk for Zone. 3 Select the new printer. If you don't know which printer to select, look on the network setup page under AppleTalk. The default name of the printer is listed beside Name. 4 Click Create. 5 If you are prompted to select a PPD (Post- Script Printer Description), you need to install the proper PPD from the Drivers, MarkVision and Utilities CD. To do this, launch the CD, click Lexmark Installer, select the appropriate PPD for your printer, and then click Install. Go back to the Chooser and try to create the new printer again. 6 Look for an icon to appear in the Chooser next to the printer name. This means you have successfully set up the new printer. A new desktop printer icon is placed on your desktop, too. 7 In the Chooser, select the printer you want to use now and close the Chooser window. Change the zone and printer name Note: MarkVision for Macintosh resides on the Drivers, MarkVision and Utilities CD If you would like to use a zone and printer name different from the defaults you can use MarkVision for Macintosh to change these settings. You can also use the printer operator panel to change the zone. (Hint: PARALLEL MENU, STD PARALLEL, NETWORK 0 SETUP, APPLETALK, PARALLEL X SETUP, Set Zone.) 102 Configure the network printer
-
 1
1 -
2
-
3
-
4
-
5
-
6
-
7
-
8
-
9
-
10
-
11
-
12
-
13
-
14
-
15
-
16
-
17
-
18
-
19
-
20
-
21
-
22
-
23
-
24
-
25
-
26
-
27
-
28
-
29
-
30
-
31
-
32
-
33
-
34
-
35
-
36
-
37
-
38
-
39
-
40
-
41
-
42
-
43
-
44
-
45
-
46
-
47
-
48
-
49
-
50
-
51
-
52
-
53
-
54
-
55
-
56
-
57
-
58
-
59
-
60
-
61
-
62
-
63
-
64
-
65
-
66
-
67
-
68
-
69
-
70
-
71
-
72
-
73
-
74
-
75
-
76
-
77
-
78
-
79
-
80
-
81
-
82
-
83
-
84
-
85
-
86
-
87
-
88
-
89
-
90
-
91
-
92
-
93
-
94
-
95
-
96
-
97
-
98
-
99
-
100
-
 101
101 -
 102
102 -
 103
103 -
 104
104 -
 105
105 -
 106
106 -
 107
107 -
 108
108 -
 109
109 -
 110
110 -
 111
111 -
112
-
113
-
114
-
115
-
116
-
117
 |
 |