Lexmark X4975 User's Guide - Page 89
Scanning, Scanning original documents, Using the printer control panel - software download
 |
UPC - 734646081399
View all Lexmark X4975 manuals
Add to My Manuals
Save this manual to your list of manuals |
Page 89 highlights
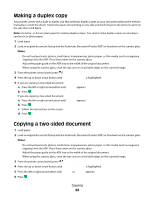
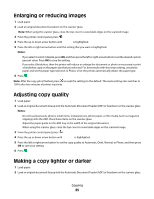
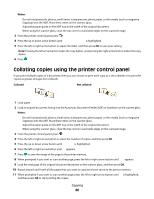
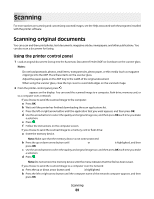
Scanning For more options on scanning and customizing scanned images, see the Help associated with the programs installed with the printer software. Scanning original documents You can scan and then print photos, text documents, magazine articles, newspapers, and other publications. You can also scan a document for faxing. Using the printer control panel 1 Load an original document faceup into the Automatic Document Feeder (ADF) or facedown on the scanner glass. Notes: • Do not load postcards, photos, small items, transparencies, photo paper, or thin media (such as magazine clippings) into the ADF. Place these items on the scanner glass. • Adjust the paper guide on the ADF tray to the width of the original document. • When using the scanner glass, close the top cover to avoid dark edges on the scanned image. 2 From the printer control panel, press . Scan to appears on the display. You can send the scanned image to a computer, flash drive, memory card, or to a computer over a network. • If you choose to send the scanned image to the computer: a Press OK. b Wait until the printer has finished downloading the scan applications list. c Press the left or right arrow button until the application that you want appears, and then press OK. d Use the arrow buttons to select the quality and original image size, and then press OK each time you make a selection. e Press . f Follow the instructions on the computer screen. • If you choose to send the scanned image to a memory card or flash drive: a Insert the memory device. Note: Make sure that the memory device is not write-protected. b Press the up or down arrow button until Memory Card or USB Flash Drive is highlighted, and then press OK. c Use the arrow buttons to select the quality and original image size, and then press OK each time you make a selection. d Press . Note: Do not remove the memory device until the menu indicates that the file has been saved. • If you choose to send the scanned image to a computer over the network: a Press the up or down arrow button until Computer is highlighted. b Press the left or right arrow button until the computer name of the network computer appears, and then press OK. Scanning 89
-
 1
1 -
2
-
3
-
4
-
5
-
6
-
7
-
8
-
9
-
10
-
11
-
12
-
13
-
14
-
15
-
16
-
17
-
18
-
19
-
20
-
21
-
22
-
23
-
24
-
25
-
26
-
27
-
28
-
29
-
30
-
31
-
32
-
33
-
34
-
35
-
36
-
37
-
38
-
39
-
40
-
41
-
42
-
43
-
44
-
45
-
46
-
47
-
48
-
49
-
50
-
51
-
52
-
53
-
54
-
55
-
56
-
57
-
58
-
59
-
60
-
61
-
62
-
63
-
64
-
65
-
66
-
67
-
68
-
69
-
70
-
71
-
72
-
73
-
74
-
75
-
76
-
77
-
78
-
79
-
80
-
81
-
82
-
83
-
 84
84 -
 85
85 -
 86
86 -
 87
87 -
 88
88 -
 89
89 -
 90
90 -
 91
91 -
 92
92 -
 93
93 -
 94
94 -
95
-
96
-
97
-
98
-
99
-
100
-
101
-
102
-
103
-
104
-
105
-
106
-
107
-
108
-
109
-
110
-
111
-
112
-
113
-
114
-
115
-
116
-
117
-
118
-
119
-
120
-
121
-
122
-
123
-
124
-
125
-
126
-
127
-
128
-
129
-
130
-
131
-
132
-
133
-
134
-
135
-
136
-
137
-
138
-
139
-
140
-
141
-
142
-
143
-
144
-
145
-
146
-
147
-
148
-
149
 |
 |