Lexmark X4975 User's Guide - Page 98
Maintaining the printer, Maintaining print cartridges - printer cartridges
 |
UPC - 734646081399
View all Lexmark X4975 manuals
Add to My Manuals
Save this manual to your list of manuals |
Page 98 highlights
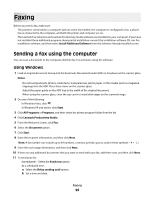
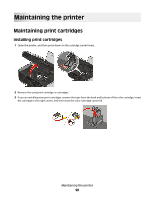
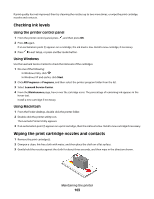
Maintaining the printer Maintaining print cartridges Installing print cartridges 1 Open the printer, and then press down on the cartridge carrier levers. 2 Remove the used print cartridge or cartridges. 3 If you are installing new print cartridges, remove the tape from the back and bottom of the color cartridge, insert the cartridge in the right carrier, and then close the color cartridge carrier lid. Maintaining the printer 98
-
 1
1 -
2
-
3
-
4
-
5
-
6
-
7
-
8
-
9
-
10
-
11
-
12
-
13
-
14
-
15
-
16
-
17
-
18
-
19
-
20
-
21
-
22
-
23
-
24
-
25
-
26
-
27
-
28
-
29
-
30
-
31
-
32
-
33
-
34
-
35
-
36
-
37
-
38
-
39
-
40
-
41
-
42
-
43
-
44
-
45
-
46
-
47
-
48
-
49
-
50
-
51
-
52
-
53
-
54
-
55
-
56
-
57
-
58
-
59
-
60
-
61
-
62
-
63
-
64
-
65
-
66
-
67
-
68
-
69
-
70
-
71
-
72
-
73
-
74
-
75
-
76
-
77
-
78
-
79
-
80
-
81
-
82
-
83
-
84
-
85
-
86
-
87
-
88
-
89
-
90
-
91
-
92
-
 93
93 -
 94
94 -
 95
95 -
 96
96 -
 97
97 -
 98
98 -
 99
99 -
 100
100 -
 101
101 -
 102
102 -
 103
103 -
104
-
105
-
106
-
107
-
108
-
109
-
110
-
111
-
112
-
113
-
114
-
115
-
116
-
117
-
118
-
119
-
120
-
121
-
122
-
123
-
124
-
125
-
126
-
127
-
128
-
129
-
130
-
131
-
132
-
133
-
134
-
135
-
136
-
137
-
138
-
139
-
140
-
141
-
142
-
143
-
144
-
145
-
146
-
147
-
148
-
149
 |
 |

Maintaining the printer
Maintaining print cartridges
Installing print cartridges
1
Open the printer, and then press down on the cartridge carrier levers.
2
Remove the used print cartridge or cartridges.
3
If you are installing new print cartridges, remove the tape from the back and bottom of the color cartridge, insert
the cartridge in the right carrier, and then close the color cartridge carrier lid.
Maintaining the printer
98