Lexmark XC9235 User Guide - Page 153
Solid color or black images
 |
View all Lexmark XC9235 manuals
Add to My Manuals
Save this manual to your list of manuals |
Page 153 highlights
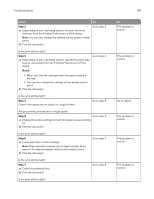
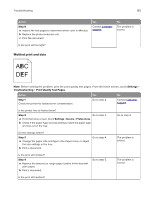
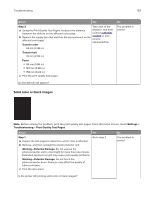
Troubleshooting 153 Action Yes Step 3 Take note of the a Using the Print Quality Test Pages, measure the distance distance, and then between the defects on the affected color page. contact customer b Replace the supply item that matches the measurement on the affected color page. support or your service representative. Transfer roller 63 mm (2.48 in.) Transfer belt 76 mm (2.99 in.) Fuser • 98 mm (3.86 in.) • 124 mm (4.88 in.) • 158 mm (6.22 in.) c Print the print quality test pages. No The problem is solved. Do the defects still appear? Solid color or black images Note: Before solving the problem, print the print quality test pages. From the home screen, touch Settings > Troubleshooting > Print Quality Test Pages. Action Yes No Step 1 Go to step 2. a Inspect the test pages to determine which color is affected. b Remove, and then reinstall the photoconductor unit. Warning-Potential Damage: Do not expose the photoconductor unit to direct light for more than one minute. Extended exposure to light may cause print quality problems. Warning-Potential Damage: Do not touch the photoconductor drum. Doing so may affect the quality of future print jobs. c Print the document. The problem is solved. Is the printer still printing solid color or black images?
-
 1
1 -
2
-
3
-
4
-
5
-
6
-
7
-
8
-
9
-
10
-
11
-
12
-
13
-
14
-
15
-
16
-
17
-
18
-
19
-
20
-
21
-
22
-
23
-
24
-
25
-
26
-
27
-
28
-
29
-
30
-
31
-
32
-
33
-
34
-
35
-
36
-
37
-
38
-
39
-
40
-
41
-
42
-
43
-
44
-
45
-
46
-
47
-
48
-
49
-
50
-
51
-
52
-
53
-
54
-
55
-
56
-
57
-
58
-
59
-
60
-
61
-
62
-
63
-
64
-
65
-
66
-
67
-
68
-
69
-
70
-
71
-
72
-
73
-
74
-
75
-
76
-
77
-
78
-
79
-
80
-
81
-
82
-
83
-
84
-
85
-
86
-
87
-
88
-
89
-
90
-
91
-
92
-
93
-
94
-
95
-
96
-
97
-
98
-
99
-
100
-
101
-
102
-
103
-
104
-
105
-
106
-
107
-
108
-
109
-
110
-
111
-
112
-
113
-
114
-
115
-
116
-
117
-
118
-
119
-
120
-
121
-
122
-
123
-
124
-
125
-
126
-
127
-
128
-
129
-
130
-
131
-
132
-
133
-
134
-
135
-
136
-
137
-
138
-
139
-
140
-
141
-
142
-
143
-
144
-
145
-
146
-
147
-
 148
148 -
 149
149 -
 150
150 -
 151
151 -
 152
152 -
 153
153 -
 154
154 -
 155
155 -
 156
156 -
 157
157 -
 158
158 -
159
-
160
-
161
-
162
-
163
-
164
-
165
-
166
-
167
-
168
-
169
-
170
-
171
-
172
-
173
-
174
-
175
-
176
-
177
-
178
-
179
-
180
-
181
-
182
-
183
-
184
-
185
-
186
-
187
-
188
-
189
-
190
-
191
-
192
-
193
-
194
-
195
-
196
-
197
-
198
-
199
-
200
-
201
-
202
-
203
-
204
-
205
-
206
-
207
-
208
-
209
-
210
-
211
-
212
-
213
-
214
-
215
-
216
-
217
-
218
-
219
 |
 |
