Meade Tripod LX600-ACF 14 inch User Manual - Page 60
Press ENTER. The telescope slews to Polaris.
 |
View all Meade Tripod LX600-ACF 14 inch manuals
Add to My Manuals
Save this manual to your list of manuals |
Page 60 highlights
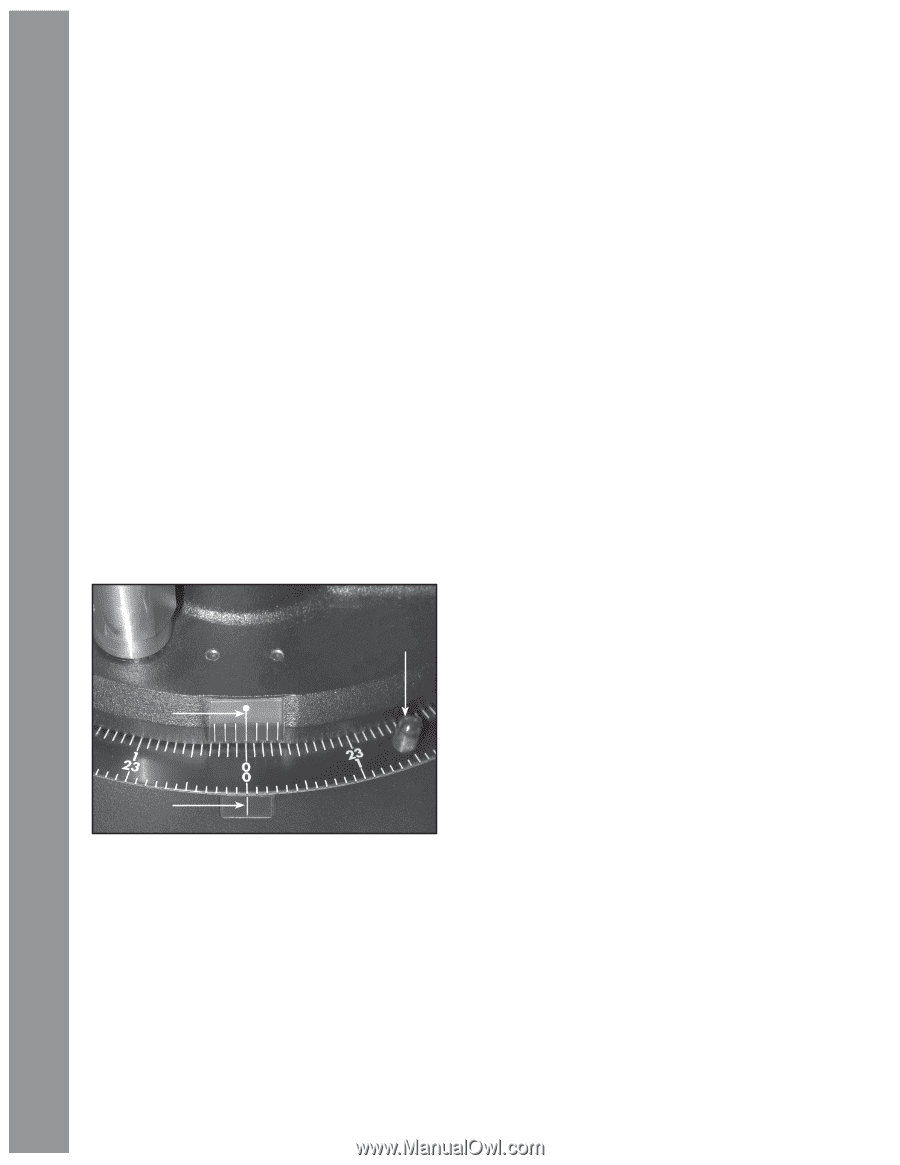
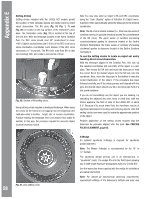
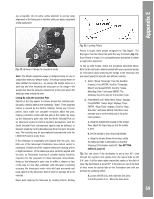
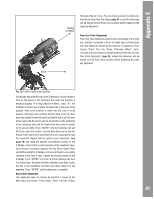
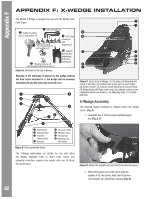
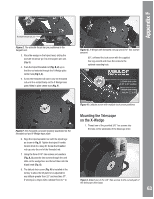
AutoStar #497ApHpAeNnDdiBxOEX so that center tick mark on fork arm base (Fig. 24, A) aligns with the tick mark on the base (Fig. 24, B). Lock the RA. e. Press ENTER. The telescope slews to Polaris. f. Use the azimuth and latitude controls on the X-Wedge to center Polaris in the field of view. Do not use the AutoStar II handbox during this process. When Polaris is centered, press ENTER. Lock the locking screws on the X-Wedge. The telescope will then slew to an alignment star and ask you to center it. Once you have done tis press ENTER. The telescope is now polar aligned. See AUTOSTAR II POLAR ALIGNMENT, on this page, for more information. At this point, your polar alignment is good enough for casual observations. There are times, however, when you will need to have precise polar alignment, such as when making fine astrophotographs. Once the latitude angle of the wedge has been fixed and lockedin according to the above procedure, it is not necessary to repeat this operation each time the telescope is used, unless you move a considerable distance North or South from your original Ꭿ field. On the left fork arm, loosen the large smooth knob centered in the setting circle. With the knob loose rotate the setting circle until it aligns with 89.2 degrees with the pointer. While holding it in place, tighten the large smooth knob. Should you wish to use the manual setting circles, the RA setting circle (Pg. 58, Fig. 20) must be calibrated manually on the Right Ascension of a star every time the telescope is set up. (The RA setting circle has two sets of numbers, the inner set is for Southern hemisphere use, while the other is for Northern hemisphere use.) Locate a star with which you're familiar. Look up the RA for the star in a star chart or other aid. With the star centered in the telescope's eyepiece, move the RA setting circle, using one of knobs (Fig. 24, C), so that the RA of the star lines up with the tick mark on the base of the telescope (Fig. 24, B). Precise Polar Alignment It should be emphasized that while doing casual observing, precise alignment of the telescope's polar axis to the celestial pole is not necessary. Don't allow a time-consuming effort at lining up with the pole to interfere with your basic enjoyment of the telescope. For long-exposure photography, however, the ground rules are quite different, and precise polar alignment is not only advisable, but almost essential. Even though the LX600 ACF telescopes offers a very precise and sophisticated drive system, the fewer tracking corrections required during the course of a long-exposure photograph, the better. In particular, the number of Declination corrections required is a direct function of the precision of polar alignment. Ꭽ Ꭾ Fig. 24. Align tick marks to set the fork arms to 00 H.A. position. observing position. (Approximately 70 miles movement in NorthSouth observing position is equivalent to 1° in latitude change.) The wedge may be detached from the field tripod and, as long as the latitude angle setting is not altered and the field tripod is leveled, it will retain the correct latitude setting when replaced on the tripod. Achieving precise polar alignment can be done with Starlocks assistance or manually using a crosshair eyepiece. See Polar Drift Alignment on page 43 for more information on using Starlock to obtain a precise polar alignment. If you wish to manually obtain a precise polar alignment, the Meade Astrometric Reticle Eyepiece (see OPTIONAL ACCESSORIES, page 44) is well-suited in this application, but it is also preferable to increase the effective magnification through the use of a 2X or 3X Barlow lens as well. Follow the procedure on page 68, Appendix G: Manual Drift Alignment to obtain a precise polar alignment without Starlocks assistance. When performing this procedure, turn off the Starlock in the Utilities menu. Achieving precise polar alignment can be done with Starlocks assistance or manually using a crosshair eyepiece. AutoStar II Polar Alignment AutoStar II provides three different (manual) methods for polar alignment: Easy, One-Star and Two-Star. The first time you polar align the telescope, check the calibration of the Declination setting circle. After performing the polar alignment procedure, center the star Polaris in the telescope One-Star Polar Alignment (Default) Setup the telescope facing true north with the tripod level. Use 60
-
 1
1 -
2
-
3
-
4
-
5
-
6
-
7
-
8
-
9
-
10
-
11
-
12
-
13
-
14
-
15
-
16
-
17
-
18
-
19
-
20
-
21
-
22
-
23
-
24
-
25
-
26
-
27
-
28
-
29
-
30
-
31
-
32
-
33
-
34
-
35
-
36
-
37
-
38
-
39
-
40
-
41
-
42
-
43
-
44
-
45
-
46
-
47
-
48
-
49
-
50
-
51
-
52
-
53
-
54
-
 55
55 -
 56
56 -
 57
57 -
 58
58 -
 59
59 -
 60
60 -
 61
61 -
 62
62 -
 63
63 -
 64
64 -
 65
65 -
66
-
67
-
68
-
69
-
70
-
71
-
72
 |
 |