Netgear WG111v3 WG111v3 User Manual - Page 29
Using WPS to Connect to a Wireless Network - review
 |
View all Netgear WG111v3 manuals
Add to My Manuals
Save this manual to your list of manuals |
Page 29 highlights
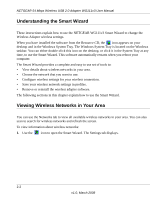
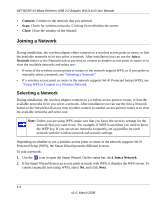
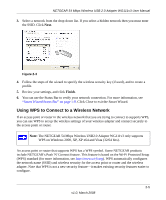
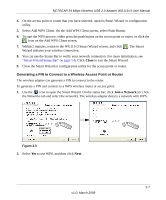
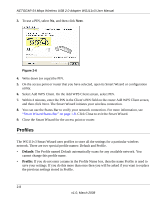
NETGEAR 54 Mbps Wireless USB 2.0 Adapter WG111v3 User Manual 3. Select a network from the drop-down list. If you select a hidden network then you must enter the SSID. Click Next. Figure 2-3 4. Follow the steps of the wizard to specify the wireless security key (if used), and to create a profile. 5. Review your settings, and click Finish. 6. You can use the Status Bar to verify your network connection. For more information, see "Smart Wizard Status Bar" on page 1-8. Click Close to exit the Smart Wizard. Using WPS to Connect to a Wireless Network If an access point or router in the wireless network that you are trying to connect to supports WPS, you can use WPS to set up the wireless settings of your wireless adapter and connect securely to the access point or router. Note: The NETGEAR 54 Mbps Wireless USB2.0 Adapter WG111v3 only supports WPS on Windows 2000, XP, XP x64 and Vista (32/64 bits). An access point or router that supports WPS has a WPS symbol. Some NETGEAR products include NETGEAR's Push 'N' Connect feature. This feature is based on the Wi-Fi Protected Setup (WPS) standard (for more information, see http://www.wi-fi.org). WPS automatically configures the network name (SSID) and wireless security for the access point or router and the wireless adapter. Note that WPS is not a new security feature-it makes existing security features easier to configure. 2-5 v1.0, March 2008
-
 1
1 -
2
-
3
-
4
-
5
-
6
-
7
-
8
-
9
-
10
-
11
-
12
-
13
-
14
-
15
-
16
-
17
-
18
-
19
-
20
-
21
-
22
-
23
-
 24
24 -
 25
25 -
 26
26 -
 27
27 -
 28
28 -
 29
29 -
 30
30 -
 31
31 -
 32
32 -
 33
33 -
 34
34 -
35
-
36
-
37
-
38
-
39
-
40
-
41
-
42
-
43
-
44
-
45
-
46
-
47
-
48
-
49
-
50
-
51
-
52
-
53
-
54
 |
 |