Netgear WG111v3 WG111v3 User Manual - Page 30
Using a WPS Button to Connect to a Wireless Access Point or Router, Push Button Configuration PBC - access point software
 |
View all Netgear WG111v3 manuals
Add to My Manuals
Save this manual to your list of manuals |
Page 30 highlights
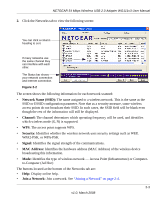
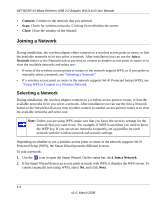
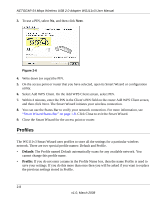
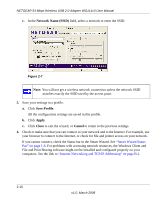
NETGEAR 54 Mbps Wireless USB 2.0 Adapter WG111v3 User Manual To connect the wireless adapter to an access point or router that supports WPS, do one of the following: • Connect during initial installation. See "Using the Smart Wizard to Set up Your Wireless Adapter" on page 1-4. • Click the Join a Network button on the Smart Wizard Settings screen. See Figure 1-5 on page 1-6. The wireless adapter detects all access points or routers in your neighborhood that support WPS, and guides you through connecting, as described in this section. • Click an access point or router that supports WPS in the Networks tab (see "Viewing Wireless Networks in Your Area" on page 2-2). There are two methods to connect using WPS: • Push Button Configuration (PBC). To enable WPS, press a push button or push dome on the access point or router, or click an onscreen button in the software. This is a fairly new technology, so not all access points and routers provide a PBC. • PIN entry. To enable WPS, use the NETGEAR Smart Wizard to generate a Personal Identification number (PIN) that is associated with the access point or router. Using a WPS Button to Connect to a Wireless Access Point or Router To join a network using a PBC: 1. Use the icon to open the Smart Wizard. On the status bar, click Join a Network. The adapter detects a network with WPS: Figure 2-4 2. Select Yes to use WPS, and then click Next. 3. Select Yes (to use a push button), and then click Next. 2-6 v1.0, March 2008
-
 1
1 -
2
-
3
-
4
-
5
-
6
-
7
-
8
-
9
-
10
-
11
-
12
-
13
-
14
-
15
-
16
-
17
-
18
-
19
-
20
-
21
-
22
-
23
-
24
-
 25
25 -
 26
26 -
 27
27 -
 28
28 -
 29
29 -
 30
30 -
 31
31 -
 32
32 -
 33
33 -
 34
34 -
 35
35 -
36
-
37
-
38
-
39
-
40
-
41
-
42
-
43
-
44
-
45
-
46
-
47
-
48
-
49
-
50
-
51
-
52
-
53
-
54
 |
 |