Netgear WNDR4700 User Manual - Page 111
Add a Custom Service, Edit or Delete a Port Forwarding Entry
 |
View all Netgear WNDR4700 manuals
Add to My Manuals
Save this manual to your list of manuals |
Page 111 highlights
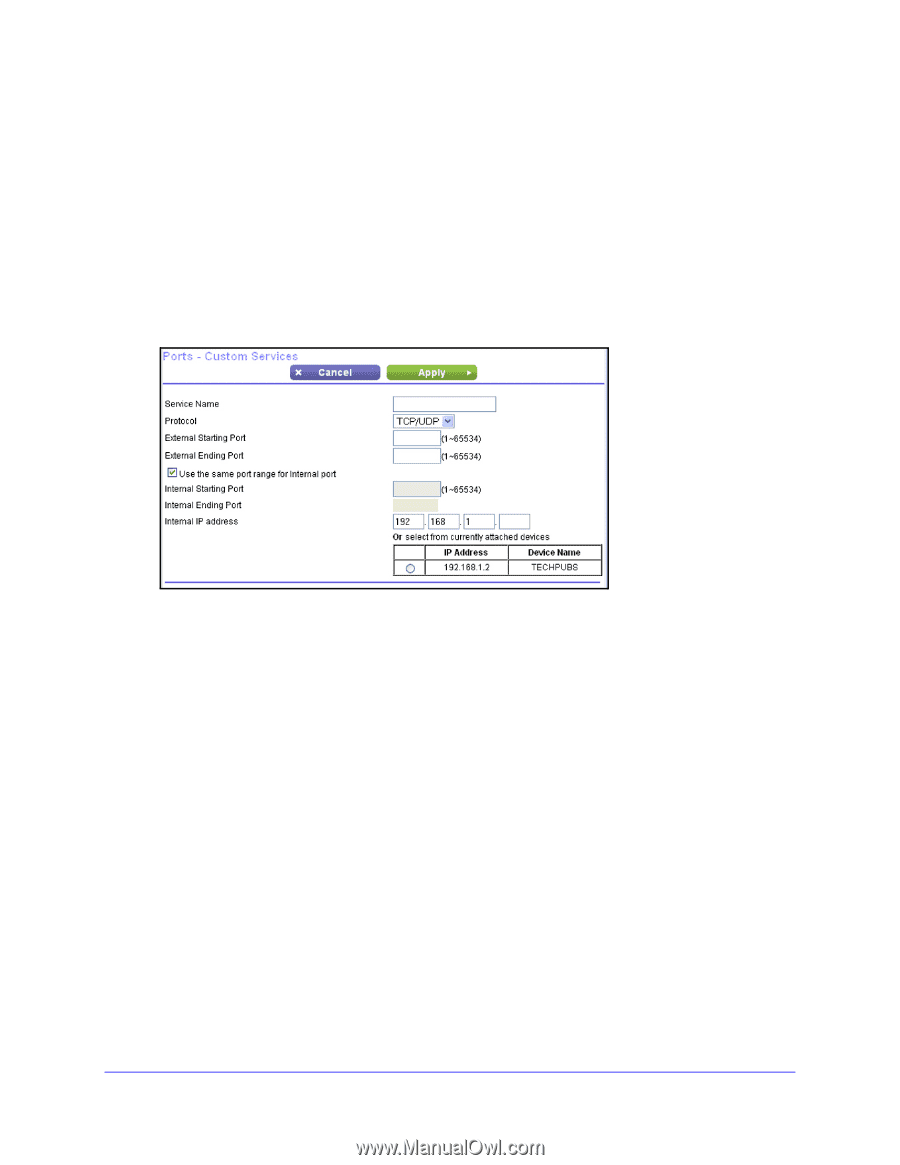
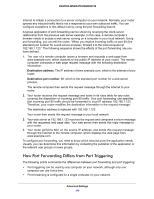
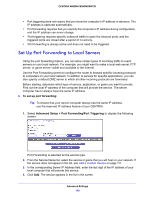
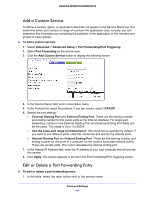
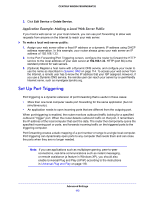
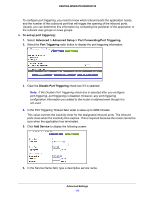
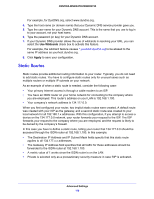
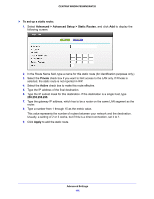
CENTRIA WNDR4700/WNDR4720 Add a Custom Service To define a service, game, or application that does not appear in the Service Name list, first determine which port number or range of numbers the application uses. Usually, you can determine this information by contacting the publisher of the application or the relevant user groups or news groups. To add a custom service: 1. Select Advanced > Advanced Setup > Port Forwarding/Port Triggering. 2. Select Port Forwarding as the service type. 3. Click the Add Custom Service button to display the following screen: 4. In the Service Name field, enter a descriptive name. 5. In the Protocol list, select the protocol. If you are unsure, select TCP/UDP. 6. Specify the port settings: • External Starting Port and External Ending Port. These are the starting number and ending number for the public ports at the Internet interface. For single port forwarding, number in the External Starting Port and External Ending Port fields can be the same. The range is from 1 to 65534. • Use the same port range for Internal port. This check box is selected by default. If you want to use different ports, clear this check box and specify the internal ports. • Internal Starting Port and Internal Ending Port. These are the starting number and ending number for the ports of a computer on the router's local area network (LAN). These are private ports. The router calculates the internal ending port. 7. In the Internal IP Address field, enter the IP address of your local computer that will provide this service. 8. Click Apply. The service appears in the list in the Port Forwarding/Port Triggering screen. Edit or Delete a Port Forwarding Entry To edit or delete a port forwarding entry: 1. In the table, select the radio button next to the service name. Advanced Settings 111
-
 1
1 -
2
-
3
-
4
-
5
-
6
-
7
-
8
-
9
-
10
-
11
-
12
-
13
-
14
-
15
-
16
-
17
-
18
-
19
-
20
-
21
-
22
-
23
-
24
-
25
-
26
-
27
-
28
-
29
-
30
-
31
-
32
-
33
-
34
-
35
-
36
-
37
-
38
-
39
-
40
-
41
-
42
-
43
-
44
-
45
-
46
-
47
-
48
-
49
-
50
-
51
-
52
-
53
-
54
-
55
-
56
-
57
-
58
-
59
-
60
-
61
-
62
-
63
-
64
-
65
-
66
-
67
-
68
-
69
-
70
-
71
-
72
-
73
-
74
-
75
-
76
-
77
-
78
-
79
-
80
-
81
-
82
-
83
-
84
-
85
-
86
-
87
-
88
-
89
-
90
-
91
-
92
-
93
-
94
-
95
-
96
-
97
-
98
-
99
-
100
-
101
-
102
-
103
-
104
-
105
-
 106
106 -
 107
107 -
 108
108 -
 109
109 -
 110
110 -
 111
111 -
 112
112 -
 113
113 -
 114
114 -
 115
115 -
 116
116 -
117
-
118
-
119
-
120
-
121
-
122
-
123
-
124
-
125
-
126
-
127
-
128
-
129
-
130
-
131
-
132
-
133
-
134
-
135
-
136
-
137
-
138
-
139
-
140
 |
 |