Netgear WNDR4700 User Manual - Page 51
QoS for a MAC Address, Edit or Delete an Existing QoS Policy
 |
View all Netgear WNDR4700 manuals
Add to My Manuals
Save this manual to your list of manuals |
Page 51 highlights
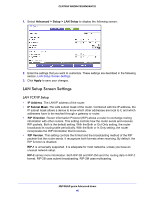
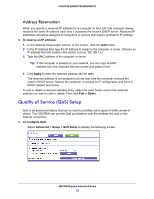
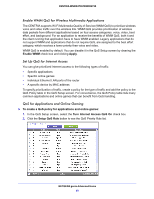
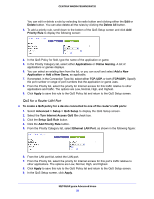
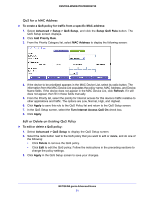
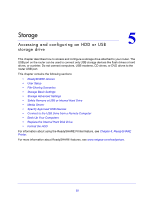
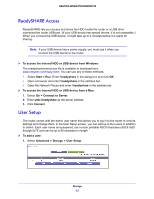
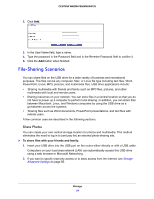
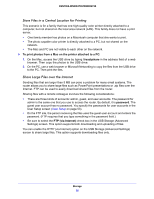
CENTRIA WNDR4700/WNDR4720 QoS for a MAC Address To create a QoS policy for traffic from a specific MAC address: 1. Select Advanced > Setup > QoS Setup, and click the Setup QoS Rule button. The QoS Setup screen displays. 2. Click Add Priority Rule. 3. From the Priority Category list, select MAC Address to display the following screen: 4. If the device to be prioritized appears in the MAC Device List, select its radio button. The information from the MAC Device List populates the policy name, MAC Address, and Device Name fields. If the device does not appear in the MAC Device List, click Refresh. If it still does not appear, then fill in these fields manually. 5. From the Priority list, select the priority for Internet access for this device's traffic reelative to other applications and traffic. The options are Low, Normal, High, and Highest. 6. Click Apply to save this rule to the QoS Policy list and return to the QoS Setup screen. 7. In the QoS Setup screen, select the Turn Internet Access QoS On check box. 8. Click Apply. Edit or Delete an Existing QoS Policy To edit or delete a QoS policy: 1. Select Advanced > QoS Setup to display the QoS Setup screen. 2. Select the radio button next to the QoS policy that you want to edit or delete, and do one of the following: • Click Delete to remove the QoS policy. • Click Edit to edit the QoS policy. Follow the instructions in the preceding sections to change the policy settings. 3. Click Apply in the QoS Setup screen to save your changes. NETGEAR genie Advanced Home 51
-
 1
1 -
2
-
3
-
4
-
5
-
6
-
7
-
8
-
9
-
10
-
11
-
12
-
13
-
14
-
15
-
16
-
17
-
18
-
19
-
20
-
21
-
22
-
23
-
24
-
25
-
26
-
27
-
28
-
29
-
30
-
31
-
32
-
33
-
34
-
35
-
36
-
37
-
38
-
39
-
40
-
41
-
42
-
43
-
44
-
45
-
 46
46 -
 47
47 -
 48
48 -
 49
49 -
 50
50 -
 51
51 -
 52
52 -
 53
53 -
 54
54 -
 55
55 -
 56
56 -
57
-
58
-
59
-
60
-
61
-
62
-
63
-
64
-
65
-
66
-
67
-
68
-
69
-
70
-
71
-
72
-
73
-
74
-
75
-
76
-
77
-
78
-
79
-
80
-
81
-
82
-
83
-
84
-
85
-
86
-
87
-
88
-
89
-
90
-
91
-
92
-
93
-
94
-
95
-
96
-
97
-
98
-
99
-
100
-
101
-
102
-
103
-
104
-
105
-
106
-
107
-
108
-
109
-
110
-
111
-
112
-
113
-
114
-
115
-
116
-
117
-
118
-
119
-
120
-
121
-
122
-
123
-
124
-
125
-
126
-
127
-
128
-
129
-
130
-
131
-
132
-
133
-
134
-
135
-
136
-
137
-
138
-
139
-
140
 |
 |