Netgear WNR612v2 WNR612v2 User Manual (PDF) - Page 17
Authentication Type, Automatic, Shared Key, Encryption Strength, WEP 64-bit encryption, WEP 128-bit - access point
 |
View all Netgear WNR612v2 manuals
Add to My Manuals
Save this manual to your list of manuals |
Page 17 highlights
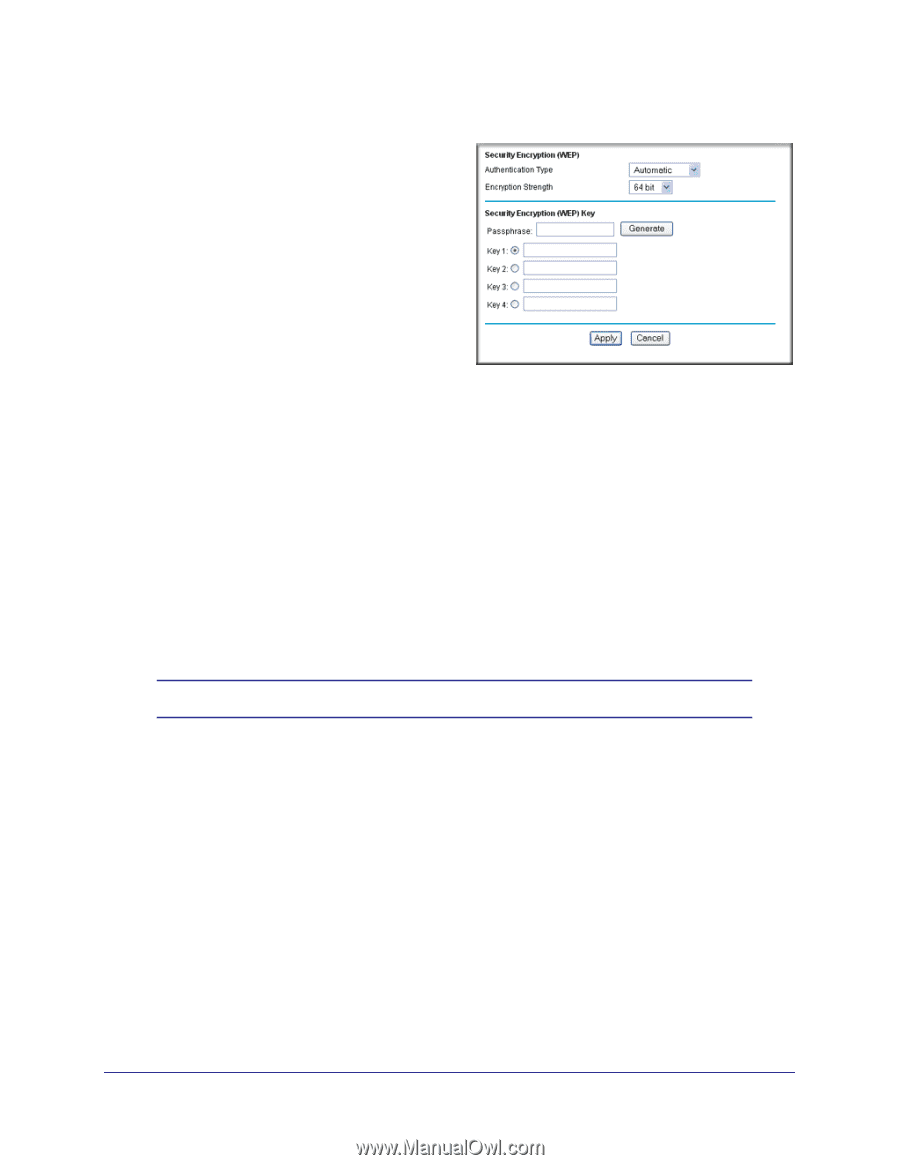
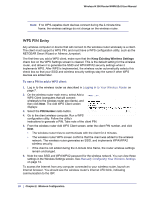
Wireless-N 150 Router WNR612v2 User Manual 2. From the main menu, select Wireless Settings to display the Wireless Settings screen. 3. In the Security Options section, select the WEP radio button: 4. Select the Authentication Type: Automatic, or Shared Key. The default is Automatic. Note: The authentication is separate from the data encryption. You can select authentication that requires a shared key, but still leaves data transmissions unencrypted. Security is stronger if you use both the Shared Key and WEP encryption settings. 5. Select the Encryption Strength setting: • WEP 64-bit encryption. Enter 10 hexadecimal digits (any combination of 0-9, a-f, or A-F). • WEP 128-bit encryption. Enter 26 hexadecimal digits (any combination of 0-9, a-f, or A-F). 6. Enter the encryption keys. You can manually or automatically program the four data encryption keys. These values must be identical on all computers and access points in your network: • Passphrase. To use a passphrase to generate the keys, enter a passphrase, and click Generate. This automatically creates the keys. Wireless stations must use the passphrase or keys to access the wireless router. Note: Not all wireless adapters support passphrase key generation. • Key 1-Key4. These values are not case-sensitive. You can manually enter the four data encryption keys. These values must be identical on all computers and access points in your network. Enter 10 hexadecimal digits (any combination of 0-9, a-f, or A-F). 7. Select which of the four keys will be the default. Data transmissions are always encrypted using the default key. The other keys can be used only to decrypt received data. The four entries are disabled if WPA-PSK or WPA authentication is selected. 8. Click Apply to save your settings. Chapter 2: Wireless Configuration | 17
-
 1
1 -
2
-
3
-
4
-
5
-
6
-
7
-
8
-
9
-
10
-
11
-
 12
12 -
 13
13 -
 14
14 -
 15
15 -
 16
16 -
 17
17 -
 18
18 -
 19
19 -
 20
20 -
 21
21 -
 22
22 -
23
-
24
-
25
-
26
-
27
-
28
-
29
-
30
-
31
-
32
-
33
-
34
-
35
-
36
-
37
-
38
-
39
-
40
-
41
-
42
-
43
-
44
-
45
-
46
-
47
-
48
-
49
-
50
-
51
-
52
-
53
-
54
-
55
-
56
-
57
-
58
-
59
-
60
-
61
-
62
-
63
-
64
-
65
-
66
-
67
-
68
-
69
-
70
-
71
-
72
-
73
-
74
-
75
-
76
-
77
-
78
-
79
-
80
-
81
-
82
-
83
-
84
-
85
-
86
-
87
-
88
-
89
-
90
-
91
-
92
-
93
 |
 |