Oki MPS2731mc MC362w/MC562w/MPS2731mc Advanced User Guide (English) - Page 51
Setting the Scan Button, Using Network Configuration
 |
View all Oki MPS2731mc manuals
Add to My Manuals
Save this manual to your list of manuals |
Page 51 highlights
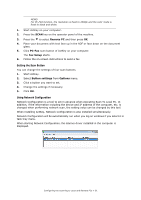
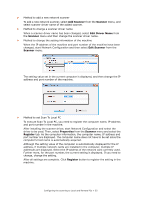
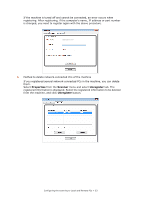
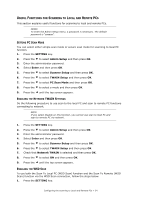
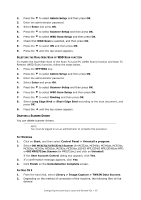
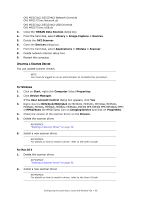
MEMO For PC-FAX function, the resolution is fixed to 200dpi and the color mode is fixed to black and white. 1. Start ActKey on your computer. 2. Press the SCAN key on the operator panel of the machine. 3. Press the to select Remote PC and then press OK. 4. Place your document with text face up in the ADF or face down on the document glass. 5. Click PC-Fax scan button of ActKey on your computer. The Fax Setup starts. 6. Follow the on-screen instructions to send a fax. Setting the Scan Button You can change the settings of four scan buttons. 1. Start ActKey. 2. Select Button settings from Options menu. 3. Click a button you want to set. 4. Change the settings if necessary. 5. Click OK. Using Network Configuration Network Configuration is a tool to set in advance when executing Scan To Local PC. In addition, if the information including the device and IP address of the computer, etc. is changed when performing network scan, the setting value can be changed by this tool. When installing ActKey, Network Configuration is also installed simultaneously. Network Configuration will be automatically run when you log on windows if you select it in task tray menu. When starting Network Configuration, the scanner driver installed in the computer is displayed. Configuring the scanning to Local and Remote PCs > 51
-
 1
1 -
2
-
3
-
4
-
5
-
6
-
7
-
8
-
9
-
10
-
11
-
12
-
13
-
14
-
15
-
16
-
17
-
18
-
19
-
20
-
21
-
22
-
23
-
24
-
25
-
26
-
27
-
28
-
29
-
30
-
31
-
32
-
33
-
34
-
35
-
36
-
37
-
38
-
39
-
40
-
41
-
42
-
43
-
44
-
45
-
 46
46 -
 47
47 -
 48
48 -
 49
49 -
 50
50 -
 51
51 -
 52
52 -
 53
53 -
 54
54 -
 55
55 -
 56
56 -
57
-
58
-
59
-
60
-
61
-
62
-
63
-
64
-
65
-
66
-
67
-
68
-
69
-
70
-
71
-
72
-
73
-
74
-
75
-
76
-
77
-
78
-
79
-
80
-
81
-
82
-
83
-
84
-
85
-
86
-
87
-
88
-
89
-
90
-
91
-
92
-
93
-
94
-
95
-
96
-
97
-
98
-
99
-
100
-
101
-
102
-
103
-
104
-
105
-
106
-
107
-
108
-
109
-
110
-
111
-
112
-
113
-
114
-
115
-
116
-
117
-
118
-
119
-
120
-
121
-
122
-
123
-
124
-
125
-
126
-
127
-
128
-
129
-
130
-
131
-
132
-
133
-
134
-
135
-
136
-
137
-
138
-
139
-
140
-
141
-
142
-
143
-
144
-
145
-
146
-
147
-
148
-
149
-
150
-
151
-
152
-
153
-
154
-
155
-
156
-
157
 |
 |
