Oki MPS2731mc MC362w/MC562w/MPS2731mc Advanced User Guide (English) - Page 55
For Windows, For Mac OS X
 |
View all Oki MPS2731mc manuals
Add to My Manuals
Save this manual to your list of manuals |
Page 55 highlights
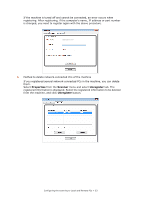
2. Press the to select Admin Setup and then press OK. 3. Enter the administrator password. 4. Select Enter and press OK. 5. Press the to select Scanner Setup and then press OK. 6. Press the to select WSD Scan Setup and then press OK. 7. Check that WSD Scan is selected, and then press OK. 8. Press the to select ON and then press OK. 9. Press the until the top screen appears. SELECTING THE DUAL-SIDE SCAN OF WSD SCAN FUNCTION To enable the Dual-Side Scan of the Scan To Local PC (WSD Scan) function and Scan To Remote (WSD Scan) function, follow the steps below. 1. Press the SETTING key. 2. Press the to select Admin Setup and then press OK. 3. Enter the administrator password. 4. Select Enter and press OK. 5. Press the to select Scanner Setup and then press OK. 6. Press the to select WSD Scan Setup and then press OK. 7. Press the to select Binding and then press OK. 8. Select Long Edge Bind or Short Edge Bind according to the scan document, and press OK. 9. Press the until the top screen appears. DELETING A SCANNER DRIVER You can delete scanner drivers. NOTE You must be logged on as an administrator to complete this procedure. For Windows 1. Click on Start, and then select Control Panel > Uninstall a program. 2. Select OKI MC5(3)x2/ES5(3)4x2 Scanner (for MC332dn, MC342dn, MC342dw, MC352dn, MC362dn, MC362w, MC562dn, MC562w, MC562dw, ES3452 MFP, ES5462 MFP, ES5462dw MFP) or OKI MPS2731mc Scanner (for MPS2731mc) and click on Uninstall. If the User Account Control dialog box appears, click Yes. 3. If a confirmation message appears, click Yes. 4. Click Finish on the Uninstallation Complete screen. For Mac OS X 1. From the hard disk, select Library > Image Capture > TWAIN Data Sources. 2. Depending on the method of connection of the machine, the following files will be deleted. Configuring the scanning to Local and Remote PCs > 55
-
 1
1 -
2
-
3
-
4
-
5
-
6
-
7
-
8
-
9
-
10
-
11
-
12
-
13
-
14
-
15
-
16
-
17
-
18
-
19
-
20
-
21
-
22
-
23
-
24
-
25
-
26
-
27
-
28
-
29
-
30
-
31
-
32
-
33
-
34
-
35
-
36
-
37
-
38
-
39
-
40
-
41
-
42
-
43
-
44
-
45
-
46
-
47
-
48
-
49
-
 50
50 -
 51
51 -
 52
52 -
 53
53 -
 54
54 -
 55
55 -
 56
56 -
 57
57 -
 58
58 -
 59
59 -
 60
60 -
61
-
62
-
63
-
64
-
65
-
66
-
67
-
68
-
69
-
70
-
71
-
72
-
73
-
74
-
75
-
76
-
77
-
78
-
79
-
80
-
81
-
82
-
83
-
84
-
85
-
86
-
87
-
88
-
89
-
90
-
91
-
92
-
93
-
94
-
95
-
96
-
97
-
98
-
99
-
100
-
101
-
102
-
103
-
104
-
105
-
106
-
107
-
108
-
109
-
110
-
111
-
112
-
113
-
114
-
115
-
116
-
117
-
118
-
119
-
120
-
121
-
122
-
123
-
124
-
125
-
126
-
127
-
128
-
129
-
130
-
131
-
132
-
133
-
134
-
135
-
136
-
137
-
138
-
139
-
140
-
141
-
142
-
143
-
144
-
145
-
146
-
147
-
148
-
149
-
150
-
151
-
152
-
153
-
154
-
155
-
156
-
157
 |
 |