Pentax PZ-1 PZ-1 Manual - Page 69
Pentax PZ-1 Manual
 |
View all Pentax PZ-1 manuals
Add to My Manuals
Save this manual to your list of manuals |
Page 69 highlights
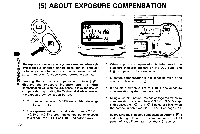
3 /7/ 0 051,07 0 3. When the shutter release button is pressed fully down, the camera automatically takes three pictures according to the memorized compensation value. * The first frame is taken at the exposure level the meter indicates, the second is underexposed, and the third overexposed. * If you press the shutter release button halfway after the first frame, [ ] blinks on the LCD panel to indicate that the camera is ready to take the second frame at any time. If you raise your finger off the button, [ !Ph ] blinks for 5 seconds and then stays on to indicate that the camera is ready to take another shot in the auto-bracketing mode. * When the built-in flash is used, the auto-bracketing mode is switched automatically to the single-frame drive mode. * A very small compensation value will have almost no effect when using negative film (especially in negative color auto development). * In the auto-bracketing mode, the camera automatically measures the exposure for each shot. * The camera-to-subject distance used for the first frame is carried over to the second and third frames. Auto Bracketing Mode with the Exposure Compensation Function You can combine the auto bracketing mode with exposure compensation (page 58) to compensate exposures only in the overexposure ( +1 or underexposure ( - ) direction. Example: Bracketing in 0.3 EV steps in the overexposure direction 1. Select the auto-bracketing mode and set the exposure compensation increment at 0.3 EV. 2. While holding down the exposure compensation button on the camera back, turn the Tv direct dial to change the overall exposure value by 0.3 EV in the overexposure ( + ) direction. 3. At this setting, the first frame is overexposed by 0.3 EV, the second frame is exposed at the exposure level indicated by meter, and the third frame is overexposed by 0.6 EV. 63
-
 1
1 -
2
-
3
-
4
-
5
-
6
-
7
-
8
-
9
-
10
-
11
-
12
-
13
-
14
-
15
-
16
-
17
-
18
-
19
-
20
-
21
-
22
-
23
-
24
-
25
-
26
-
27
-
28
-
29
-
30
-
31
-
32
-
33
-
34
-
35
-
36
-
37
-
38
-
39
-
40
-
41
-
42
-
43
-
44
-
45
-
46
-
47
-
48
-
49
-
50
-
51
-
52
-
53
-
54
-
55
-
56
-
57
-
58
-
59
-
60
-
61
-
62
-
63
-
 64
64 -
 65
65 -
 66
66 -
 67
67 -
 68
68 -
 69
69 -
 70
70 -
 71
71 -
 72
72 -
 73
73 -
 74
74 -
75
-
76
-
77
-
78
-
79
-
80
-
81
-
82
-
83
-
84
-
85
-
86
-
87
-
88
-
89
-
90
-
91
-
92
-
93
-
94
-
95
-
96
-
97
-
98
-
99
-
100
-
101
-
102
-
103
-
104
-
105
-
106
-
107
-
108
-
109
-
110
-
111
-
112
-
113
-
114
-
115
-
116
-
117
-
118
-
119
-
120
-
121
-
122
-
123
-
124
 |
 |
