Pioneer AVIC-F90BT Owner's Manual - Page 133
Recording your travel history - reviews
 |
UPC - 012562897271
View all Pioneer AVIC-F90BT manuals
Add to My Manuals
Save this manual to your list of manuals |
Page 133 highlights
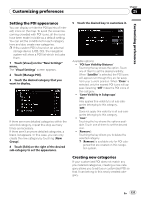
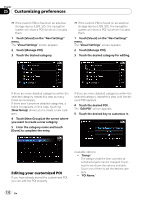
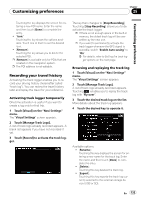
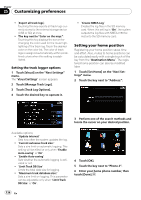
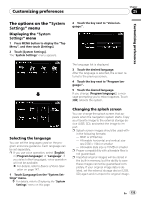
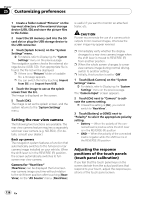
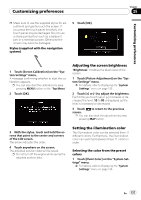
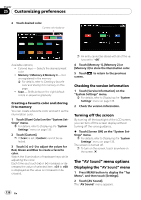
Customizing preferences Chapter 25 Customizing preferences Touching the key displays the screen for entering a new POI name. Enter the name and then touch [Done] to complete the entry. ! "Icon:" Touching the key shows the options available. Touch one of them to set the desired icon. ! [Remove]: Touching the key allows you to delete the selected POI. p [Remove] is available only for POIs that are created on this navigation system. p The POI address is not editable. Recording your travel history Activating the track logger enables you to record your driving history (hereinafter called "track log"). You can review the travel history later and replay the travel for your reference. Activating track logger temporarily One-time activation is useful if you want to create a log only for that trip. 1 Touch [Visual] on the "Navi Settings" menu. The "Visual Settings" screen appears. 2 Touch [Manage Track Logs]. A list of track logs already recorded appears. A blank list appears if you have not recorded it yet. 3 Touch [Record] to activate the track logger. The key then changes to [Stop Recording]. Touching [Stop Recording] allows you to deactivate the track logger. p If there is not enough space in the built-in memory, the oldest track log will be overwritten by the new one. p If you want to permanently activate the track logger whenever the GPS signal is available, switch "Enable Auto-saving" to "On". = For details, refer to Setting the track logger options on the next page. Browsing and replaying the track log 1 Touch [Visual] on the "Navi Settings" menu. The "Visual Settings" screen appears. 2 Touch [Manage Track Logs]. A list of track logs already recorded appears. Touching enables you to replay the track log with "Fly over". 3 Touch the desired track log on the list. More details about the track log appears. 4 Touch the desired key to operate it. Available options; ! [Rename]: Touching this key displays the screen for entering a new name for the track log. Enter the name and then touch [Done] to complete the entry. ! [Delete]: Touching this key deletes the track log. ! [Export]: Touching this key exports the track log currently selected to the external storage device (USB or SD). En 133
-
 1
1 -
2
-
3
-
4
-
5
-
6
-
7
-
8
-
9
-
10
-
11
-
12
-
13
-
14
-
15
-
16
-
17
-
18
-
19
-
20
-
21
-
22
-
23
-
24
-
25
-
26
-
27
-
28
-
29
-
30
-
31
-
32
-
33
-
34
-
35
-
36
-
37
-
38
-
39
-
40
-
41
-
42
-
43
-
44
-
45
-
46
-
47
-
48
-
49
-
50
-
51
-
52
-
53
-
54
-
55
-
56
-
57
-
58
-
59
-
60
-
61
-
62
-
63
-
64
-
65
-
66
-
67
-
68
-
69
-
70
-
71
-
72
-
73
-
74
-
75
-
76
-
77
-
78
-
79
-
80
-
81
-
82
-
83
-
84
-
85
-
86
-
87
-
88
-
89
-
90
-
91
-
92
-
93
-
94
-
95
-
96
-
97
-
98
-
99
-
100
-
101
-
102
-
103
-
104
-
105
-
106
-
107
-
108
-
109
-
110
-
111
-
112
-
113
-
114
-
115
-
116
-
117
-
118
-
119
-
120
-
121
-
122
-
123
-
124
-
125
-
126
-
127
-
 128
128 -
 129
129 -
 130
130 -
 131
131 -
 132
132 -
 133
133 -
 134
134 -
 135
135 -
 136
136 -
 137
137 -
 138
138 -
139
-
140
-
141
-
142
-
143
-
144
-
145
-
146
-
147
-
148
-
149
-
150
-
151
-
152
-
153
-
154
-
155
-
156
-
157
-
158
-
159
-
160
-
161
-
162
-
163
-
164
-
165
-
166
-
167
-
168
-
169
-
170
-
171
-
172
-
173
-
174
-
175
-
176
-
177
-
178
-
179
-
180
-
181
-
182
-
183
-
184
-
185
-
186
-
187
-
188
-
189
-
190
-
191
-
192
 |
 |
