Pioneer AVIC N2 Owner's Manual - Page 96
Initial Settings, Adjusting initial settings, Switching the auxiliary setting, Setting the rear
 |
UPC - 012562735191
View all Pioneer AVIC N2 manuals
Add to My Manuals
Save this manual to your list of manuals |
Page 96 highlights
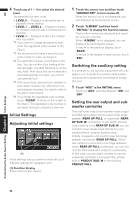
AV 4 Touch any of 1 - 8 to select the desired level. The parental lock level is set. • LEVEL 8 - Playback of the entire disc is possible (initial setting) • LEVEL 7 - LEVEL 2 - Playback of discs for children and non-adult oriented discs is possible • LEVEL 1 - Playback of discs for children only is possible ❒ If you want to change the parental level, enter the registered code number in the Step 2. ❒ We recommend to keep a record of your code number in case you forget it. ❒ The parental lock level is recorded on the disc. You can confirm it by looking at the disc package, included literature or on the disc itself. With discs that do not feature a recorded parental lock level, you cannot use parental lock. ❒ With some discs, parental lock operates to skip certain scenes only, after which normal playback resumes. For details, refer to the disc's instructions. ❒ If you forget the registered code number, touch "CLEAR" 10 times on the screen in the Step 2. The registered code number is canceled, letting you register a new one. Initial Settings Adjusting initial settings (1) Initial settings lets you perform initial set up of different settings for navigation unit. (1) Function display Shows the function names. 1 Touch the source icon and then touch "SOURCE OFF" to turn source off. When the source icon is not displayed, you can display it by touching the screen. 2 Touch "A.MENU" and then touch "INITIAL" to display the function names. The function names are displayed and operable ones are selected. When "A.MENU" is not displayed, you can display it by touching the screen. To return to the previous display, touch "BACK". To return to the display of each source, touch "ESC". Switching the auxiliary setting It is possible to use auxiliary equipment with navigation unit. Activate the auxiliary setting when using auxiliary equipment connected to navigation unit. 1 Touch "AUX" in the INITIAL menu. Touching "AUX" switches between "ON" and "OFF". Setting the rear output and subwoofer controller This unit's rear output (rear speaker leads output and RCA rear output) can be used for full-range speaker (REAR SP FULL) or subwoofer (REAR SP SUB. W) connection. If you switch the rear output setting to the REAR SP SUB. W, you can connect a rear speaker lead directly to a subwoofer without using an auxiliary amp. Initially, navigation unit is set for rear full-range speaker connection (REAR SP FULL). When rear output is connected to full range speakers (when REAR SP FULL is selected), you can connect the RCA subwoofer output to a subwoofer. In this case, you can select whether to use the subwoofer controller's (low pass filter, phase) built-in PREOUT SUB. W or the auxiliary PREOUT FULL. Customizing the Audio Source Setting Chapter 8 Initial Settings 94
-
 1
1 -
2
-
3
-
4
-
5
-
6
-
7
-
8
-
9
-
10
-
11
-
12
-
13
-
14
-
15
-
16
-
17
-
18
-
19
-
20
-
21
-
22
-
23
-
24
-
25
-
26
-
27
-
28
-
29
-
30
-
31
-
32
-
33
-
34
-
35
-
36
-
37
-
38
-
39
-
40
-
41
-
42
-
43
-
44
-
45
-
46
-
47
-
48
-
49
-
50
-
51
-
52
-
53
-
54
-
55
-
56
-
57
-
58
-
59
-
60
-
61
-
62
-
63
-
64
-
65
-
66
-
67
-
68
-
69
-
70
-
71
-
72
-
73
-
74
-
75
-
76
-
77
-
78
-
79
-
80
-
81
-
82
-
83
-
84
-
85
-
86
-
87
-
88
-
89
-
90
-
 91
91 -
 92
92 -
 93
93 -
 94
94 -
 95
95 -
 96
96 -
 97
97 -
 98
98 -
 99
99 -
 100
100 -
 101
101 -
102
-
103
-
104
-
105
-
106
-
107
-
108
-
109
-
110
-
111
-
112
-
113
-
114
-
115
-
116
-
117
-
118
-
119
-
120
-
121
-
122
-
123
-
124
-
125
-
126
-
127
-
128
-
129
-
130
-
131
-
132
-
133
-
134
-
135
-
136
-
137
-
138
-
139
 |
 |
