Pioneer SC-05 Owner's Manual - Page 115
Video, Settings
 |
UPC - 012562891521
View all Pioneer SC-05 manuals
Add to My Manuals
Save this manual to your list of manuals |
Page 115 highlights
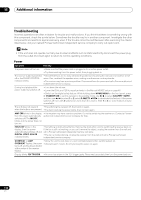
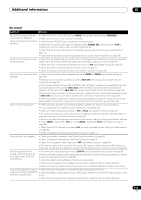
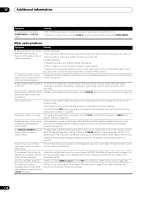
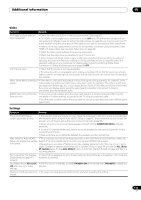
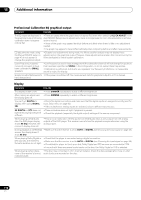
Additional information 15 Video Symptom No image is output when an input is selected. Remedy • Check the video connections of the source component (see page 22). • For HDMI, or when digital video conversion is set to OFF and a TV and another component are connected with different cords (in Setting the Video options on page 98), you must connect your TV to this receiver using the same type of video cable as you used to connect your video component. • Make sure the input assignment is correct for components connected using component video, HDMI or S-Video cables (see The Input Setup menu on page 92). • Check the video output settings of the source component. • Check that the video input you selected on your TV is correct. • Some components (such as video game units) have resolutions that may not be converted. If adjusting this receiver's Resolution setting (in Setting the Video options on page 98) and/or the resolution settings on your component or display doesn't work, try switching Digital Video Conversion (in Setting the Video options on page 98) OFF. Can't record video. • Check that the source is not copy-protected. • The video converter is not available when making recordings. Check that the same type of video cable is used for connecting both the recorder and the video source (the one you want to record) to this receiver. Noisy, intermittent, or distorted • Sometimes a video deck may output a noisy video signal (during scanning, for example), or the picture. video quality may just be poor (with some video game units, for example). The picture quality may also depend on the settings, etc. of your display device. Switch off the video converter and reconnect the source and display device using the same type of connection (component, S-Video or composite), then start playback again. ZONE2 video convert function does not work. • Conversion is not possible when the video input signal is a component signal. Either use the composite or S-Video terminal, or connect to the TV using a component cable. • Turn the video convert function off and connect the source component and monitor with the same type of cord. Settings Symptom Remedy The Auto MCACC Setup continually shows an error. • The ambient noise level may be too high. Keep the noise level in the room as low as possible (see also Problems when using the Auto MCACC Setup on page 11). If the noise level cannot be kept low enough, you will have to set up the surround sound manually (page 55). • When using only one surround back speaker, connect it to the SURROUND BACK L (Single) terminals. • To use a 5.1-channel speaker set, use the surround speakers for the surround channel, not the surround back channel. • Make sure there are no obstacles between the speakers and the microphone. After using the Auto MCACC • There may have been some low frequency noise in the room from an air-conditioner, motor, etc. Setup, the speaker size setting Switch off all other appliances in the room and use Auto MCACC Setup again. is incorrect. • Depending on a number of factors (room size, speaker placement, etc.) this may occur in some cases. Change the speaker setting manually in Speaker Setting on page 56, and use the ALL (Keep SP System) option for the Auto MCACC menu in Automatic MCACC (Expert) on page 44 if this is a recurring problem. Can't adjust the Fine Speaker Distance setting (page 47) properly. The display shows KEY LOCK ON when you try to make settings. • Check that the speakers are all in phase (make sure the positive (+) and negative (-) terminals are matched up properly). • With the receiver in standby, press STANDBY/ON while holding down SPEAKERS to disable the key lock. Most recent settings have been • The power cord was disconnected from the wall while adjusting this setting. erased. 115 En
-
 1
1 -
2
-
3
-
4
-
5
-
6
-
7
-
8
-
9
-
10
-
11
-
12
-
13
-
14
-
15
-
16
-
17
-
18
-
19
-
20
-
21
-
22
-
23
-
24
-
25
-
26
-
27
-
28
-
29
-
30
-
31
-
32
-
33
-
34
-
35
-
36
-
37
-
38
-
39
-
40
-
41
-
42
-
43
-
44
-
45
-
46
-
47
-
48
-
49
-
50
-
51
-
52
-
53
-
54
-
55
-
56
-
57
-
58
-
59
-
60
-
61
-
62
-
63
-
64
-
65
-
66
-
67
-
68
-
69
-
70
-
71
-
72
-
73
-
74
-
75
-
76
-
77
-
78
-
79
-
80
-
81
-
82
-
83
-
84
-
85
-
86
-
87
-
88
-
89
-
90
-
91
-
92
-
93
-
94
-
95
-
96
-
97
-
98
-
99
-
100
-
101
-
102
-
103
-
104
-
105
-
106
-
107
-
108
-
109
-
 110
110 -
 111
111 -
 112
112 -
 113
113 -
 114
114 -
 115
115 -
 116
116 -
 117
117 -
 118
118 -
 119
119 -
 120
120 -
121
-
122
-
123
-
124
-
125
-
126
-
127
-
128
-
129
-
130
-
131
-
132
-
133
-
134
-
135
-
136
-
137
-
138
 |
 |
