Pioneer VSX-1021-K Owner's Manual - Page 49
When Speaker System is set to ZONE 2 - multi zone
 |
UPC - 884938132978
View all Pioneer VSX-1021-K manuals
Add to My Manuals
Save this manual to your list of manuals |
Page 49 highlights
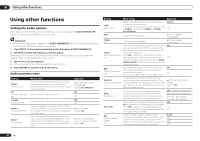
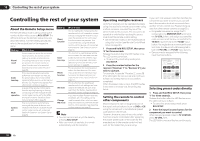
Using other functions 09 e ! This setting is only displayed when the video signals below are being input: - 480i or 576i analog video signals f ! This setting is only displayed when the video signals below are being input: - 480i, 576i, 480p, 576p, 720p, 1080i analog video signals - 480i, 576i, 480p, 576p, 720p, 1080i, 1080p, 1080p24 HDMI video signals g This adjustment is only possible when 480i signals are being input from the composite video jacks. h ! If the image doesn't match your monitor type, adjust the aspect ratio on the source component or on the monitor. ! This setting is only displayed when 480i/p or 576i/p video signals are being input. Switching the speaker terminals If you selected Normal(SB/FH), Normal(SB/FW) or Speaker B at Speaker system setting on page 64 , you can switch between speakers using the SPEAKERS button. If you selected Front Bi-Amp or ZONE 2, the button will simply switch your main speaker terminals on or off. % Use SPEAKERS on the front panel to select a speaker system setting. As mentioned above, if you have selected Front Bi-Amp or ZONE 2, the button will simply switch your main speaker terminal (A) on or off. Press repeatedly to choose a speaker terminal option: When you select Normal(SB/FH), you can select from: ! SP: SB/FH ON - Surround back or front height channels are added to the front, center and surround channels (maximum 5 channels) and a maximum of 7 channels are output. The surround back and front height channels are switched automatically according to the audio input signal. ! SP: SB ON - Surround back channels are added to the front, center and surround channels (maximum 5 channels) and a maximum of 7 channels are output. ! SP: FH ON - Front height channels are added to the front, center and surround channels (maximum 5 channels) and a maximum of 7 channels are output. ! SP: OFF - No sound is output from the speakers. When you select Normal(SB/FW), you can select from: ! SP: SB/FW ON - Surround back or front wide channels are added to the front, center and surround channels (maximum 5 channels) and a maximum of 7 channels are output. The surround back and front wide channels are switched automatically according to the audio input signal. ! SP: SB ON - Surround back channels are added to the front, center and surround channels (maximum 5 channels) and a maximum of 7 channels are output. ! SP: FW ON - Front wide channels are added to the front, center and surround channels (maximum 5 channels) and a maximum of 7 channels are output. ! SP: OFF - No sound is output from the speakers. When you select Speaker B, you can select from: ! SP: A ON - Sound is output from the A-speaker terminals (up to 7 channels (including surround back channels), depending on the source). ! SP: B ON - Sound is output from the two speakers connected to the B-speaker terminals. Multichannel sources will not be heard. ! SP: A+B ON - Sound is output from the A-speaker terminals (up to 5 channels, depending on the source), the two speakers connected to the B-speaker terminals, and the subwoofer. The sound from the B-speaker terminals will be the same as the sound from the A-speaker terminals (multichannel sources will be downmixed to 2 channels). ! SP: OFF - No sound is output from the speakers. Note ! The subwoofer output depends on the settings you made in Manual speaker setup on page 64 . However, if SP: B ON is selected above, no sound is heard from the subwoofer (the LFE channel is not downmixed). ! All speaker systems (except Speaker B connections) are switched off when headphones are connected. Using the MULTI-ZONE controls The following steps use the front panel controls to adjust the sub zone volume and select sources. See MULTI-ZONE remote controls on page 49 . 1 Press MULTI-ZONE ON/OFF on the front panel. Each press selects a MULTI-ZONE option: ! ZONE 2 ON - Switches the MULTI-ZONE feature on ! MULTI ZONE OFF - Switches the MULTIZONE feature off The MULTI-ZONE indicator lights when the MULTI-ZONE control has been switched ON. 2 Press MULTI-ZONE CONTROL on the front panel. ! When the receiver is on, make sure that any operations for the sub zone are done while ZONE 2 shows in the display. If this is not showing, the front panel controls affect the main zone only. 3 Use the INPUT SELECTOR dial to select the source for the sub zone. For example, ZONE 2 CD-R sends the source connected to the CD-R/TAPE inputs to the sub room (ZONE 2) . ! If you select TUNER, you can use the tuner controls to select a preset station (see Saving station presets on page 31 if you're unsure how to do this). The tuner cannot be tuned to more than one station at a time. Therefore, changing the station in one zone also changes the station in the other zone. Please be careful not to change stations when recording a radio broadcast. 4 When Speaker System is set to ZONE 2, use the MASTER VOLUME dial to adjust the volume for the sub zone. 5 When you're finished, press MULTI-ZONE CONTROL again to return to the main zone controls. You can also press MULTI-ZONE ON/OFF on the front panel to switch off all output to the sub zone. ! You won't be able to switch the main zone off completely unless you've switched off the MULTI-ZONE control first. ! If you don't plan to use the MULTI-ZONE feature for a while, turn off the power in both the sub and main rooms so that this receiver is in standby. MULTI-ZONE remote controls Press the remote control's ZONE 2 to operate the ZONE 2. The following table shows the possible MULTIZONE remote controls: Button(s) u What it does Switches on/off power in the sub zone. En 49
-
 1
1 -
2
-
3
-
4
-
5
-
6
-
7
-
8
-
9
-
10
-
11
-
12
-
13
-
14
-
15
-
16
-
17
-
18
-
19
-
20
-
21
-
22
-
23
-
24
-
25
-
26
-
27
-
28
-
29
-
30
-
31
-
32
-
33
-
34
-
35
-
36
-
37
-
38
-
39
-
40
-
41
-
42
-
43
-
 44
44 -
 45
45 -
 46
46 -
 47
47 -
 48
48 -
 49
49 -
 50
50 -
 51
51 -
 52
52 -
 53
53 -
 54
54 -
55
-
56
-
57
-
58
-
59
-
60
-
61
-
62
-
63
-
64
-
65
-
66
-
67
-
68
-
69
-
70
-
71
-
72
-
73
-
74
-
75
-
76
-
77
-
78
-
79
-
80
-
81
-
82
-
83
-
84
-
85
-
86
-
87
-
88
-
89
-
90
-
91
-
92
-
93
-
94
-
95
-
96
-
97
-
98
-
99
-
100
-
101
-
102
-
103
-
104
-
105
-
106
-
107
-
108
-
109
-
110
-
111
-
112
-
113
-
114
-
115
-
116
-
117
-
118
-
119
-
120
-
121
-
122
-
123
-
124
-
125
-
126
-
127
-
128
-
129
-
130
-
131
-
132
-
133
-
134
-
135
-
136
-
137
-
138
-
139
-
140
-
141
-
142
-
143
-
144
-
145
-
146
-
147
-
148
-
149
-
150
-
151
-
152
-
153
-
154
-
155
-
156
-
157
-
158
-
159
-
160
-
161
-
162
-
163
-
164
-
165
-
166
-
167
-
168
-
169
-
170
-
171
-
172
-
173
-
174
-
175
-
176
-
177
-
178
-
179
-
180
-
181
-
182
-
183
-
184
 |
 |