Pioneer VSX-1021-K Owner's Manual - Page 80
Important information, regarding the HDMI, connection, Cleaning the unit, About status messages - network errors
 |
UPC - 884938132978
View all Pioneer VSX-1021-K manuals
Add to My Manuals
Save this manual to your list of manuals |
Page 80 highlights
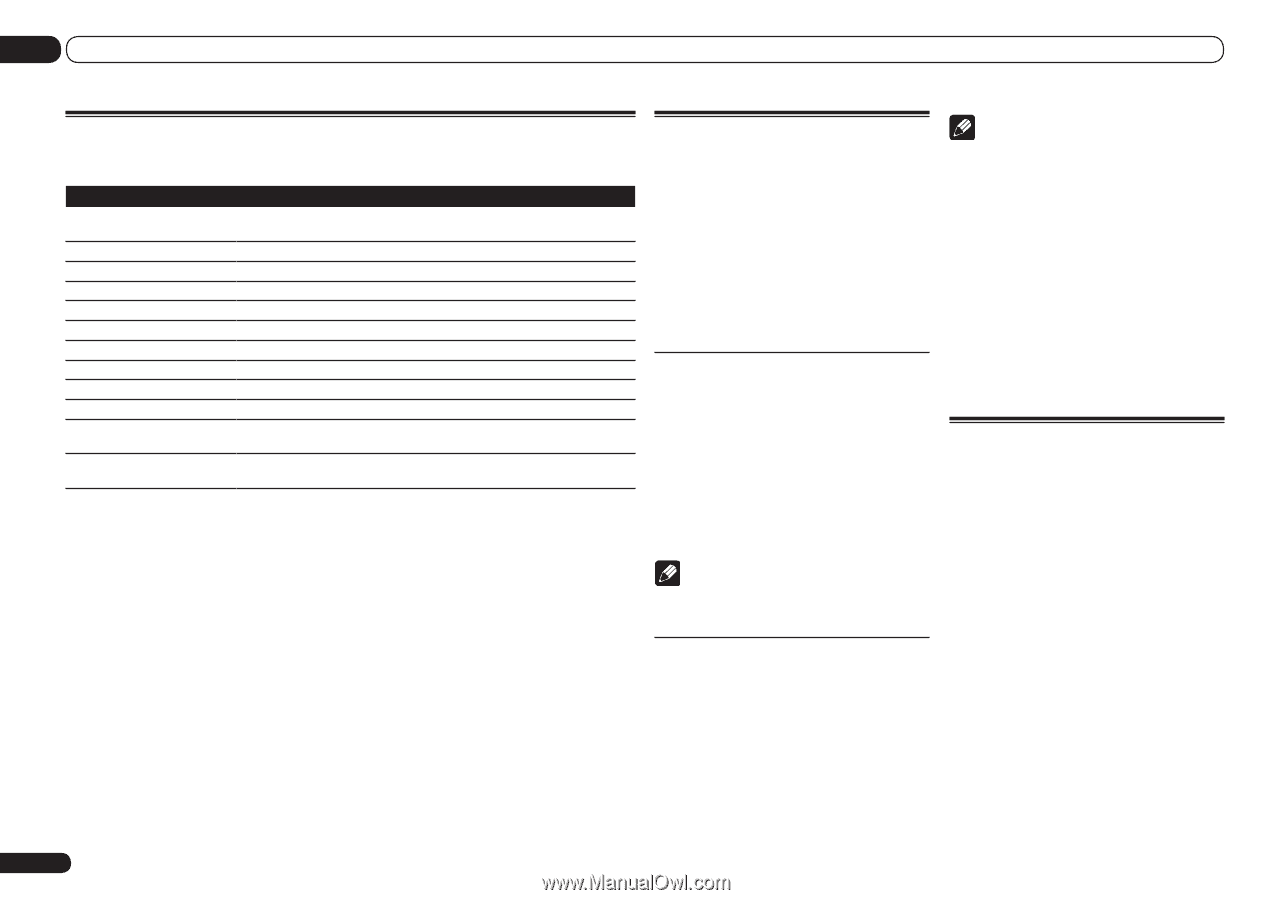
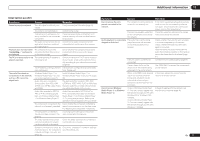
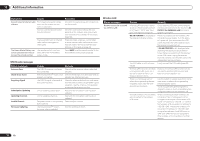
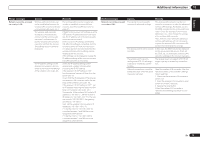
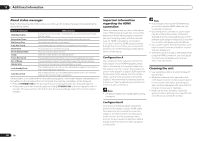
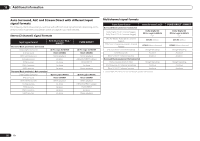
13 Additional information About status messages Refer to the following information when you come up with a status message while operating the Home Media Gallery. Status messages Descriptions STARTING H.M.G. A component on the network, including a PC, is currently being connected. Wait for a while. Connection Down The selected category or Internet radio station cannot be accessed. File Format Error Cannot be played back for some reasons. Track Not Found The selected song has not been found anywhere on the network. Server Error The selected server cannot be accessed. Server Disconnected The server has been disconnected. empty There are no files stored in the selected folder. Preset Not Stored The selected Internet radio station is not currently registered and saved. Out of Range The value entered is beyond the permitted range of the network settings. License Error The license for the contents to be played back is invalid. Item Already Exists This is displayed when the file you have attempted to register in the Favorites folder has already been registered. Favorite List Full This is displayed when you have attempted to register a file in the Favorites folder but the Favorites folder is already full. If the problem is not solved after the troubleshooting above, if the screen freezes unexpectedly or if the buttons on the remote control or front panel stop working completely, do the following: ! Press u STANDBY/ON on the front panel to turn off the power, then turn the power back on. ! If the power cannot be turned off, press and hold u STANDBY/ON on the front panel for over 10 seconds. The power will turn off. (In this case, the various settings made on the receiver may be cleared.) Important information regarding the HDMI connection There are cases where you may not be able to route HDMI signals through this receiver (this depends on the HDMI-equipped component you are connecting-check with the manufacturer for HDMI compatibility information). If you aren't receiving HDMI signals properly through this receiver (from your component), please try one of the following configurations when connecting up. Configuration A Use component video cables to connect the video output of your HDMI-equipped component to the receiver's component video input. The receiver can then convert the analog component video signal to a digital HDMI signal for transmission to the display. For this configuration, use the most convenient connection (digital is recommended) for sending audio to the receiver. See the operating instructions for more on audio connections. Note ! The picture quality will change slightly during conversion. Note ! If your display only has one HDMI terminal, you can only receive HDMI video from the connected component. ! Depending on the component, audio output may be limited to the number of channels available from the connected display unit (for example audio output is reduced to 2 channels for a monitor with stereo audio limitations). ! If you want to switch the input function, you'll have to switch functions on both the receiver and your display unit. ! Since the sound is muted on the display when using the HDMI connection, you must adjust the volume on the display every time you switch input functions. Cleaning the unit ! Use a polishing cloth or dry cloth to wipe off dust and dirt. ! When the surface is dirty, wipe with a soft cloth dipped in some neutral cleanser diluted five or six times with water, and wrung out well, and then wipe again with a dry cloth. Do not use furniture wax or cleansers. ! Never use thinners, benzene, insecticide sprays or other chemicals on or near this unit, since these will corrode the surface. Configuration B Connect your HDMI-equipped component directly to the display using an HDMI cable. Then use the most convenient connection (digital is recommended) for sending audio to the receiver. See the operating instructions for more on audio connections. Set the display volume to minimum when using this configuration. 80 En
-
 1
1 -
2
-
3
-
4
-
5
-
6
-
7
-
8
-
9
-
10
-
11
-
12
-
13
-
14
-
15
-
16
-
17
-
18
-
19
-
20
-
21
-
22
-
23
-
24
-
25
-
26
-
27
-
28
-
29
-
30
-
31
-
32
-
33
-
34
-
35
-
36
-
37
-
38
-
39
-
40
-
41
-
42
-
43
-
44
-
45
-
46
-
47
-
48
-
49
-
50
-
51
-
52
-
53
-
54
-
55
-
56
-
57
-
58
-
59
-
60
-
61
-
62
-
63
-
64
-
65
-
66
-
67
-
68
-
69
-
70
-
71
-
72
-
73
-
74
-
 75
75 -
 76
76 -
 77
77 -
 78
78 -
 79
79 -
 80
80 -
 81
81 -
 82
82 -
 83
83 -
 84
84 -
 85
85 -
86
-
87
-
88
-
89
-
90
-
91
-
92
-
93
-
94
-
95
-
96
-
97
-
98
-
99
-
100
-
101
-
102
-
103
-
104
-
105
-
106
-
107
-
108
-
109
-
110
-
111
-
112
-
113
-
114
-
115
-
116
-
117
-
118
-
119
-
120
-
121
-
122
-
123
-
124
-
125
-
126
-
127
-
128
-
129
-
130
-
131
-
132
-
133
-
134
-
135
-
136
-
137
-
138
-
139
-
140
-
141
-
142
-
143
-
144
-
145
-
146
-
147
-
148
-
149
-
150
-
151
-
152
-
153
-
154
-
155
-
156
-
157
-
158
-
159
-
160
-
161
-
162
-
163
-
164
-
165
-
166
-
167
-
168
-
169
-
170
-
171
-
172
-
173
-
174
-
175
-
176
-
177
-
178
-
179
-
180
-
181
-
182
-
183
-
184
 |
 |