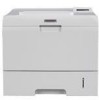
Ricoh 5100N Quick Installation Guide - Page 118
Printer Port, IPP port, In Windows 2000/XP/2003, In Unix, Configuring IPP in the print server
 |
UPC - 026649028502
View all Ricoh 5100N manuals
Add to My Manuals
Save this manual to your list of manuals |
Page 118 highlights
6 Enter the IP address or DNS name of the printer and the name of a user-defined print queue. 7 Click OK. 8 Follow the onscreen instructions to complete installation. In Windows 2000/XP/2003 To add an LPR port to Windows 2000/XP/2003, users must install a Standard TCP/IP port by default, then change the printing protocol in the printer properties. For installing the Standard TCP/IP port, see page 4.4. 1 From the Windows Start menu, select Settings Æ Printers, or Printers and Faxes. 2 Right-click the printer you want and select Properties. 3 Click Ports. 4 Make sure that the appropriate Standard TCP/IP port is selected and click Configure Port. 5 Select LPR from the Protocol section. 6 Enter the print queue name and click OK. 7 Click OK to close the properties window. In Unix Depending on your particular Unix system, LPD configuration may vary. See your system documentation for the correct syntax for the system. Printer Port A Network Printer port is used to send print jobs from network computers running Windows OS that do not support the Standard TCP/IP port or LPR port. Adding a Network Printer port 1 From the Windows Start menu, select Settings Æ Printers. 2 Right-click the printer you want and select Properties. 3 Open the Details tab and click Add Port. 4 Select Network Printer Port from the Other list and click OK. 5 Select the print server you want to use and click OK. If you cannot find the print server, click Add New Print Server to list, specify information for the print server, such as print server name, IP address, or MAC address, and click OK. 6 When the port name displays in the Print to the following port list, click OK or Close. 4.5 TCP/IP environment IPP port Internet Printing Protocol (IPP) allows printing across the Internet, meaning that you can send a print job to your printer from a remote place if you are an Internet user, no matter what operating system you use or where you are. Configuring IPP in the print server The network administrator must specify information required for IPP, such as the URI (Uniform Resource Identifier). 1 Run your web browser and access Web Image Monitor SP 5100N. 2 Click Network Settings Æ Raw TCP/IP, LPR, IPP. 3 Configure the IPP parameters: • Printer Name: Enter the network printer's name to be used with IPP printing. • Printer URI: Enter the URL of the printer using the following format: ipp://the IP address of the printer or http://the IP address of the printer:631 (Ex:ipp:// 168.10.17.82 or http://168.10.17.82:631) 631 is the IPP port number. • Printer Information: Enter additional information about the printer. • More Printer Information: Enter more additional information about the printer. • Printer Location: Enter the name of the location where the printer is physically located. • Multiple Operation Timeout: Enter the time to elapse before the printer ends a print job. When there is no incoming data after the specified number of seconds, the printer ends reception. • Time to Keep Jobs in History: Set the length of time the IPP printer keeps job information. • Operator Message: Enter printer information for printer users. • Job Count: shows the number of print jobs. • Driver Installer: shows the URL where you can get the driver installer. • Manufacturer: shows the URL where you can get manufacturer information. 4 Click Apply. Configuring a Windows client After the network administrator has configured the network print server, each printer user must install the printer driver and set the print port to IPP 1.1 Port Monitor.
-
 1
1 -
2
-
3
-
4
-
5
-
6
-
7
-
8
-
9
-
10
-
11
-
12
-
13
-
14
-
15
-
16
-
17
-
18
-
19
-
20
-
21
-
22
-
23
-
24
-
25
-
26
-
27
-
28
-
29
-
30
-
31
-
32
-
33
-
34
-
35
-
36
-
37
-
38
-
39
-
40
-
41
-
42
-
43
-
44
-
45
-
46
-
47
-
48
-
49
-
50
-
51
-
52
-
53
-
54
-
55
-
56
-
57
-
58
-
59
-
60
-
61
-
62
-
63
-
64
-
65
-
66
-
67
-
68
-
69
-
70
-
71
-
72
-
73
-
74
-
75
-
76
-
77
-
78
-
79
-
80
-
81
-
82
-
83
-
84
-
85
-
86
-
87
-
88
-
89
-
90
-
91
-
92
-
93
-
94
-
95
-
96
-
97
-
98
-
99
-
100
-
101
-
102
-
103
-
104
-
105
-
106
-
107
-
108
-
109
-
110
-
111
-
112
-
 113
113 -
 114
114 -
 115
115 -
 116
116 -
 117
117 -
 118
118 -
 119
119 -
 120
120 -
 121
121 -
 122
122 -
 123
123 -
124
-
125
-
126
-
127
-
128
-
129
-
130
-
131
-
132
-
133
-
134
-
135
-
136
-
137
-
138
-
139
-
140
-
141
-
142
-
143
-
144
-
145
-
146
-
147
-
148
-
149
-
150
-
151
-
152
-
153
-
154
-
155
-
156
-
157
-
158
-
159
-
160
-
161
-
162
-
163
-
164
-
165
-
166
-
167
-
168
-
169
-
170
-
171
-
172
-
173
-
174
-
175
-
176
-
177
-
178
 |
 |
