Ricoh 5100N Quick Installation Guide - Page 16
System setup, Using control panel menus
 |
UPC - 026649028502
View all Ricoh 5100N manuals
Add to My Manuals
Save this manual to your list of manuals |
Page 16 highlights
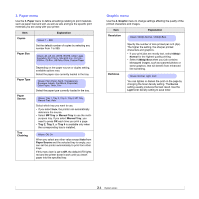
2 System setup This chapter shows menus you can set and provides basic settings for your printer. This chapter includes: • Using control panel menus • Menu overview • Printing a demo page • Changing the display language • Using toner save mode Using control panel menus A number of menus are available to make it easy for you to change the printer settings. The diagram on the next column shows the menus and all of the menu items available in each menu. The items in each menu and the options you can select are described in more detail in the tables beginning on page 2.2. Accessing control panel menus You can control your printer from the printer's control panel. You can also set the control panel menus while printing. 1 Press Menu until the menu you want appears on the bottom line of the display and press OK. 2 Press the Scroll buttons until the desired menu item appears and press OK. 3 If the menu item has sub menus, repeat step 2. 4 Press the Scroll buttons to access the desired setting option or the required value. 5 Press OK to save your selection. An asterisk (*) appears next to the selection on the display, indicating that it is now the default. 6 Press Stop to return to Standby mode. Note • Print settings made from the printer driver on a connected computer override the settings on the control panel. 2.1
-
 1
1 -
2
-
3
-
4
-
5
-
6
-
7
-
8
-
9
-
10
-
 11
11 -
 12
12 -
 13
13 -
 14
14 -
 15
15 -
 16
16 -
 17
17 -
 18
18 -
 19
19 -
 20
20 -
 21
21 -
22
-
23
-
24
-
25
-
26
-
27
-
28
-
29
-
30
-
31
-
32
-
33
-
34
-
35
-
36
-
37
-
38
-
39
-
40
-
41
-
42
-
43
-
44
-
45
-
46
-
47
-
48
-
49
-
50
-
51
-
52
-
53
-
54
-
55
-
56
-
57
-
58
-
59
-
60
-
61
-
62
-
63
-
64
-
65
-
66
-
67
-
68
-
69
-
70
-
71
-
72
-
73
-
74
-
75
-
76
-
77
-
78
-
79
-
80
-
81
-
82
-
83
-
84
-
85
-
86
-
87
-
88
-
89
-
90
-
91
-
92
-
93
-
94
-
95
-
96
-
97
-
98
-
99
-
100
-
101
-
102
-
103
-
104
-
105
-
106
-
107
-
108
-
109
-
110
-
111
-
112
-
113
-
114
-
115
-
116
-
117
-
118
-
119
-
120
-
121
-
122
-
123
-
124
-
125
-
126
-
127
-
128
-
129
-
130
-
131
-
132
-
133
-
134
-
135
-
136
-
137
-
138
-
139
-
140
-
141
-
142
-
143
-
144
-
145
-
146
-
147
-
148
-
149
-
150
-
151
-
152
-
153
-
154
-
155
-
156
-
157
-
158
-
159
-
160
-
161
-
162
-
163
-
164
-
165
-
166
-
167
-
168
-
169
-
170
-
171
-
172
-
173
-
174
-
175
-
176
-
177
-
178
 |
 |
