Ricoh 5100N Quick Installation Guide - Page 120
Reset, Ethernet speed, Network Settings, IP filtering, IP Address1, Address10, Apply, General
 |
UPC - 026649028502
View all Ricoh 5100N manuals
Add to My Manuals
Save this manual to your list of manuals |
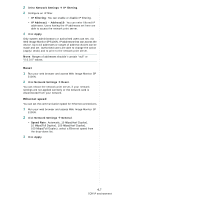
Page 120 highlights
2 Select Network Settings Æ IP filtering. 3 Configure an IP filter. • IP Filtering: You can enable or disable IP filtering. • IP Address1 ~ Address10: You can enter filtered IP addresses. Users having the IP addresses set here are able to access the network print server. 4 Click Apply. Only system administrators or authorised users can set, via Web Image Monitor SP 5100N, IP addresses that can access the device. Up to 10 addresses or ranges of address choices can be made and set. Authorised users are able to change the action (Apply/ Undo) and to print to the network print server. NOTE: Ranges of addresses shouldn't contain "null" or "0.0.0.0" values. Reset 1 Run your web browser and access Web Image Monitor SP 5100N. 2 Click Network Settings Æ Reset. You can reboot the network print server, if your network settings are not applied correctly or the network card is disconnected from your network. Ethernet speed You can set the communication speed for Ethernet connections. 1 Run your web browser and access Web Image Monitor SP 5100N. 2 Click Network Settings Æ General. • Speed Rate: Automatic, 10 Mbps(Harf Duplex), 10 Mbps(Full Duplex), 100 Mbps(Harf Duplex), 100 Mbps(Full Duplex). select a Ethernet speed from the drop-down list. 3 Click Apply. 4.7 TCP/IP environment
-
 1
1 -
2
-
3
-
4
-
5
-
6
-
7
-
8
-
9
-
10
-
11
-
12
-
13
-
14
-
15
-
16
-
17
-
18
-
19
-
20
-
21
-
22
-
23
-
24
-
25
-
26
-
27
-
28
-
29
-
30
-
31
-
32
-
33
-
34
-
35
-
36
-
37
-
38
-
39
-
40
-
41
-
42
-
43
-
44
-
45
-
46
-
47
-
48
-
49
-
50
-
51
-
52
-
53
-
54
-
55
-
56
-
57
-
58
-
59
-
60
-
61
-
62
-
63
-
64
-
65
-
66
-
67
-
68
-
69
-
70
-
71
-
72
-
73
-
74
-
75
-
76
-
77
-
78
-
79
-
80
-
81
-
82
-
83
-
84
-
85
-
86
-
87
-
88
-
89
-
90
-
91
-
92
-
93
-
94
-
95
-
96
-
97
-
98
-
99
-
100
-
101
-
102
-
103
-
104
-
105
-
106
-
107
-
108
-
109
-
110
-
111
-
112
-
113
-
114
-
 115
115 -
 116
116 -
 117
117 -
 118
118 -
 119
119 -
 120
120 -
 121
121 -
 122
122 -
 123
123 -
 124
124 -
 125
125 -
126
-
127
-
128
-
129
-
130
-
131
-
132
-
133
-
134
-
135
-
136
-
137
-
138
-
139
-
140
-
141
-
142
-
143
-
144
-
145
-
146
-
147
-
148
-
149
-
150
-
151
-
152
-
153
-
154
-
155
-
156
-
157
-
158
-
159
-
160
-
161
-
162
-
163
-
164
-
165
-
166
-
167
-
168
-
169
-
170
-
171
-
172
-
173
-
174
-
175
-
176
-
177
-
178
 |
 |
