Ricoh AP610N Setup Guide - Page 70
Enter, Escape, Enter, WEP Setting, Active, Yes HEX, Yes
 |
UPC - 026649023385
View all Ricoh AP610N manuals
Add to My Manuals
Save this manual to your list of manuals |
Page 70 highlights
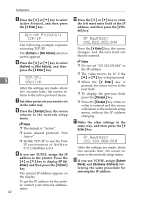
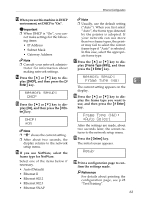
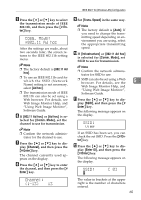
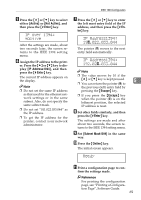
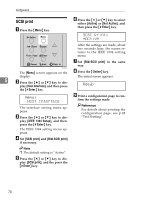
Configuration M Press the {U} or {T} key to select characters, and then press the {# Enter} key. Q Press the {U} or {T} key to dis- play [WEP Setting], and then press the {# Enter} key. SSID: Ak [ 1] You can now enter the next character. The following message appears on the display. WEP Setting: *Not Active N Continue entering the key. R Press the {U} or {T} key to dis- Note ❒ The characters that can be used are ASCII 0x20-0x7e (32 bytes). play [Active], and then press the {# Enter} key. The following message appears on the display. ❒ To display the previous charac- ter, press the {Escape} key. 5 O After entering the key, press the Change WEP Key: Yes (HEX) {# Enter} key twice. Note SSID: [32] AAAAAAAAAAAAAAAA After the settings are made, about two seconds later, the screen returns to the IEEE 802.11b setting menu. P In the case of using a WEP key on a network, activate the WEP setting to be used for communication along with WEP. Note ❒ Confirm the network administrator for the WEP Key to use. ❒ WEP key can also be set using a Web browser. For details, see Web Image Monitor Help. ❒ When setting the WEP Setting to [Active], you will need to enter the WEP key. If you have not entered the key, be sure to enter it. ❒ If you have entered the WEP key and change the setting, press the {U} or {T} key to display [No], and then press the {# Enter} key. S Press the {U} or {T} key to dis- play [Yes (HEX)] when inputting a hexadecimal WEP key or [Yes (ASCII)] when inputting an ASCII WEP key. Then press the {# Enter} key. WEP Key: k [ 0] The value in brackets at the upper right is the number of characters entered. 66
-
 1
1 -
2
-
3
-
4
-
5
-
6
-
7
-
8
-
9
-
10
-
11
-
12
-
13
-
14
-
15
-
16
-
17
-
18
-
19
-
20
-
21
-
22
-
23
-
24
-
25
-
26
-
27
-
28
-
29
-
30
-
31
-
32
-
33
-
34
-
35
-
36
-
37
-
38
-
39
-
40
-
41
-
42
-
43
-
44
-
45
-
46
-
47
-
48
-
49
-
50
-
51
-
52
-
53
-
54
-
55
-
56
-
57
-
58
-
59
-
60
-
61
-
62
-
63
-
64
-
 65
65 -
 66
66 -
 67
67 -
 68
68 -
 69
69 -
 70
70 -
 71
71 -
 72
72 -
 73
73 -
 74
74 -
 75
75 -
76
-
77
-
78
-
79
-
80
-
81
-
82
-
83
-
84
 |
 |
