Ricoh Priport HQ7000 Printer Reference - Page 31
Installing the Software, Auto Run
 |
View all Ricoh Priport HQ7000 manuals
Add to My Manuals
Save this manual to your list of manuals |
Page 31 highlights
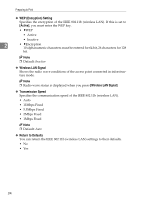
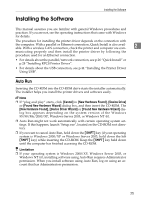
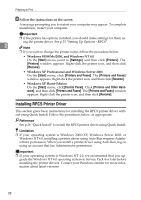
Installing the Software Installing the Software This manual assumes you are familiar with general Windows procedures and practices. If you are not, see the operating instructions that come with Windows for details. The procedure for installing the printer driver depends on the connection with the computer. With a parallel or Ethernet connection, Quick Install is also available. With a wireless LAN connection, check the printer and computer are com- 2 municating properly and then install the printer driver by following the procedure used for an Ethernet connection. • For details about the parallel/network connection, see p.26 "Quick Install" or p.28 "Installing RPCS Printer Driver". • For details about the USB connection, see p.44 "Installing the Printer Driver Using USB". Auto Run Inserting the CD-ROM into the CD-ROM drive starts the installer automatically. The installer helps you install the printer drivers and software easily. Note ❒ If "plug and play" starts, click [Cancel] in [New Hardware Found], [Device Drive] or [Found New Hardware Wizard] dialog box, and then insert the CD-ROM. The [New Hardware Found], [Device Driver Wizard] or [Found New Hardware Wizard] dialog box appears depending on the system version of the Windows 95/98/Me/2000/XP, Windows Server 2003, or Windows NT 4.0. ❒ Auto Run might not work automatically with certain operating system settings. If this happens, launch "Setup.exe", located on the CD-ROM root directory. ❒ If you want to cancel Auto Run, hold down the {SHIFT} key (if your operating system is Windows 2000/XP or Windows Server 2003, hold down the left {SHIFT} key) while inserting the CD-ROM. Keep the {SHIFT} key held down until the computer has finished accessing the CD-ROM. Limitation ❒ If your operating system is Windows 2000/XP, Windows Server 2003, or Windows NT 4.0, installing software using Auto Run requires Administrator permission. When you install software using Auto Run, log on using an account that has Administrators permission. 25
-
 1
1 -
2
-
3
-
4
-
5
-
6
-
7
-
8
-
9
-
10
-
11
-
12
-
13
-
14
-
15
-
16
-
17
-
18
-
19
-
20
-
21
-
22
-
23
-
24
-
25
-
 26
26 -
 27
27 -
 28
28 -
 29
29 -
 30
30 -
 31
31 -
 32
32 -
 33
33 -
 34
34 -
 35
35 -
 36
36 -
37
-
38
-
39
-
40
-
41
-
42
-
43
-
44
-
45
-
46
-
47
-
48
-
49
-
50
-
51
-
52
-
53
-
54
-
55
-
56
-
57
-
58
-
59
-
60
-
61
-
62
-
63
-
64
-
65
-
66
-
67
-
68
-
69
-
70
-
71
-
72
-
73
-
74
-
75
-
76
-
77
-
78
-
79
-
80
-
81
-
82
-
83
-
84
-
85
-
86
-
87
-
88
-
89
-
90
-
91
-
92
-
93
-
94
-
95
-
96
-
97
-
98
-
99
-
100
-
101
-
102
-
103
-
104
-
105
-
106
 |
 |