Ricoh Priport HQ7000 Printer Reference - Page 36
TCP/IP, NetBEUI, SmartDeviceMonitor, Search, Specify Address
 |
View all Ricoh Priport HQ7000 manuals
Add to My Manuals
Save this manual to your list of manuals |
Page 36 highlights
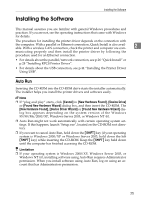
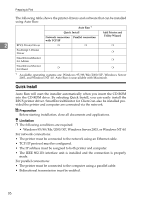
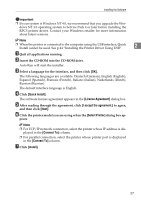
Preparing to Print I Select SmartDeviceMonitor. SmartDeviceMonitor A Click [Port:], and then click [Add]. B Click [SmartDeviceMonitor], and then click [OK]. 2 C Select the printer you want to use. ❖ TCP/IP A Click [TCP/IP], and then click [Search]. Available machines will be listed. B Select the printer you want to use, and then click [OK]. Note ❒ Machines that respond to an IP broadcast from the computer will be displayed. To print to a printer not listed here, click [Specify Address], and then enter the IP address or host name. ❒ Part of the printer's IP address is used for the port name. Under Windows 95/98/Me, avoid using an address that is partially similar to one already in use. For example , if "192.168.0.2" is already used, "192.168.0.2xx" cannot be used. Similarly, if "192.168.0.20" is already used, "192.168.0.2" cannot be used. ❖ NetBEUI A Click [NetBEUI], and then click [Search]. A list of machines that can be used with NetBEUI appears. B Select the printer you want to use, and then click [OK]. Note ❒ NetBEUI cannot be used under Windows XP or Windows Server 2003. ❒ Machines that respond to a broadcast from the computer will be displayed. To print to a printer not listed here, click [Specify Address], and then enter the NetBEUI address. Confirm the NetBEUI address on the network is on the configuration page. The NetBEUI address appears as "\\RNPxxxx\xxx" on the configuration page. Enter the machine's network path name in the form of "%%Computer name\Share name". Do not enter "\\" but "%%" as head characters. ❒ You cannot print to machines beyond routers. 30
-
 1
1 -
2
-
3
-
4
-
5
-
6
-
7
-
8
-
9
-
10
-
11
-
12
-
13
-
14
-
15
-
16
-
17
-
18
-
19
-
20
-
21
-
22
-
23
-
24
-
25
-
26
-
27
-
28
-
29
-
30
-
 31
31 -
 32
32 -
 33
33 -
 34
34 -
 35
35 -
 36
36 -
 37
37 -
 38
38 -
 39
39 -
 40
40 -
 41
41 -
42
-
43
-
44
-
45
-
46
-
47
-
48
-
49
-
50
-
51
-
52
-
53
-
54
-
55
-
56
-
57
-
58
-
59
-
60
-
61
-
62
-
63
-
64
-
65
-
66
-
67
-
68
-
69
-
70
-
71
-
72
-
73
-
74
-
75
-
76
-
77
-
78
-
79
-
80
-
81
-
82
-
83
-
84
-
85
-
86
-
87
-
88
-
89
-
90
-
91
-
92
-
93
-
94
-
95
-
96
-
97
-
98
-
99
-
100
-
101
-
102
-
103
-
104
-
105
-
106
 |
 |
