Samsung SGH-X506 User Manual (user Manual) (ver.f2) (English) - Page 76
Message, Select, Save to, Drafts, Create New Message, Options, Text Style, Input Method
 |
View all Samsung SGH-X506 manuals
Add to My Manuals
Save this manual to your list of manuals |
Page 76 highlights
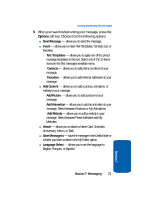
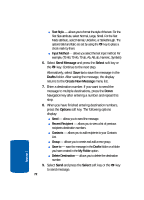
ⅷ Text Style - allows you to format the style of the text. For the Text Size attribute, select Normal, Large, Small. For the Text Mode attribute, select Normal, Underline, or Strikethrough. The options Bold and Italic are set by using the key to place a check mark by them. ⅷ Input Method - allows you select the text input method. For example, (T9 AB, T9 Ab, T9 ab, Ab, AB, ab, Numeric, Symbols) 6. Select Send Message and press the Select soft key or the key. Continue to the next step. Alternatively, select Save to to save the message in the Drafts folder. After saving the message, the display returns to the Create New Message menu list. 7. Enter a destination number. If you want to send the message to multiple destinations, press the Down Navigation key after entering a number and repeat this step. 8. When you have finished entering destination numbers, press the Options soft key. The following options display: ⅷ Send - allows you to send the message. ⅷ Recent Recipient - allows you to view a list of previous recipients destination numbers. ⅷ Contacts - allows you to add recipients to your Contacts List. ⅷ Group - allows you to create and add a new group. ⅷ Save to - save the message in the Drafts folder or a folder you have created in the My Folder option. ⅷ Delete Destination - allows you to delete the destination number. 9. Select Send and press the Select soft key or the key to send message. 72 Section 7
-
 1
1 -
2
-
3
-
4
-
5
-
6
-
7
-
8
-
9
-
10
-
11
-
12
-
13
-
14
-
15
-
16
-
17
-
18
-
19
-
20
-
21
-
22
-
23
-
24
-
25
-
26
-
27
-
28
-
29
-
30
-
31
-
32
-
33
-
34
-
35
-
36
-
37
-
38
-
39
-
40
-
41
-
42
-
43
-
44
-
45
-
46
-
47
-
48
-
49
-
50
-
51
-
52
-
53
-
54
-
55
-
56
-
57
-
58
-
59
-
60
-
61
-
62
-
63
-
64
-
65
-
66
-
67
-
68
-
69
-
70
-
 71
71 -
 72
72 -
 73
73 -
 74
74 -
 75
75 -
 76
76 -
 77
77 -
 78
78 -
 79
79 -
 80
80 -
 81
81 -
82
-
83
-
84
-
85
-
86
-
87
-
88
-
89
-
90
-
91
-
92
-
93
-
94
-
95
-
96
-
97
-
98
-
99
-
100
-
101
-
102
-
103
-
104
-
105
-
106
-
107
-
108
-
109
-
110
-
111
-
112
-
113
-
114
-
115
-
116
-
117
-
118
-
119
-
120
-
121
-
122
-
123
-
124
-
125
-
126
-
127
-
128
-
129
-
130
-
131
-
132
-
133
-
134
-
135
-
136
-
137
-
138
-
139
-
140
-
141
-
142
-
143
-
144
-
145
-
146
-
147
-
148
-
149
-
150
-
151
-
152
-
153
-
154
-
155
-
156
-
157
-
158
-
159
-
160
-
161
-
162
-
163
-
164
-
165
-
166
-
167
-
168
-
169
-
170
-
171
-
172
-
173
-
174
-
175
-
176
-
177
-
178
-
179
-
180
-
181
-
182
-
183
-
184
-
185
-
186
-
187
-
188
-
189
-
190
-
191
-
192
-
193
-
194
-
195
-
196
 |
 |