Sharp AR-337 AR-287 , AR-337 , AR-407 Operation Manual
Sharp AR-337 Manual
 |
View all Sharp AR-337 manuals
Add to My Manuals
Save this manual to your list of manuals |
Sharp AR-337 manual content summary:
- Sharp AR-337 | AR-287 , AR-337 , AR-407 Operation Manual - Page 1
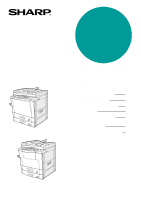
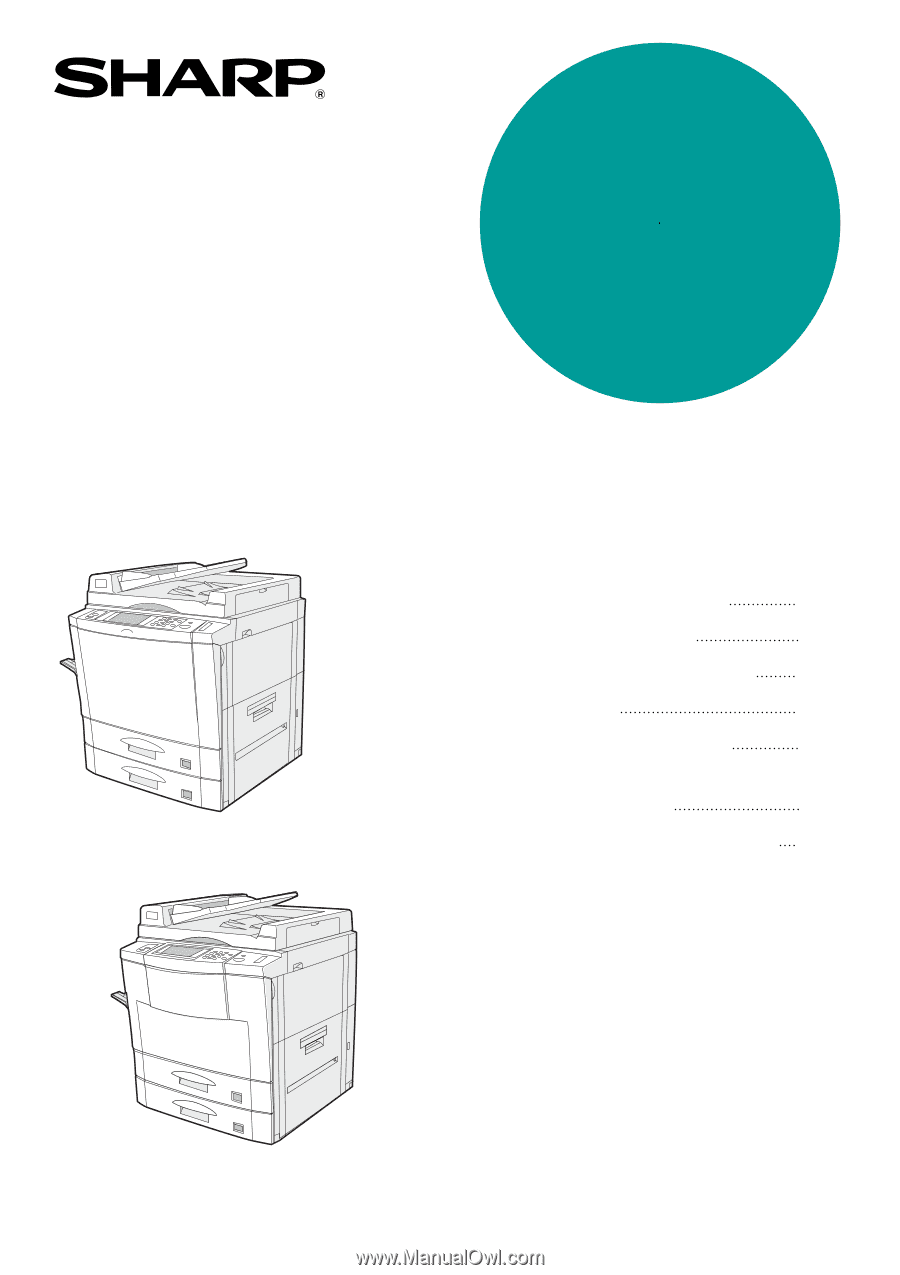
AR-287/AR-337 MODEL AR-287 AR-337 AR-407 DIGITAL COPYING MACHINE OPERATION MANUAL Page • GETTING STARTED 1-1 • MAKING COPIES 2-1 • SPECIAL FUNCTIONS 3-1 • SUPPLIES 4-1 • COPIER TROUBLE? 5-1 • GENERAL INFORMATION 6-1 • OPTIONAL EQUIPMENT 7-1 AR-407 - Sharp AR-337 | AR-287 , AR-337 , AR-407 Operation Manual - Page 2
loss or theft, record and retain for reference the copier's serial number located on the left hand side at the rear corner of the copier. Model Number AR-287/AR-337/AR-407 Serial Number Date of Purchase Place of Purchase Authorized Sharp Copier Service Department Number CINSE1949FC51 - Sharp AR-337 | AR-287 , AR-337 , AR-407 Operation Manual - Page 3
......... 4-2 Loading copy paper 4-2 q ADDING TONER 4-5 q USED TONER DISPOSAL 4-7 q STORAGE OF SUPPLIES 4-8 CHAPTER 5 COPIER TROUBLE? q MISFEED REMOVAL 5-2 q MAINTENANCE REQUIRED ......... 5-11 q TROUBLESHOOTING 5-12 CHAPTER 6 GENERAL INFORMATION q PART NAMES AND FUNCTIONS ....... 6-2 Exterior - Sharp AR-337 | AR-287 , AR-337 , AR-407 Operation Manual - Page 4
, it is recommended that users first read this manual to become familiar with all the features of the copiers. NOTE: q The tandem copying function is not available for the AR-287. q This manual describes only copier features. For a description of optional printer features and scanner features, see - Sharp AR-337 | AR-287 , AR-337 , AR-407 Operation Manual - Page 5
CHAPTER 1 GETTING STARTED This chapter describes the basic information on the use of this copier. Page q INSTALLATION REQUIREMENTS 1-2 q CAUTIONS 1-3 q POWER ON AND OFF 1-5 Power save modes 1-5 q INFORMATION FUNCTION 1-7 q USING THE TOUCH PANEL 1-8 How to use the touch panel 1-8 Selection of - Sharp AR-337 | AR-287 , AR-337 , AR-407 Operation Manual - Page 6
3. Do not install the machine where it is: q damp or humid, q exposed to direct sunlight, q extremely dusty, q poorly ventilated, q subject to extreme temperature or humidity changes (e.g., near an air conditioner or heater). 4. Since a hard disk drive is built into this copier, place the copier on - Sharp AR-337 | AR-287 , AR-337 , AR-407 Operation Manual - Page 7
STARTED Cautions CAUTIONS 1. Do not touch the photoconductive drum. Scratches or smudges on the drum will cause dirty copies. 2. The fusing unit is extremely hot. Exercise care in this area. Fusing unit 3. Since a hard disk drive is built into the copier, be sure to turn the power switch to the - Sharp AR-337 | AR-287 , AR-337 , AR-407 Operation Manual - Page 8
µs ±2.3 ns)/7 mm 0.24 mW - 0.60 mW SAFETY PRECAUTIONS This Digital Copier is rated Class 1 and complies with 21 CFR 1040.10 and 1040.11 of the precautions below. q Do not remove the cabinet, operation panel or any other covers. q The copier's exterior covers contain several safety interlock - Sharp AR-337 | AR-287 , AR-337 , AR-407 Operation Manual - Page 9
65 seconds for the AR-287/337 and about 75 seconds for the AR-407. Once the copier is ready, the message display will change to "READY TO COPY.", and the START key indicator will light up, indicating that copying is possible. If the copier has been programmed in the auditing mode, the message "ENTER - Sharp AR-337 | AR-287 , AR-337 , AR-407 Operation Manual - Page 10
made. To copy from the preheat mode, make desired copier selections and press the START key using the normal copying procedure. 5 KEY OPERATOR See page 22 of the KEY OPERATOR'S GUIDE for information on setting the preheat mode. As an ENERGY STAR® Partner, SHARP has determined that this product meets - Sharp AR-337 | AR-287 , AR-337 , AR-407 Operation Manual - Page 11
a quick reference guide to the use of the various features and functions of this copier. The information mode can be entered when the copier is in the standby mode. GETTING STARTED Information function INFORMATION SELECT INFORMATION. COPIER ADDING TONER INSTRUCTIONS 1 Press the INFORMATION - Sharp AR-337 | AR-287 , AR-337 , AR-407 Operation Manual - Page 12
be enabled by a key operator program. See page 27 of the KEY OPERATOR'S GUIDE. If any keys are displayed gray, the keys have been disabled. If you press can be selected by pressing the relevant keys on the SPECIAL MODES screen (page 3-4) or on the IMAGE EDIT menu (page 3-21) to highlight the keys. - Sharp AR-337 | AR-287 , AR-337 , AR-407 Operation Manual - Page 13
1 CHAPTER GETTING STARTED Using the touch panel Function setting icons READY TO COPY. READY TO COPY. ERASE EDGE ERASE CENTER ERASE EDGE+CENTER ERASE 1.81/2 11 2.11 17 CANCEL OK OK 1/2 (0~1) inch USING THE TOUCH PANEL Selected special functions are indicated with their icons on the basic - Sharp AR-337 | AR-287 , AR-337 , AR-407 Operation Manual - Page 14
- Sharp AR-337 | AR-287 , AR-337 , AR-407 Operation Manual - Page 15
adjustments. Page q AUDITING ACCOUNTS 2-2 q USING THE RSPF 2-3 q COPYING FROM THE DOCUMENT GLASS 2-8 q REDUCTION/ENLARGEMENT/ZOOM 2-11 q SPECIAL PAPERS (manual feed 2-14 Two sided copying with bypass tray 2-15 q EXPOSURE ADJUSTMENTS 2-16 q SORT/GROUP 2-17 q JOB MEMORY 2-18 q INTERRUPTING - Sharp AR-337 | AR-287 , AR-337 , AR-407 Operation Manual - Page 16
enabled by the key operator program with the optional printer expansion kit installed. Then the account limit setting will be canceled. 5 KEY OPERATOR See page 46 of the AR-PB2A operation manual for the printer auditing mode setting. q The message will be displayed for several seconds, then change - Sharp AR-337 | AR-287 , AR-337 , AR-407 Operation Manual - Page 17
to remove any along the side guides. q Special originals mode is on, the image of the originals will be automatically rotated to match the copy paper. However, if enlargement copying onto a paper size larger than 8-1/2" x 11" is performed, the image will not be rotated. q Image loss (max. 13/64 - Sharp AR-337 | AR-287 , AR-337 , AR-407 Operation Manual - Page 18
copies of 1-sided originals 1 Adjust the original guides to the size of the originals and set Remove the original from the document glass in this case. q If copy paper of the required size is not installed in any of the trays, the following message will appear. READY TO COPY. (DOCUMENT FEEDER MODE - Sharp AR-337 | AR-287 , AR-337 , AR-407 Operation Manual - Page 19
originals Maximum height line 1 Adjust the original guides to the size of the originals and set the originals face up in the document feeder tray. 2 CHAPTER MAKING COPIES Using the RADF 2 Press the 2-SIDED COPY key. AUTO READY TO COPY.(DOCUMENT FEEDER MODE) 2-SIDED COPY OK 3 Press the key - Sharp AR-337 | AR-287 , AR-337 , AR-407 Operation Manual - Page 20
originals Maximum height line 1 Adjust the original guides to the size of the originals and set the originals face up in the document feeder tray. 2 CHAPTER MAKING COPIES Using the RADF 2 Press the 2-SIDED COPY key. AUTO READY TO COPY.(DOCUMENT FEEDER MODE) 2-SIDED COPY OK 3 Press the key - Sharp AR-337 | AR-287 , AR-337 , AR-407 Operation Manual - Page 21
originals Maximum height line 1 Adjust the original guides to the size of the originals and set the originals face up in the document feeder tray. 2 CHAPTER MAKING COPIES Using the RADF 2 Press the 2-SIDED COPY key. AUTO READY TO COPY.(DOCUMENT FEEDER MODE) 2-SIDED COPY OK 3 Press the key - Sharp AR-337 | AR-287 , AR-337 , AR-407 Operation Manual - Page 22
by turning over the original manually. q If the orientation of mode is on, the image of the original will be automatically rotated to match the copy paper. However, if enlargement copying onto a paper size larger than 8-1/2" x 11" is performed, the image will not be rotated. q Image void (max. 13/64 - Sharp AR-337 | AR-287 , AR-337 , AR-407 Operation Manual - Page 23
If the copier is in the SORT mode, the original will be scanned when the START key is pressed but copying will not begin. Proceed to step 6. q To cancel a copy run, press the CLEAR ALL ( CA ) key. Copying will stop and the number in the copy quantity display will be reset to 0. 6 Remove - Sharp AR-337 | AR-287 , AR-337 , AR-407 Operation Manual - Page 24
a mistake is made. 7 Press the START key. q The original will be scanned each time the START key is pressed, but copying will not begin yet. 8 Remove the first original and replace it with the next original after the START key indicator lights up, and then press the START key. q Copy from - Sharp AR-337 | AR-287 , AR-337 , AR-407 Operation Manual - Page 25
either automatically with the "AUTO IMAGE" key or manually with the reduction, enlargement or "ZOOM" keys on the touch panel. The zoom function enables precise copy ratio selection from 25% to 400% (for the AR-407) or from 25% to 800% (for the AR-287 and AR-337) in 1% increments. 5 KEY OPERATOR - Sharp AR-337 | AR-287 , AR-337 , AR-407 Operation Manual - Page 26
-287/AR-337) READY TO COPY. 95% 50% 25% 100 % ZOOM 100% OK 141% 200% 400% 800% XY ZOOM AUTO EXPOSURE MENU 1 2 AUTO 81/2 11 PAPER SELECT AUTO IMAGE 100% COPY RATIO 3 Use the MENU 1 2 key to select menu 1 or menu 2 for copy ratio selection. Menu 1 A. Preset reduction copy ratios are: 77% and 64 - Sharp AR-337 | AR-287 , AR-337 , AR-407 Operation Manual - Page 27
81/2 14 81/2 14 81/2 11 64% 11 17 81/2 11 81/2 11 81/2 11 11 17 51/2 81/2 81/2 11 AUTO IMAGE 100% COPY RATIO 5 Press the "OK" key. READY size. q If the AUTO PAPER SELECT mode is on, the appropriate copy paper size a tray of the required size is not installed, use the bypass tray and press the - Sharp AR-337 | AR-287 , AR-337 , AR-407 Operation Manual - Page 28
is selected and a nonstandard sized paper is used from the bypass tray, the corresponding one-sided mode will be selected automatically when the START key is pressed. 2 CHAPTER MAKING COPIES Special papers (manual feed) 1 Place the original in the document feeder tray or on the document glass - Sharp AR-337 | AR-287 , AR-337 , AR-407 Operation Manual - Page 29
) 34 3 4 1 2 12 Two-sided copying with bypass tray Two-sided copies can be made manually using the bypass tray, when the heavy paper which is out of spec. for duplex module is used. 1 Place the first original face down on the document glass and make a copy. q The first side of the copy - Sharp AR-337 | AR-287 , AR-337 , AR-407 Operation Manual - Page 30
AUTO EXPOSURE Automatic This is the standard initial setting for this copier. In this mode, the characteristics of an original being copied are "read" by of the copied images by reducing the effect of colored or shaded background areas. Text, text/photo, and photo Text mode: This mode is useful - Sharp AR-337 | AR-287 , AR-337 , AR-407 Operation Manual - Page 31
is used for copying, copies will be collated in the default setting. To copy in the GROUP mode, press the OUTPUT key and then select the GROUP mode on the touch panel. When the GROUP mode is selected, the GROUP ( ) icon is indicated on the touch panel. q When the document glass is used - Sharp AR-337 | AR-287 , AR-337 , AR-407 Operation Manual - Page 32
manually reprogramming each aspect of the job. q All functions that can be set in the copy mode prohibited. See page 25 of the KEY OPERATOR'S GUIDE. 8 LEAR 0 9 PROGRAM P CLEAR C JOB PROGRAMS EXIT PRESS PROGRAM NUMBER. RECALL STORE/DELETE MAKE COPIER SELECTIONS AND PRESS [OK]. 1.81/2 11 2.11 17 - Sharp AR-337 | AR-287 , AR-337 , AR-407 Operation Manual - Page 33
. q To cancel deletion, press the "CANCEL" key. JOB PROGRAMS PRESS PROGRAM NUMBER. EXIT 4 Press the "EXIT" key to exit the job memory mode. RECALL STORE/DELETE 8 LEAR 0 9 PROGRAM P CLEAR C Recalling a job program 1 Press the PROGRAM key. q The JOB PROGRAMS screen will appear on the touch - Sharp AR-337 | AR-287 , AR-337 , AR-407 Operation Manual - Page 34
AR-TR1) is installed, interrupt copies are output to the second tray of the unit. 5 KEY OPERATOR If the second tray is not installed, output of copies to the second tray must be disabled. See page 27 of the KEY OPERATOR'S GUIDE mode and remove the original(s) used for interrupt copying. q The copier - Sharp AR-337 | AR-287 , AR-337 , AR-407 Operation Manual - Page 35
3 CHAPTER CHAPTER 3 SPECIAL FUNCTIONS This chapter describes the special copying functions including various image editing functions which have been made possible by digital image processing technology. Page q XY ZOOM 3-2 q MARGIN SHIFT 3-4 q ERASE 3-6 q DUAL PAGE COPYING 3-8 q MULTI SHOT 3-10 - Sharp AR-337 | AR-287 , AR-337 , AR-407 Operation Manual - Page 36
% (for the AR-287 and AR-337). The illustrations below describe the case of the AR-407. 3 CHAPTER SPECIAL FUNCTIONS XY zoom 1 Place the original in the document feeder tray or on the document glass. 2 Press the "COPY RATIO" key on the touch panel. / 1 2 11 100% ELECT COPY RATIO 64% 11 17 81 - Sharp AR-337 | AR-287 , AR-337 , AR-407 Operation Manual - Page 37
100 % % ZOOM % 100% READY TO COPY. 77% 64% 50% XY ZOOM AUTO EXPOSURE X 50 % Y 100 % direction again, press the X key. q The message "IMAGE IS LARGER THAN THE COPY PAPER." may appear, indicating desired paper size. q If the AUTO PAPER SELECT mode is on, the appropriate copy paper size will have - Sharp AR-337 | AR-287 , AR-337 , AR-407 Operation Manual - Page 38
to 1" in 1/8" increments. See page 16 of the KEY OPERATOR'S GUIDE. NOTE: The front side and reverse side are referred to as "SIDE MODES key. q The SPECIAL MODES screen will appear. READY TO CO READY TO COPY. SPECIAL MODES MARGIN SHIFT ERASE MULTI SHOT COVERS PAMPHLET COPY AUTO EXPOSURE IMAGE - Sharp AR-337 | AR-287 , AR-337 , AR-407 Operation Manual - Page 39
shift READY TO COPY. SPECIAL MODES MARGIN SHIFT ERASE MULTI SHOT COVERS PAMPHLET COPY AUTO EXPOSURE IMAGE EDIT AUTO 81/2 11 PAPER SELECT Press the upper "OK" key on the touch panel. 7 Make all other desired copier selections and press the START key. q If the document feeder is used, scanning - Sharp AR-337 | AR-287 , AR-337 , AR-407 Operation Manual - Page 40
AB This copier has an edge erase mode and a center erase mode. q page 16 of the KEY OPERATOR'S GUIDE. 3 CHAPTER SPECIAL FUNCTIONS Erase 1 MODES key. q The SPECIAL MODES screen will appear. READY TO COPY. SPECIAL MODES MARGIN SHIFT ERASE MULTI SHOT COVERS PAMPHLET COPY AUTO EXPOSURE IMAGE - Sharp AR-337 | AR-287 , AR-337 , AR-407 Operation Manual - Page 41
the upper "OK" key on the touch panel. 7 Make all other desired copier selections and press the START key. q If the document feeder is used, scanning and copying will start. q If the document glass is used in the SORT mode, proceed to the next step. PLACE NEXT ORIGINAL. PRESS [START]. WHEN FINISHED - Sharp AR-337 | AR-287 , AR-337 , AR-407 Operation Manual - Page 42
to be copied first on the left part of the document glass. 8 1/2 Paper size index 2 READY TO CO Press the SPECIAL MODES key. q The SPECIAL MODES screen will appear. READY TO COPY. SPECIAL MODES MARGIN SHIFT ERASE MULTI SHOT COVERS PAMPHLET COPY AUTO EXPOSURE IMAGE EDIT AUTO 81/2 11 PAPER - Sharp AR-337 | AR-287 , AR-337 , AR-407 Operation Manual - Page 43
CLEAR C CLEAR ALL CA START 7 Press the START key. q If the SORT mode has been selected for copying multiple originals, proceed to the next step. If not . PRESS [START]. WHEN FINISHED, PRESS [READ-END]. READ-END AUTO IMAGE AUTO EXPOSURE 81/2 11 PAPER SELECT 100% COPY RATIO 8 Replace the - Sharp AR-337 | AR-287 , AR-337 , AR-407 Operation Manual - Page 44
desired paper size. AUTO EXPOSURE AUTO 81/2 11 PAPER SELECT 100% COPY RATIO 3 Press the 2-SIDED COPY key and select a duplex mode if desired. Press the "OK" key to close the duplex selection window. AUTO 4 READY TO CO Press the SPECIAL MODES key. q The SPECIAL MODES screen will appear. 3-10 - Sharp AR-337 | AR-287 , AR-337 , AR-407 Operation Manual - Page 45
MULTI SHOT READY TO COPY. SPECIAL MODES MARGIN SHIFT ERASE MULTI SHOT COVERS PAMPHLET COPY AUTO EXPOSURE IMAGE EDIT 81/2 11 PAPER SELECT number of originals and the orientation of the originals and copy paper, the image of the originals may be rotated. 7 Select the layout of originals on - Sharp AR-337 | AR-287 , AR-337 , AR-407 Operation Manual - Page 46
, proceed to the next step. PLACE NEXT ORIGINAL. PRESS [START]. WHEN FINISHED, PRESS [READ-END]. READ-END AUTO EXPOSURE 81/2 11 PAPER SELECT AUTO IMAGE 100% COPY RATIO 12 Replace the finished original with the next original after the START key indicator lights up, and then press the START key - Sharp AR-337 | AR-287 , AR-337 , AR-407 Operation Manual - Page 47
close the duplex selection window. AUTO READY TO CO 3 Press the SPECIAL MODES key. q The SPECIAL MODES screen will appear. READY TO COPY.(DOCUMENT FEEDER MODE) SPECIAL MODES OK MARGIN SHIFT MULTI SHOT ERASE COVERS DUAL PAGE COPY TRANSPARENCY INSERTS PAMPHLET COPY IMAGE EDIT TEXT STAMP AUTO - Sharp AR-337 | AR-287 , AR-337 , AR-407 Operation Manual - Page 48
COVERS 3 CHAPTER SPECIAL FUNCTIONS Covers COVERS FRONT BACK FRONT+BACK O CANCEL O PRINT ON FRONT 5 Select cover placement. q Select "FRONT", "BACK" or "FRONT+BACK" on the touch panel. YES NO NT K NT+BACK OK CANCEL OK PRINT ON FRONT COVER? YES NO 6 Indicate whether the front cover sheets are - Sharp AR-337 | AR-287 , AR-337 , AR-407 Operation Manual - Page 49
Transparency film with insert sheets 2 READY TO CO Press the SPECIAL MODES key. q The SPECIAL MODES screen will appear. READY TO COPY. SPECIAL MODES MARGIN SHIFT ERASE MULTI SHOT COVERS PAMPHLET COPY AUTO EXPOSURE IMAGE EDIT AUTO 81/2 11 PAPER SELECT OK DUAL PAGE COPY TRANSPARENCY INSERTS - Sharp AR-337 | AR-287 , AR-337 , AR-407 Operation Manual - Page 50
and copying will start. q If the document glass is used in the SORT mode, proceed to the next step. 9 Replace the finished original with the next 8-1/2" x 11" can be scanned. q When copying is completed, remove remaining transparency film. q To cancel the TRANSPARENCY INSERTS function, select the - Sharp AR-337 | AR-287 , AR-337 , AR-407 Operation Manual - Page 51
mode is on, the copy paper selected will be twice the size of the originals and will be copied on both sides. Four pages will be copied onto one sheet. q Center stapling cannot be performed by this copier. Even if PAMPHLET COPY is selected and the optional finishers (AR-FN1N, AR-FN2) is installed - Sharp AR-337 | AR-287 , AR-337 , AR-407 Operation Manual - Page 52
copy READY TO COPY. SPECIAL MODES MARGIN SHIFT ERASE MULTI SHOT COVERS PAMPHLET COPY AUTO EXPOSURE IMAGE EDIT AUTO 81/2 11 PAPER Depending on installation of an optional component, the "PAMPHLET COPY" function may be included in the "IMAGE EDIT" menu. In this case, press the "IMAGE EDIT" key - Sharp AR-337 | AR-287 , AR-337 , AR-407 Operation Manual - Page 53
q When the desired paper size is not selected, touch the desired paper tray on the touch panel then the AUTO IMAGE key. This O AUTO 11 17 1 URE PAPER SELECT COP lets the copier automatically set the best reduction or enlargement ratio and display it on the touch panel, judging from the placed - Sharp AR-337 | AR-287 , AR-337 , AR-407 Operation Manual - Page 54
"IMAGE EDIT" key on the SPECIAL MODES screen and pressing the key of each function. JOB BUILD Original The JOB BUILD function allows copying of multipage documents containing up to 120 pages (the limit, however, might be up to 60 pages of 8-1/2" x 14" or 11" x 17" paper size when the copier is - Sharp AR-337 | AR-287 , AR-337 , AR-407 Operation Manual - Page 55
EDIT JOB BUILD B/W REVERSE OK OK CENTERING REPEAT COPY BINDING CHANGE 4 Press the "IMAGE EDIT" key. q The IMAGE EDIT menu will appear. READY TO COPY. SPECIAL MODES OK IMAGE EDIT OK JOB BUILD B/W REVERSE CENTERING REPEAT COPY BINDING CHANGE 5 Press the "JOB BUILD" key. q The "JOB BUILD - Sharp AR-337 | AR-287 , AR-337 , AR-407 Operation Manual - Page 56
first section of original pages has been fed and the START lights up, remove the scanned originals from the exit area, set the next section of original different sizes, CENTERING is used to shift the image as a whole to the center of the copy paper. The image will shift only in the left to right - Sharp AR-337 | AR-287 , AR-337 , AR-407 Operation Manual - Page 57
81/2 11 PAPER SELECT 100% COPY RATIO 3 READY TO CO Press the SPECIAL MODES key. q The SPECIAL MODES screen will appear. READY TO COPY. SPECIAL MODES MARGIN SHIFT ERASE MULTI SHOT COVERS PAMPHLET COPY IMAGE EDIT AUTO EXPOSURE 11 17 PAPER SELECT OK DUAL PAGE COPY TRANSPARENCY INSERTS TEXT - Sharp AR-337 | AR-287 , AR-337 , AR-407 Operation Manual - Page 58
in the SORT mode, proceed to the next step. PLACE NEXT ORIGINAL. PRESS [START]. WHEN FINISHED, PRESS [READ-END]. READ-END AUTO IMAGE AUTO EXPOSURE 11 the original size and the number of the images required in single sheet of paper. When the copier cannot detect the size of original, however, - Sharp AR-337 | AR-287 , AR-337 , AR-407 Operation Manual - Page 59
AUTO 81/2 11 PAPER SELECT 100 COPY RA 3 READY TO CO Press the SPECIAL MODES key. q The SPECIAL MODES screen will appear. READY TO COPY. SPECIAL MODES MARGIN SHIFT ERASE MULTI SHOT COVERS PAMPHLET COPY IMAGE EDIT AUTO EXPOSURE 11 17 PAPER SELECT OK DUAL PAGE COPY TRANSPARENCY INSERTS TEXT - Sharp AR-337 | AR-287 , AR-337 , AR-407 Operation Manual - Page 60
the upper "OK" key. 9 Make all other desired copier selections and enter the desired number of copies. q If the document glass is used in the SORT mode, proceed to the next step. PLACE NEXT ORIGINAL. PRESS -END AUTO EXPOSURE 11 17 PAPER SELECT AUTO IMAGE 100% COPY RATIO 3-26 11 Replace the - Sharp AR-337 | AR-287 , AR-337 , AR-407 Operation Manual - Page 61
PAGE COPY TRANSPARENCY INSERTS TEXT STAMP 100% COPY RATIO READY TO COPY. SPECIAL MODES IMAGE EDIT JOB BUILD B/W REVERSE OK OK CENTERING REPEAT COPY BINDING CHANGE 3 Press the "IMAGE EDIT" key on the touch panel. q The IMAGE EDIT menu will appear. 4 Press the "B/W REVERSE" key on the touch panel - Sharp AR-337 | AR-287 , AR-337 , AR-407 Operation Manual - Page 62
upper "OK" key. 6 Make all other desired copier selections and enter the desired number of copies. 7 Press the START key. q If the document feeder is used, scanning of originals and copying will start. q If the document glass is used in the SORT mode, proceed to the next step. PLACE NEXT ORIGINAL - Sharp AR-337 | AR-287 , AR-337 , AR-407 Operation Manual - Page 63
FUNCTIONS BINDING CHANGE This function rotates the image of originals of the second side in the 1-sided to 2-sided copy mode. This function is useful for copying 8-1/2" x 14" or 11" x 17" originals in the 1-sided to 2-sided copy mode to allow left side binding. Original AB CDEF 1 GH 2 Setting - Sharp AR-337 | AR-287 , AR-337 , AR-407 Operation Manual - Page 64
11 PAPER SELECT OK DUAL PAGE COPY TRANSPARENCY INSERTS TEXT STAMP 100% COPY RATIO 4 Press the "IMAGE EDIT" key on the touch panel. q The IMAGE EDIT menu will appear. READY TO COPY. SPECIAL MODES IMAGE EDIT JOB BUILD B/W REVERSE OK OK CENTERING BINDING CHANGE REPEAT COPY 5 Press the "BINDING - Sharp AR-337 | AR-287 , AR-337 , AR-407 Operation Manual - Page 65
EDITING FUNCTIONS 3 CHAPTER SPECIAL FUNCTIONS Image editing functions OK OK CENTERING REPEAT COPY 1 2 3 INTERRUPT 456 78 AUDIT CLEAR 0 9 PROGRAM P CLEAR C INTERRUPT CLEAR ALL CA CLEAR C START 6 Press the upper "OK" key. 7 Make all other desired copier selections and enter the desired - Sharp AR-337 | AR-287 , AR-337 , AR-407 Operation Manual - Page 66
"TEXT STAMP" key on the SPECIAL MODES screen and then selecting from the "TEXT image, part of the copy image will be covered except for watermark. Part of watermark may be covered with the copy image GUIDE. The initial setting of the date format can be changed. See page 18 of the KEY OPERATOR'S GUIDE - Sharp AR-337 | AR-287 , AR-337 , AR-407 Operation Manual - Page 67
Text stamp READY TO COPY. SPECIAL MODES MARGIN SHIFT ERASE MULTI SHOT COVERS PAMPHLET COPY AUTO EXPOSURE IMAGE EDIT AUTO 81/2 11 PAPER SELECT OK . READY TO COPY. DATE March 23, 2000 23 March, 2000 03/23/00 23/03/00 CANCEL OK OK 1ST PAGE ONLY ALL PAGES 5 Select the desired date format - Sharp AR-337 | AR-287 , AR-337 , AR-407 Operation Manual - Page 68
STAMP DATE WATERMARK PRINT DIRECTION 12 45 OK OK SELECT STAMP PAGE NUMBER 3 INTERRUPT 6 9 Press the upper "OK" key. 10 Make all other desired copier selections and enter the desired number of copies. 78 AUDIT CLEAR 0 9 PROGRAM P CLEAR C INTERRUPT CLEAR C CLEAR ALL CA START 11 Press the START - Sharp AR-337 | AR-287 , AR-337 , AR-407 Operation Manual - Page 69
CHAPTER SPECIAL FUNCTIONS Text stamp 2 READY TO CO Press the SPECIAL MODES key. q The SPECIAL MODES screen will appear. READY TO COPY. SPECIAL MODES MARGIN SHIFT ERASE MULTI SHOT COVERS PAMPHLET COPY AUTO EXPOSURE IMAGE EDIT AUTO 81/2 11 PAPER SELECT OK DUAL PAGE COPY TRANSPARENCY INSERTS - Sharp AR-337 | AR-287 , AR-337 , AR-407 Operation Manual - Page 70
TEXT STAMP 3 CHAPTER SPECIAL FUNCTIONS Text stamp SELECT STAMP Confidential Copy CANCEL Urgent 1 O 5 Select the desired stamp to be printed. q The selected stamp will be highlighted. Preliminary Draft Final A OPTION CANCEL Urgent Preliminary Final ON OK 1ST PAGE ONLY ALL PAGES 6 Select - Sharp AR-337 | AR-287 , AR-337 , AR-407 Operation Manual - Page 71
PAGE NUMBER 12 Press the upper "OK" key. TION 12 45 78 AUDIT CLEAR 0 3 INT CLEAR ALL CA 6 START 9 PROGRAM P 13 Make all other desired copier selections and enter the desired number of copies. 14 Press the START key. q If the document feeder is used, scanning of originals and copying will - Sharp AR-337 | AR-287 , AR-337 , AR-407 Operation Manual - Page 72
tray or on the document glass. 2 READY TO CO Press the SPECIAL MODES key. q The SPECIAL MODES screen will appear. READY TO COPY. SPECIAL MODES MARGIN SHIFT ERASE MULTI SHOT COVERS PAMPHLET COPY AUTO EXPOSURE IMAGE EDIT AUTO 81/2 11 PAPER SELECT OK DUAL PAGE COPY TRANSPARENCY INSERTS TEXT - Sharp AR-337 | AR-287 , AR-337 , AR-407 Operation Manual - Page 73
TEXT STAMP 3 CHAPTER SPECIAL FUNCTIONS Text stamp PECIAL MODES EXT STAMP DATE WATERMARK PRINT DIRECTION OK OK SELECT STAMP PAGE NUMBER WATERMARK Confidential Copy CANCEL Urgent 1 O Preliminary Draft Final A OPTION 4 Press the "WATERMARK" key - Sharp AR-337 | AR-287 , AR-337 , AR-407 Operation Manual - Page 74
STAMP PAGE NUMBER 11 Press the upper "OK" key. 12 45 78 AUDIT CLEAR 0 3 INT CLEAR ALL CA 6 START 9 PROGRAM P 12 Make all other desired copier selections and enter the desired number of copies. 13 Press the START key. q If the document feeder is used, scanning of originals and copying will - Sharp AR-337 | AR-287 , AR-337 , AR-407 Operation Manual - Page 75
tray or on the document glass. 2 READY TO CO Press the SPECIAL MODES key. q The SPECIAL MODES screen will appear. READY TO COPY. SPECIAL MODES MARGIN SHIFT ERASE MULTI SHOT COVERS PAMPHLET COPY AUTO EXPOSURE IMAGE EDIT AUTO 81/2 11 PAPER SELECT OK DUAL PAGE COPY TRANSPARENCY INSERTS TEXT - Sharp AR-337 | AR-287 , AR-337 , AR-407 Operation Manual - Page 76
TEXT STAMP 3 CHAPTER SPECIAL FUNCTIONS Text stamp PECIAL MODES EXT STAMP DATE WATERMARK PRINT DIRECTION OK OK SELECT STAMP PAGE NUMBER GE NUMBER OK CANCEL OK FIRST PAGE -1-,-2-,-3-.. NUMBER 1/5,2/5,3/5.. 1,2,3.... 1 4 Press the "PAGE NUMBER" key - Sharp AR-337 | AR-287 , AR-337 , AR-407 Operation Manual - Page 77
upper "OK" key. OK OK SELECT STAMP PAGE NUMBER 12 45 78 AUDIT CLEAR 0 3 INT CLEAR ALL CA 6 START 9 PROGRAM P 10 Make all other desired copier selections and enter the desired number of copies. 11 Press the START key. q If the document feeder is used, copying will start after all originals - Sharp AR-337 | AR-287 , AR-337 , AR-407 Operation Manual - Page 78
is used. q The TANDEM COPY key will only be displayed on the touch panel of the machine set as the main copier, (an authorized Sharp Service Technician will do the setting of the main and sub copiers at the time of installation). When the tandem function is selected, (only available on the main - Sharp AR-337 | AR-287 , AR-337 , AR-407 Operation Manual - Page 79
when the tandem copying is activated. 7 Ensure that paper of the same size selected in the main copier is installed in the sub copier. q Paper of the same size and same orientation must be installed in the two copiers. Even if the image of the original is rotated to match the copy paper in the main - Sharp AR-337 | AR-287 , AR-337 , AR-407 Operation Manual - Page 80
SETTING REVIEW The current settings of copier functions can be displayed on the touch panel. 3 CHAPTER SPECIAL key. q The REVIEW screen will appear. The settings of the duplex mode (1-sided to 1-sided, etc.), sort/ group mode, and special functions will be displayed. The exposure, paper size, and - Sharp AR-337 | AR-287 , AR-337 , AR-407 Operation Manual - Page 81
4 CHAPTER CHAPTER 4 SUPPLIES This chapter describes the supplies for this copier such as paper and toner. Page q PAPER 4-2 Types and sizes of copy paper 4-2 Loading copy paper 4-2 q ADDING TONER 4-5 q USED TONER DISPOSAL 4-7 q STORAGE OF SUPPLIES 4-8 4-1 - Sharp AR-337 | AR-287 , AR-337 , AR-407 Operation Manual - Page 82
is no copy paper in a selected paper feed station. When a selected paper tray is not installed or is improperly installed, "PUSH PAPER TRAY INTO THE MACHINE UNTIL IT LATCHES." will be displayed. Install it or push it back firmly into place. For best results, use only Sharp recommended paper. 4-2 - Sharp AR-337 | AR-287 , AR-337 , AR-407 Operation Manual - Page 83
holds 500 sheets of 20 lb. bond paper. Do not load paper above the maximum height line. 3 Push the paper tray firmly back into the copier. 4-3 - Sharp AR-337 | AR-287 , AR-337 , AR-407 Operation Manual - Page 84
copy paper. Left guide Front guide Maximum height line 4 Load copy paper into the tray. SUPPLIES Paper 11x17 4-4 5 x8 8 x14 8 x11 8 x13 8 x11 Paper size card 5 Place the paper size card in the front of the paper tray. q The paper size card has three faces. Fold the card properly to show - Sharp AR-337 | AR-287 , AR-337 , AR-407 Operation Manual - Page 85
of Sharp copiers. Look for the Genuine Supplies label on the toner package. GENUINE SUPPLIES 4 CHAPTER SUPPLIES Adding toner 1 Open the front cover. 2 Pull down the toner hopper lock lever and pull the toner hopper out slowly until it stops. 5X 20X 20X 3 Tap on the top of the toner cartridge - Sharp AR-337 | AR-287 , AR-337 , AR-407 Operation Manual - Page 86
empty, tap on the top of the cartridge again until empty. 8 Slide the empty toner cartridge back along the guides and remove it. q The cartridge opening will be closed as it is moved back along the guides. 9 Slide the toner hopper into the copier and return the toner hopper lock lever into place. 10 - Sharp AR-337 | AR-287 , AR-337 , AR-407 Operation Manual - Page 87
toner hopper. q Remove the cap from a new toner collecting container and use it to cover the full toner collecting container. q Keep the full toner collecting container until the next regular service call. Your authorized Sharp Service Technician will collect the container for disposal. 3 Install - Sharp AR-337 | AR-287 , AR-337 , AR-407 Operation Manual - Page 88
, engineered, and tested to maximize the life and performance of Sharp copiers. Look for the Genuine Supplies label on the toner package. GENUINE SUPPLIES Photoconductive drum The AR-287/AR-337/AR-407 Copiers have advanced process control technology which improves copy quality uniformity. This - Sharp AR-337 | AR-287 , AR-337 , AR-407 Operation Manual - Page 89
5 CHAPTER CHAPTER 5 COPIER TROUBLE? This chapter describes how to remove misfed originals and paper and other common trouble remedies. Page l MISFEED REMOVAL 5-2 l MAINTENANCE REQUIRED 5-11 l TROUBLESHOOTING 5-12 5-1 - Sharp AR-337 | AR-287 , AR-337 , AR-407 Operation Manual - Page 90
the photoconductive drum or the corona wires. First confirm the misfeed locations. For misfeeds in optional equipment, see their respective sections. (pages 7-14, 7-28, 7-32, and 7-36) ( P. 5-3) ( P. 5-6) ( P. 5-7) ( P. 5-9) ( P. 5-4) ( P. 5-5) 5 CHAPTER COPIER TROUBLE? Misfeed removal 5-2 - Sharp AR-337 | AR-287 , AR-337 , AR-407 Operation Manual - Page 91
MISFEED REMOVAL 5 CHAPTER A MISFEED HAS OCCURRED. CLEAR INDICATED AREA. PRESS FOR RECOVERY INSTRUCTIONS. Misfeed in the RADF When the RADF misfeeds an original sheet, the copier will stop and the misfeed message will appear. An original misfeed may occur at one of three locations: (A) in the RADF - Sharp AR-337 | AR-287 , AR-337 , AR-407 Operation Manual - Page 92
MISFEED REMOVAL A MISFEED HAS OCCURRED. Misfeed in the bypass tray CLEAR INDICATED AREA. PRESS FOR RECOVERY INSTRUCTIONS. 1 Gently pull the misfed paper out. 2 Open and close the front cover to cancel the misfeed display. 5 CHAPTER COPIER TROUBLE? Misfeed removal 5-4 - Sharp AR-337 | AR-287 , AR-337 , AR-407 Operation Manual - Page 93
tray which was in use and remove the misfed paper. l Be careful not to tear the misfed paper during removal. 4 Close the paper tray and the side cover. 5 Open and close the front cover to cancel the misfeed display. l Confirm that the misfeed display is cleared. 5-5 COPIER TROUBLE? Misfeed removal - Sharp AR-337 | AR-287 , AR-337 , AR-407 Operation Manual - Page 94
CLEAR INDICATED AREA. PRESS FOR RECOVERY INSTRUCTIONS. 1 Open the front cover. Transport lever 2 Remove the misfed paper. 1 Turn the remove the misfed paper. Roller rotating knob A l Push down the paper guide and remove any misfed paper. 5-6 Paper guide COPIER TROUBLE? Misfeed removal - Sharp AR-337 | AR-287 , AR-337 , AR-407 Operation Manual - Page 95
3 Close the front cover. l Confirm that the misfeed display is cleared. A MISFEED HAS OCCURRED. Misfeed around the fusing unit and exit area CLEAR INDICATED AREA. PRESS FOR RECOVERY INSTRUCTIONS. 1 Open the front cover. 2 Open the exit area cover carefully. 5-7 COPIER TROUBLE? Misfeed removal - Sharp AR-337 | AR-287 , AR-337 , AR-407 Operation Manual - Page 96
the misfed paper is in the inner part of the exit area: 1 Turn roller rotating knob B in the direction of the arrow and remove the paper. 2 If the misfed paper is deep in the fusing unit, lift the fusing unit tab and remove any misfed paper. CAUTION The fusing unit is hot! Be sure to touch - Sharp AR-337 | AR-287 , AR-337 , AR-407 Operation Manual - Page 97
guide 2 Remove the misfed paper. 1 Open the paper guide, turn roller rotating knob D in the direction of the arrow and remove the misfed paper. Close the paper guide. 2 Remove any misfed paper from the duplex module. l Be careful not to tear the misfed paper during removal. 5-9 COPIER TROUBLE - Sharp AR-337 | AR-287 , AR-337 , AR-407 Operation Manual - Page 98
misfed paper from the section below the exit area. 5 CHAPTER COPIER TROUBLE? Misfeed removal 3 Close the exit area cover. 4 Open and close cover. l If any paper is set in the bypass tray, remove the paper and close the bypass tray before opening the right side cover. Paper feed area open/close - Sharp AR-337 | AR-287 , AR-337 , AR-407 Operation Manual - Page 99
MAINTENANCE REQUIRED When the message “READY TO COPY. (MAINTENANCE REQUIRED)” appears in the message display, service by an authorized Sharp Service Technician will be required soon. Contact your Service Center as soon as possible. 5-11 5 CHAPTER COPIER TROUBLE? Maintenance required - Sharp AR-337 | AR-287 , AR-337 , AR-407 Operation Manual - Page 100
frequently. l Is paper properly installed? See pages 2-14 and 4-2. l Pieces of paper inside copier? l Paper curled or damp? Remove all pieces of misfed paper. See page 5-2. Store copy paper flat in the wrapper in a dry location. See page 4-8. 5 CHAPTER COPIER TROUBLE? Troubleshooting 5-12 - Sharp AR-337 | AR-287 , AR-337 , AR-407 Operation Manual - Page 101
code will appear in the message display. Example Should the copier stop completely, and the message "CALL FOR SERVICE. CODE: " appear in the message display, contact your authorized Sharp Service Center. 5 KEY OPERATOR See page 29 of the KEY OERATOR'S GUIDE. 5-13 COPIER TROUBLE? Troubleshooting - Sharp AR-337 | AR-287 , AR-337 , AR-407 Operation Manual - Page 102
- Sharp AR-337 | AR-287 , AR-337 , AR-407 Operation Manual - Page 103
INFORMATION This chapter describes general information for using this copier. Page q PART NAMES AND FUNCTIONS 6-2 Exterior 6-2 Interior 6-3 Operation panel 6-4 Touch panel (Basic screen 6-5 q USER MAINTENANCE 6-6 q TOUCH PANEL CONTRAST ADJUSTMENT 6-7 q SPECIFICATIONS 6-8 6-1 6 CHAPTER - Sharp AR-337 | AR-287 , AR-337 , AR-407 Operation Manual - Page 104
sheets of 20 lb. bond paper. Front cover Open to remove misfeeds and to service the copier. Handles Right side cover Open to remove misfeeds in the paper feed area. Toner collecting container cover Open to replace the toner collecting container. Document glass All originals which cannot be copied - Sharp AR-337 | AR-287 , AR-337 , AR-407 Operation Manual - Page 105
unit The unit is used to charge the photoconductive drum. Toner hopper Contains toner. Roller rotating knobs Turn to remove misfed paper. Paper guide Push down to remove misfed paper. Accessories Operation manual 1 Key operator's guide 1 Toner collecting containers (including 1 pre-installed - Sharp AR-337 | AR-287 , AR-337 , AR-407 Operation Manual - Page 106
select the job memory mode. CLEAR ( C ) key Press to clear the copy quantity display, or press during a copy run to terminate copying. The copier will stop after copier. Press for guidance when a misfeed occurs, when adding toner, or when used toner must be disposed of. GENERAL INFORMATION Part - Sharp AR-337 | AR-287 , AR-337 , AR-407 Operation Manual - Page 107
OUTPUT key Press to select the finisher mode: SORT or GROUP. SCAN key Press to select the network scanner function. (Optional Printer Expansion Kit and Network Scanner Expansion Kit must be installed.) EXPOSURE display Indicates the selected exposure mode. EXPOSURE key (p. 2-16) Press to select the - Sharp AR-337 | AR-287 , AR-337 , AR-407 Operation Manual - Page 108
USER MAINTENANCE The document glass and the document cover (RADF transport belt) must be kept clean to avoid dirty areas from cloth. q If necessary, dampen the cloth with water. Do not use thinner, benzene, or similar volatile cleaning agents. 6-6 6 CHAPTER GENERAL INFORMATION User maintenance - Sharp AR-337 | AR-287 , AR-337 , AR-407 Operation Manual - Page 109
TOUCH PANEL CONTRAST ADJUSTMENT The contrast of the touch panel can be adjusted as below. 6 CHAPTER 1 Press the CUSTOM SETTINGS key. ETTINGS DISPLAY CONTRAST KEY OPERATOR PROGRAMS 2 Press the "DISPLAY CONTRAST" key on the touch panel. TTINGS ONTRAST 3 Press the "LIGHTER" or "DARKER" key to - Sharp AR-337 | AR-287 , AR-337 , AR-407 Operation Manual - Page 110
system Developer system Light source Resolution Gradation Required power supply AR-287 AR-337 AR-407 Desktop Dry, electrostatic transfer system Sheets, bound documents Reversing automatic document feeder (RADF) Max. 11" x 17" Max. 11" x 17", min. 5-1/2" x 8-1/2" Image loss: Max. 13/64 - Sharp AR-337 | AR-287 , AR-337 , AR-407 Operation Manual - Page 111
Copier dimensions Operating conditions Optional equipment AR-287 AR AR-DE1N) 500-sheet paper drawer (AR-CS1) Dual tray output unit (AR-TR1) Exit tray (AR-TE1) Tandem - connection cable (AR-CA1) Printer expansion kit (AR-PB2A) Printer server card (AR-NC3D) Network scanner expansion kit (AR-NS1) AR - Sharp AR-337 | AR-287 , AR-337 , AR-407 Operation Manual - Page 112
- Sharp AR-337 | AR-287 , AR-337 , AR-407 Operation Manual - Page 113
Tray Output Unit (AR-TR1). Page q SYSTEM CONFIGURATION 7-2 q FINISHER (AR-FN1N 7-3 Part names 7-3 Specifications 7-3 Offset stack 7-4 Sort and group 7-5 Staple sort 7-6 Staple cartridge replacement 7-10 Staple jam removal 7-12 Misfeed removal 7-14 q FINISHER (AR-FN2 7-19 Part names 7-19 - Sharp AR-337 | AR-287 , AR-337 , AR-407 Operation Manual - Page 114
EQUIPMENT 7 System configuration CHAPTER Dual tray output unit (AR-TR1) Exit tray (AR-TE1) Stand/500-sheet paper drawer (AR-DE1N) 500-sheet paper drawer (AR-CS1) 7-2 Printer expansion kit (AR-PB2A) Printer server card (AR-NC3D) Network scanner expansion kit (AR-NS1) Tandem - connection cable - Sharp AR-337 | AR-287 , AR-337 , AR-407 Operation Manual - Page 115
optional finisher (AR-FN1N) is installed, the copier can automatically staple the sorted copies. Each collated set of copies or group of copies can be stacked offset from the previous set. PART NAMES Top tray Top cover Finisher release lever Second tray (not used in the copy mode) Paper feed - Sharp AR-337 | AR-287 , AR-337 , AR-407 Operation Manual - Page 116
FINISHER (AR-FN1N) Offset stack OUTPUT TOP TRAY OFFSET TRAY OFFSET AUTO SO AUTO 8 In pressing the OUTPUT key and then the "OFFSET" check mark box on the touch panel. When the STAPLE SORT mode is selected, the offset stack function will be disabled. The top tray cannot be used to offset copies. To - Sharp AR-337 | AR-287 , AR-337 , AR-407 Operation Manual - Page 117
be grouped in the OFFSET mode as the default setting. OPTIONAL EQUIPMENT 7 Finisher (AR-FN1N) CHAPTER SORT mode 1 2 3 3 mode 3 2 1 3 Collated sets of copies will be stapled and delivered to the 2 1 2 3 offset tray. 1 q See next page for details. 3 2 1 NOTE: Rotation copy (image - Sharp AR-337 | AR-287 , AR-337 , AR-407 Operation Manual - Page 118
FINISHER (AR-FN1N) Staple sort The STAPLE SORT mode staples 8-1/2" x 11", 8-1/2" x 11"R, 8-1/2" x 14", and 11" x 17" size copies. Stapled sets cannot be delivered to the top tray. NOTE: Different size originals cannot be copied onto copy paper of their respective sizes in the STAPLE SORT mode. The - Sharp AR-337 | AR-287 , AR-337 , AR-407 Operation Manual - Page 119
) OPTIONAL EQUIPMENT 7 Finisher (AR-FN1N) CHAPTER OPY.(DOCUMENT FEEDER MODE) OK 4 Select the desired stapling position. q The AR-FN1N finisher has three selectable stapling positions as shown below. STAPLE SORT SORT GROUP READY TO COPY.(DOCUMENT FEEDER MODE) OUTPUT OK TOP TRAY OFFSET TRAY - Sharp AR-337 | AR-287 , AR-337 , AR-407 Operation Manual - Page 120
) OPTIONAL EQUIPMENT 7 Finisher (AR-FN1N) CHAPTER Stapling position Using the document glass 1 Set the original "STAPLE SORT" key on the touch panel. 4 Select the desired stapling position. q The AR-FN1N finisher has three selectable stapling positions as shown below. STAPLE SORT SORT GROUP 7-8 - Sharp AR-337 | AR-287 , AR-337 , AR-407 Operation Manual - Page 121
-FN1N) OPTIONAL EQUIPMENT 7 Finisher (AR-FN1N) CHAPTER READY TO COPY. OUTPUT TOP TRAY OFFSET TRAY 5 Press the "OK" key. 6 Set the number of copies. 7 Press the START key. 8 Remove the finished original with the next original after the START key indicator lights up, and then press the START key - Sharp AR-337 | AR-287 , AR-337 , AR-407 Operation Manual - Page 122
holding the finisher release lever, slide the finisher away from the copier. 2 Turn the stapler unit to face up. 3 Hold the staple box release lever to unlatch the staple box. 4 Remove the staple box. 5 Remove the empty staple cartridge from inside the staple box. 7-10 OPTIONAL EQUIPMENT 7 Finisher - Sharp AR-337 | AR-287 , AR-337 , AR-407 Operation Manual - Page 123
000 staples. 7 Remove the rear paper and tape from the cartridge. q Pull them straight. If they are pulled obliquely, the tape may be torn. 8 Insert the staple box to the stapler unit until it clicks into place. 9 Return the stapler unit to face down. 10 Push the finisher toward the copier and latch - Sharp AR-337 | AR-287 , AR-337 , AR-407 Operation Manual - Page 124
(AR-FN1N) Staple jam removal If staples become jammed in the stapler, "CHECK STAPLER POSITION OR STAPLE JAM." will be displayed. Remove the jammed staples in the manner described below. 1 While holding the finisher release lever, slide the finisher away from the copier. 2 Turn the stapler unit to - Sharp AR-337 | AR-287 , AR-337 , AR-407 Operation Manual - Page 125
FINISHER (AR-FN1N) 6 Return the lever to its original position. 7 Insert the staple box to the stapler unit until it clicks in place. 8 Return the stapler unit to face down. 9 Push the finisher toward the copier and latch it in place. 7-13 OPTIONAL EQUIPMENT 7 Finisher (AR-FN1N) CHAPTER - Sharp AR-337 | AR-287 , AR-337 , AR-407 Operation Manual - Page 126
20-bin sorter A MISFEED HAS OCCURRED. Misfeed in the upper transport area CLEAR INDICATED AREA. PRESS FOR RECOVERY INSTRUCTIONS. 1 While holding the finisher release lever, slide the finisher away from the copier. 2 Remove the misfed paper. OPTIONAL EQUIPMENT 7 Finisher (AR-FN1N) CHAPTER 7-14 - Sharp AR-337 | AR-287 , AR-337 , AR-407 Operation Manual - Page 127
FINISHER (AR-FN1N) 3 If the misfed paper cannot be removed in step 2, open the cover of the paper feed area of the finisher. 4 Remove the misfed paper. 5 If the misfed paper cannot be removed in step 4, close the cover of the paper feed area and open the top cover. 6 Remove the misfed paper. 7 Close - Sharp AR-337 | AR-287 , AR-337 , AR-407 Operation Manual - Page 128
is cleared. OPTIONAL EQUIPMENT 7 Finisher (AR-FN1N) CHAPTER A MISFEED HAS OCCURRED. Misfeed in the lower transport area CLEAR INDICATED AREA. PRESS FOR RECOVERY INSTRUCTIONS. 1 While holding the finisher release lever, slide the finisher away from the copier. 2 Remove the misfed paper from the - Sharp AR-337 | AR-287 , AR-337 , AR-407 Operation Manual - Page 129
FINISHER (AR-FN1N) 3 Open the paper transport area cover of the finisher. 4 Use the transport area lever to open the transport. 5 Remove the misfed paper. 6 Close the transport. 7-17 OPTIONAL EQUIPMENT 7 Finisher (AR-FN1N) CHAPTER - Sharp AR-337 | AR-287 , AR-337 , AR-407 Operation Manual - Page 130
misfed paper. q Remove the misfed paper from the paper transport area. Roller rotating knob q If the misfed paper is not seen in the paper transport area, turn the roller rotating knob to feed the paper. 8 Close the paper transport area cover. 9 Push the finisher toward the copier and latch it - Sharp AR-337 | AR-287 , AR-337 , AR-407 Operation Manual - Page 131
and the second groups copies by original. When an optional finisher (AR-FN2) is installed, the copier can automatically staple the sorted copies. Each collated set of copies or group of copies can be stacked offset from the previous set. PART NAMES Top tray Top cover OPTIONAL EQUIPMENT 7 Finisher - Sharp AR-337 | AR-287 , AR-337 , AR-407 Operation Manual - Page 132
top tray cannot be used to offset copies. 3 2 1 3 2 1 1 11 1 12 1 1 OFFSET mode When copying in the SORT mode, each collated set of copies will be stacked offset a minimum of 61/64 inch from the previous set. When copying in the GROUP mode, copies will be offset and stacked in groups of multiple - Sharp AR-337 | AR-287 , AR-337 , AR-407 Operation Manual - Page 133
is used for copying, copies will be grouped at the default setting. q In the STAPLE SORT mode, only 8-1/2" x 11" paper can be used. OPTIONAL EQUIPMENT 7 Finisher (AR-FN2) CHAPTER SORT mode 1 2 3 Each set of copies will be sequentially delivered to the 3 2 1 1 2 offset tray or the top tray - Sharp AR-337 | AR-287 , AR-337 , AR-407 Operation Manual - Page 134
STAPLE SORT mode. Stapling position Using the RADF 1 Set the originals in the document feeder tray. q If the number of copies in one set is more than 30, the copies will not be stapled. q If the orientation of the originals does not match that of the copy paper, the images of the - Sharp AR-337 | AR-287 , AR-337 , AR-407 Operation Manual - Page 135
OPTIONAL EQUIPMENT 7 Finisher (AR-FN2) CHAPTER READY TO COPY.(DOCUMENT FEEDER MODE) OUTPUT OK TOP TRAY OFFSET TRAY STAPLE SORT SORT GROUP AUTO EXPOSURE AUTO 81/2 11 PAPER SELECT 100% COPY RATIO 1 2 3 INTERRUPT 456 78 AUDIT CLEAR 0 9 - Sharp AR-337 | AR-287 , AR-337 , AR-407 Operation Manual - Page 136
the orientation of the original does not match that of the copy paper, the image of the original will be rotated. The stapling position in this case is will be stapled at an improper position. OPTIONAL EQUIPMENT 7 Finisher (AR-FN2) CHAPTER 2 Press the OUTPUT key. AUTO EXPOSURE READY TO COPY - Sharp AR-337 | AR-287 , AR-337 , AR-407 Operation Manual - Page 137
FINISHER (AR-FN2) 1 2 3 INTERRUPT 456 78 AUDIT CLEAR 0 9 CLEAR PROGRAM C P INTERRUPT CLEAR ALL CA CLEAR C START 5 Set the number of copies. q If and each set of copies will be automatically stapled and delivered to the offset tray. OPTIONAL EQUIPMENT 7 Finisher (AR-FN2) CHAPTER 7-25 - Sharp AR-337 | AR-287 , AR-337 , AR-407 Operation Manual - Page 138
as follows: 1 Open the stapler cover. OPTIONAL EQUIPMENT 7 Finisher (AR-FN2) CHAPTER 2 Lift the green release lever and remove the staple cartridge from the stapler. q A few staples will be left in the cartridge. Remove and discard them. 3 Insert a new sheet of paper (8-1/2" x 11" or A4 size - Sharp AR-337 | AR-287 , AR-337 , AR-407 Operation Manual - Page 139
If there are sufficient staples left in the cartridge, the stapler is jammed. Remove the jammed staples in the manner described below. 1 Close and open the stapler cover. 2 Remove all copies from the tray. OPTIONAL EQUIPMENT 7 Finisher (AR-FN2) CHAPTER 3 Insert a new sheet of paper (8-1/2" x 11 - Sharp AR-337 | AR-287 , AR-337 , AR-407 Operation Manual - Page 140
FINISHER (AR-FN2) Misfeed removal A MISFEED HAS OCCURRED. CLEAR INDICATED AREA. PRESS FOR RECOVERY INSTRUCTIONS. The copier will stop when a misfeed occurs. The message "A MISFEED HAS OCCURRED. CLEAR INDICATED AREA. PRESS FOR RECOVERY INSTRUCTIONS." will appear along with a display of paper - Sharp AR-337 | AR-287 , AR-337 , AR-407 Operation Manual - Page 141
FINISHER (AR-FN2) 5 Remove the misfed paper. 6 Rotate the paper feed area cover as shown to open it. 7 Remove the misfed paper. 8 Open the paper guide and remove the misfed paper. 9 Close the paper feed area cover and then close the top cover. 10 Push the finisher toward the copier and latch it in - Sharp AR-337 | AR-287 , AR-337 , AR-407 Operation Manual - Page 142
be installed. PART NAMES Paper tray control button OPTIONAL EQUIPMENT Large capacity tray (AR-LC1N) 7 CHAPTER Specifications Paper size 8-1/2" x 11" Paper weight 15 lbs. to 28 lbs. Paper capacity 3,000 sheets Weight Approx. 70.6 lbs. (32 kg) Dimensions 13" (W) x 21-17/64" (D) x 22-61/64 - Sharp AR-337 | AR-287 , AR-337 , AR-407 Operation Manual - Page 143
-LC1N) OPTIONAL EQUIPMENT 7 Large capacity tray (AR-LC1N) CHAPTER Loading copy paper The large capacity tray will automatically lower when the tray runs out of paper. 1 Press the paper tray control button - Sharp AR-337 | AR-287 , AR-337 , AR-407 Operation Manual - Page 144
LARGE CAPACITY TRAY (AR-LC1N) Misfeed removal A MISFEED HAS OCCURRED. CLEAR INDICATED AREA. PRESS FOR RECOVERY INSTRUCTIONS. The copier will stop when a misfeed occurs. The message "A MISFEED HAS OCCURRED. CLEAR INDICATED AREA. PRESS FOR RECOVERY INSTRUCTIONS." will appear with a display of paper - Sharp AR-337 | AR-287 , AR-337 , AR-407 Operation Manual - Page 145
TRAY (AR-LC1N) 3 Push the large capacity tray toward the copier and latch it into place. 4 If misfed paper is not found in step 2, pull the tray out. q When pulling the large capacity tray out, be sure to pull it out after the paper tray control button lamp goes out. 5 Remove the misfed - Sharp AR-337 | AR-287 , AR-337 , AR-407 Operation Manual - Page 146
Total of 1,000 sheets of 20 lb. bond paper with an optional 500-sheet paper drawer installed Weight Approx. 55.2 lbs. (25 kg) Dimensions 23-5/8" (W) x 23-25/32" (D) x 15-7/8" (H) (600 mm (W) x 604 mm (D) x 403 mm (H)) Specifications are subject to change for improvement without notice. 7-34 - Sharp AR-337 | AR-287 , AR-337 , AR-407 Operation Manual - Page 147
STAND/500-SHEET PAPER DRAWER (AR-DE1N) Loading copy paper The method of loading of copy paper for the paper tray of the 500sheet paper drawer is the same as for the paper trays in the copier. See page 4-3. The method of changing the copy paper size is also the same for the - Sharp AR-337 | AR-287 , AR-337 , AR-407 Operation Manual - Page 148
STAND/500-SHEET PAPER DRAWER (AR-DE1N) Misfeed removal A MISFEED HAS OCCURRED. CLEAR INDICATED AREA. PRESS FOR RECOVERY INSTRUCTIONS. The copier will stop when a misfeed occurs. The message "A MISFEED HAS OCCURRED. CLEAR INDICATED AREA. PRESS FOR RECOVERY INSTRUCTIONS." will appear with a display - Sharp AR-337 | AR-287 , AR-337 , AR-407 Operation Manual - Page 149
TRAY OUTPUT UNIT (AR-TR1) This optional unit can deliver interrupt copies to the lower exit tray. PART NAMES Upper exit tray (AR-TE1) Lower exit tray (AR-TE1) tray in interrupt copying. See page 26 of the KEY OPERATOR'S GUIDE. q Be sure to extend the tray when feeding 8-1/2" x 14" or 11" x - Sharp AR-337 | AR-287 , AR-337 , AR-407 Operation Manual - Page 150
Upper tray : 14 lbs. to 34 lbs. Lower tray : 15 lbs. to 28 lbs. Power supply Drawn from the copier Weight Approx. 7.3 lbs. (3.3 kg) Specifications are subject to change for improvement without notice. OPTIONAL EQUIPMENT Dual tray output unit (AR-TR1) 7 CHAPTER 7-38 2000B DSC1 CINSE1949FC51 - Sharp AR-337 | AR-287 , AR-337 , AR-407 Operation Manual - Page 151
any warranties, either express or implied, directly to you, the end-user and no one is authorized to make any representations or warranties on behalf of Sharp. Specifically, SHARP DOES NOT EXTEND TO YOU, THE END-USER, ANY EXPRESS WARRANTY OR ANY IMPLIED WARRANTY OF MERCHANTABILITY, FITNESS FOR USE - Sharp AR-337 | AR-287 , AR-337 , AR-407 Operation Manual - Page 152
AR-287/AR-337/AR-407 SHARP ELECTRONICS CORPORATION Sharp Plaza, Mahwah, New Jersey 07430-2135. SHARP CORPORATION PPRRININTTEEDDININJJAAPPAANN 0200B00B DSC11 CCIINNSSEE11994499FFCC5511
-
 1
1 -
 2
2 -
 3
3 -
 4
4 -
 5
5 -
 6
6 -
 7
7 -
8
-
9
-
10
-
11
-
12
-
13
-
14
-
15
-
16
-
17
-
18
-
19
-
20
-
21
-
22
-
23
-
24
-
25
-
26
-
27
-
28
-
29
-
30
-
31
-
32
-
33
-
34
-
35
-
36
-
37
-
38
-
39
-
40
-
41
-
42
-
43
-
44
-
45
-
46
-
47
-
48
-
49
-
50
-
51
-
52
-
53
-
54
-
55
-
56
-
57
-
58
-
59
-
60
-
61
-
62
-
63
-
64
-
65
-
66
-
67
-
68
-
69
-
70
-
71
-
72
-
73
-
74
-
75
-
76
-
77
-
78
-
79
-
80
-
81
-
82
-
83
-
84
-
85
-
86
-
87
-
88
-
89
-
90
-
91
-
92
-
93
-
94
-
95
-
96
-
97
-
98
-
99
-
100
-
101
-
102
-
103
-
104
-
105
-
106
-
107
-
108
-
109
-
110
-
111
-
112
-
113
-
114
-
115
-
116
-
117
-
118
-
119
-
120
-
121
-
122
-
123
-
124
-
125
-
126
-
127
-
128
-
129
-
130
-
131
-
132
-
133
-
134
-
135
-
136
-
137
-
138
-
139
-
140
-
141
-
142
-
143
-
144
-
145
-
146
-
147
-
148
-
149
-
150
-
151
-
152
 |
 |
•
GETTING STARTED
•
MAKING COPIES
•
SPECIAL FUNCTIONS
•
SUPPLIES
•
COPIER TROUBLE?
•
GENERAL
INFORMATION
•
OPTIONAL EQUIPMENT
1-1
2-1
3-1
4-1
5-1
6-1
7-1
DIGITAL COPYING MACHINE
OPERATION MANUAL
Page
AR-407
AR-287/AR-337
MODEL
AR-287
AR-337
AR-407