Sharp AR M550N AR-M550 AR-M620 AR-M700 Operation Manual - Page 42
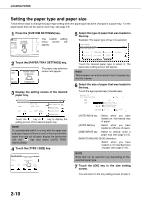
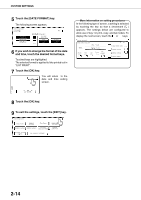
Touch the [DATE FORMAT] key., Touch the [OK] key.
 |
View all Sharp AR M550N manuals
Add to My Manuals
Save this manual to your list of manuals |
Page 42 highlights
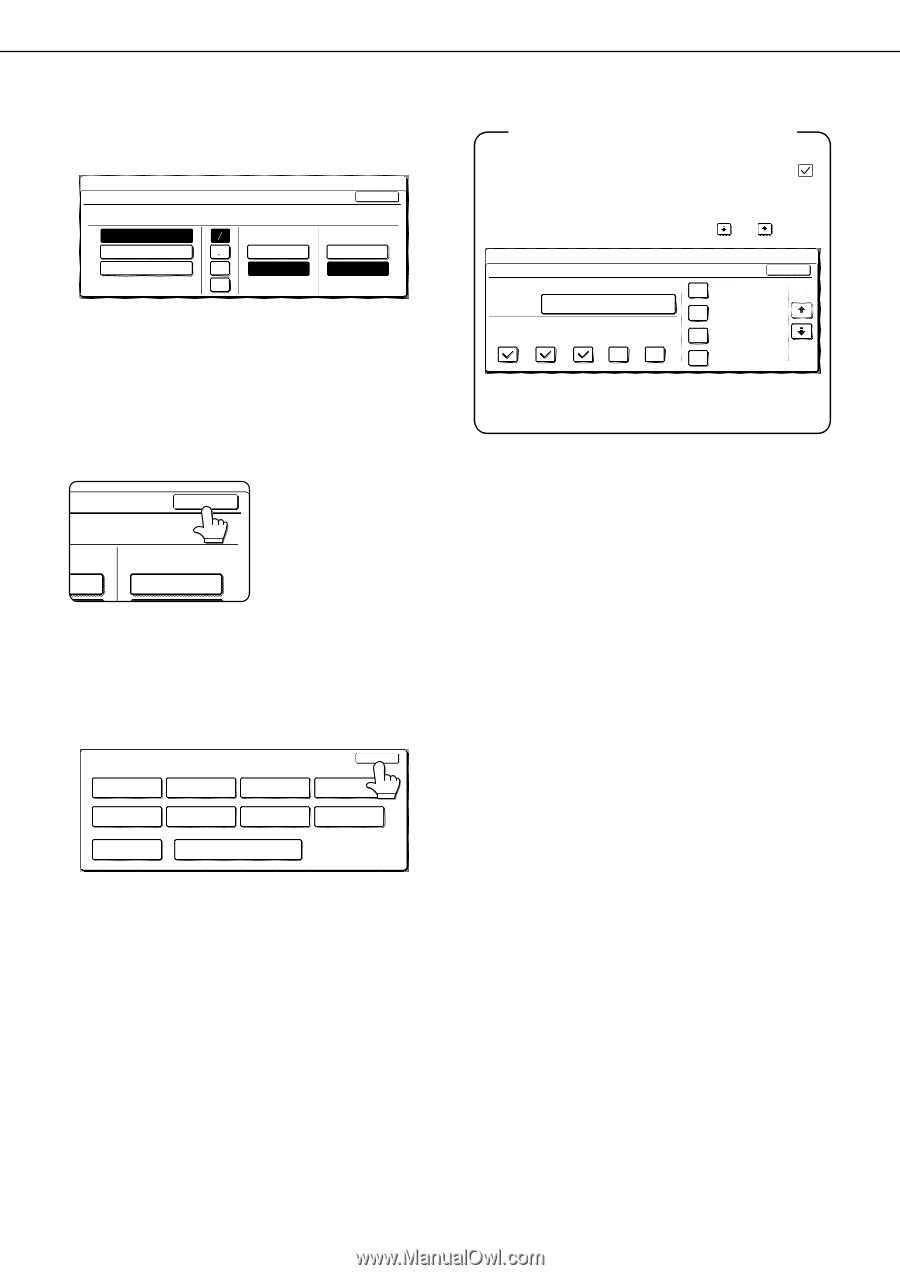
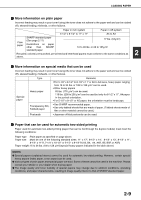
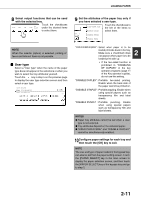
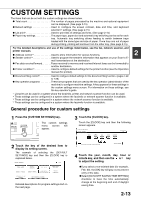
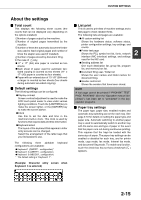
CUSTOM SETTINGS 5 Touch the [DATE FORMAT] key. The following screen appears. CUSTOM SETTINGS DATE FORMAT YYYY/MM/DD MM/DD/YYYY DD/MM/YYYY 2003/10/20/MON 14:27 DAY-NAME POSITION FIRST LAST OK 12-HOUR 24-HOUR 6 If you wish to change the format of the date and time, touch the desired format keys. Touched keys are highlighted. The selected format is applied to lists printed out in "LIST PRINT". 7 Touch the [OK] key. You will return to the OK date and time setting screen. ME ON T 12-HOUR 8 Touch the [OK] key. 9 To exit the settings, touch the [EXIT] key. CUSTOM SETTINGS EXIT TOTAL COUNT DEFAULT SETTINGS LIST PRINT FAX DATA ADDRESS CONTROL SENDER CONTROL RECEIVE/FORWARD DOCUMENT FILING CONTROL KEY OPERATOR PROGRAMS PAPER TRAY SETTINGS PRINTER CONDITION More information on setting procedures In the following type of screen, a setting is selected by touching the key so that a checkmark ( ) appears. The settings below are configured to allow use of tray 1 in print, copy, and fax modes. To display the next screen, touch the or keys. CUSTOM SETTINGS PAPER TRAY SETTINGS TYPE / SIZE TRAY1 PLAIN / 81/2X11 PRINT COPY DOC. FAX I-FAX FILING OK FIXED PAPER SIDE 1/8 DISABLE DUPLEX DISABLE STAPLE DISABLE PUNCH 2-14
-
 1
1 -
2
-
3
-
4
-
5
-
6
-
7
-
8
-
9
-
10
-
11
-
12
-
13
-
14
-
15
-
16
-
17
-
18
-
19
-
20
-
21
-
22
-
23
-
24
-
25
-
26
-
27
-
28
-
29
-
30
-
31
-
32
-
33
-
34
-
35
-
36
-
 37
37 -
 38
38 -
 39
39 -
 40
40 -
 41
41 -
 42
42 -
 43
43 -
 44
44 -
 45
45 -
 46
46 -
 47
47 -
48
-
49
-
50
-
51
-
52
-
53
-
54
-
55
-
56
-
57
-
58
-
59
-
60
-
61
-
62
-
63
-
64
-
65
-
66
-
67
-
68
-
69
-
70
-
71
-
72
-
73
-
74
-
75
-
76
-
77
-
78
-
79
-
80
-
81
-
82
-
83
-
84
-
85
-
86
-
87
-
88
-
89
-
90
-
91
-
92
-
93
-
94
-
95
-
96
-
97
-
98
-
99
-
100
-
101
-
102
-
103
-
104
-
105
-
106
-
107
-
108
-
109
-
110
-
111
-
112
-
113
-
114
-
115
-
116
-
117
-
118
-
119
-
120
-
121
-
122
-
123
-
124
-
125
-
126
-
127
-
128
-
129
-
130
-
131
-
132
-
133
-
134
-
135
-
136
-
137
-
138
-
139
-
140
-
141
-
142
-
143
-
144
-
145
-
146
-
147
-
148
-
149
-
150
-
151
-
152
-
153
-
154
-
155
-
156
-
157
-
158
-
159
-
160
-
161
-
162
-
163
-
164
-
165
-
166
-
167
-
168
-
169
-
170
-
171
-
172
 |
 |