Sharp MX-B201D MX-B201D Operation Guide
Sharp MX-B201D Manual
 |
View all Sharp MX-B201D manuals
Add to My Manuals
Save this manual to your list of manuals |
Sharp MX-B201D manual content summary:
- Sharp MX-B201D | MX-B201D Operation Guide - Page 1
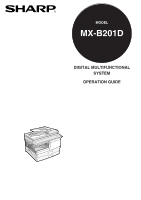
MODEL MX-B201D DIGITAL MULTIFUNCTIONAL SYSTEM OPERATION GUIDE - Sharp MX-B201D | MX-B201D Operation Guide - Page 2
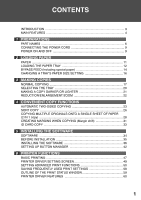
SHEET OF PAPER (2 IN 1 copy 28 CREATING MARGINS WHEN COPYING (Margin shift 31 ID CARD COPY 33 5 INSTALLING THE SOFTWARE SOFTWARE 34 BEFORE INSTALLATION 35 INSTALLING THE SOFTWARE 36 SETTING UP BUTTON MANAGER 42 6 PRINTER FUNCTIONS BASIC PRINTING 47 PRINTER DRIVER SETTING SCREEN 49 SETTING - Sharp MX-B201D | MX-B201D Operation Guide - Page 3
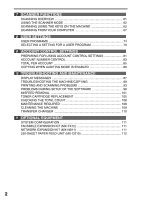
ACCOUNT CONTROL SETTINGS 81 ACCOUNT NUMBER CONTROL 83 TOTAL PER ACCOUNT 85 COPYING WHEN AUDITING MODE IS ENABLED 86 10 TROUBLESHOOTING AND MAINTENANCE DISPLAY MESSAGES 87 TROUBLESHOOTING THE MACHINE/COPYING 89 PRINTING AND SCANNING PROBLEMS 93 PROBLEMS DURING SETUP OF THE SOFTWARE 98 MISFEED - Sharp MX-B201D | MX-B201D Operation Guide - Page 4
how to use it as a copier. Also explains how to install the software that allows the machine to be used as a printer and scanner for your computer. Start Guide This manual covers the procedures for setup and the safety relations. Operation guide for fax (for the models with the MX-FX12 option) This - Sharp MX-B201D | MX-B201D Operation Guide - Page 5
document glass with the polygon rotating in the copy ready state and "LSU SETTING" set to ON in the user programs (8-1/2" x 11", paper fed from paper tray). *2 When user program 24 is set to OFF. High-quality digital image • High-quality copying at 600 dpi is performed. • In addition to automatic - Sharp MX-B201D | MX-B201D Operation Guide - Page 6
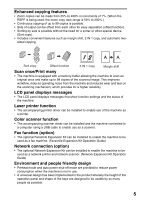
image. This improves workflow, reduces operating fax machine. (Facsimile Expansion Kit Operation Guide) Network connection (option) • The optional Network Expansion Kit can be installed to enable the machine to be used as a network printer and network scanner. (Network Expansion Kit Operation Guide - Sharp MX-B201D | MX-B201D Operation Guide - Page 7
tray Bypass tray 17 Toner cartridge USB connector 8 9 10 11 12 12 13 1 Document glass 2 Operation panel 3 Front cover 4 Paper tray 5 Side cover 6 Side cover open button 7 Bypass tray paper guides 8 Original output tray extension 9 Paper output tray Photoconductive drum 5 14 3 15 16 10 Paper - Sharp MX-B201D | MX-B201D Operation Guide - Page 8
mode lights (copy, printer, scanner, fax mode indicators). 2 Display This shows messages indicating the machine status and any problems that occur, as well as user programs and function setting menus. 3 Numeric keys Use these to enter the number of copies and other numerical settings. The keys can - Sharp MX-B201D | MX-B201D Operation Guide - Page 9
pressed to return to normal operation from auto power shut-off mode. 18 Shows the current copy ratio. 19 Shows the selected paper size. 20 Shows the number of copies that has been entered with the numeric keys. 21 A checkmark " " appears when the exposure has been changed, or when two-sided copying - Sharp MX-B201D | MX-B201D Operation Guide - Page 10
when no keys are pressed for the preset "AUTO CLEAR" time following the end of a copy job. When the machine reverts to the initial settings, all settings and functions selected to that point are cancelled. The "AUTO CLEAR" can be changed in the user programs. (p.74) When in the copy mode READY TO - Sharp MX-B201D | MX-B201D Operation Guide - Page 11
a long time, turn off the power switch and remove the power cord from the outlet. Check the following to make sure the machine is not in operation: • key again, however, the scan size set in "CHANGING A TRAY'S PAPER SIZE SETTING" (p.16) or "VALID COPY WIDTH" (program number 25) (p.77) will be used. - Sharp MX-B201D | MX-B201D Operation Guide - Page 12
one (106 g/m2 to sheet at a 128 g/m2)*3 time in the bypass tray. *1 The number of sheets of paper that can be loaded varies depending on the weight of the paper. *2 Do not use non-standard envelopes or envelopes that have metal clasps, plastic snappers, strings, windows, linings, self-adhesive - Sharp MX-B201D | MX-B201D Operation Guide - Page 13
, feed each sheet one at a time using the bypass tray (do not attempt continuous copying or printing). ● There are many varieties of special paper available on the market, and some cannot be used with this machine. Before using special paper, contact your authorised service representative. ● Before - Sharp MX-B201D | MX-B201D Operation Guide - Page 14
machine. • If you loaded a different size of paper than was loaded previously in the tray, go to "CHANGING A TRAY'S PAPER SIZE SETTING" (p.16) • When not using the machine for an extended period, remove all paper from the paper tray and store it in a dry place. If paper is left in the machine for an - Sharp MX-B201D | MX-B201D Operation Guide - Page 15
added must be the same size and type as the paper already in the tray. • Do not use paper that is smaller than the original. This may cause smudges or unclean images. • Do not use paper that has already been printed on by a laser printer or plain paper fax machine. This may cause smudges or unclean - Sharp MX-B201D | MX-B201D Operation Guide - Page 16
1 right of the tray until they click. 2 Set the bypass tray paper guides to the paper width. Insert the paper (print face down) all the way into the bypass tray. 3 Press the [TRAY SELECT] key ( Print face ) to select the bypass tray. Note for loading thick paper Confirm that user program 29 is - Sharp MX-B201D | MX-B201D Operation Guide - Page 17
paper size changes as follows each time the [ ] key ( ) or [ ] key ( ) is pressed: "8.5 x 14"→"8.5 x 13"→"8.5 x 11"→"5.5 x 8.5"→ "A4"→"B5"→"A5". TRAY1 1:8.5x11 When you have finished configuring the tray's paper size setting, press the [MENU] key. 4 Squeeze the lock lever of the front guide and - Sharp MX-B201D | MX-B201D Operation Guide - Page 18
will not be copied (image loss). For the image loss, see the START GUIDE. 1 Open the document cover cover/RSPF. 3 mark 4 Select the number of copies and other copy settings, and then press the [START] key key ( ). • For the copy settings, see pages 20 through 32. Copying books or originals with - Sharp MX-B201D | MX-B201D Operation Guide - Page 19
tray, be sure to remove any staples or paper clips from them. • When a copy is made, the edges will not be copied (image loss). For the image loss, see the START GUIDE guides to the size of the originals. 3 Set the original(s) face up in the document feeder tray. The RSPF indicator on the operation - Sharp MX-B201D | MX-B201D Operation Guide - Page 20
, pull out the paper output tray extension. Paper holder arm The paper output tray has a paper holder arm. The paper holder arm presses gently on the output paper to stack it (p.6). After removing paper, if you need to return the paper to the paper output tray, lift up the paper holder arm and place - Sharp MX-B201D | MX-B201D Operation Guide - Page 21
[CLEAR] key ( ) and enter the correct number. SELECTING THE TRAY Press the [TRAY SELECT] key ( ). Each time, you press the [TRAY SELECT] key ( ), the location indicated by the tray location indicator changes in the following order : paper tray→lower paper tray (when the 250-sheet paper feed unit is - Sharp MX-B201D | MX-B201D Operation Guide - Page 22
changed with "AE LEVEL ADJUST" in the user original type. The original image type changes as follows each time the [EXPOSURE ( )] image, press the [ ] key ( ). For a lighter image, press the [ ] key ( ). TEXT | | | | | 4 Press the [OK] key. 5 Select the number of copies and any other copy settings - Sharp MX-B201D | MX-B201D Operation Guide - Page 23
quickly change as follows each time changing at each of the preset ratios. To continue changing the ratio, release the key and then hold it down again. 4 Select the number of copies and any other copy settings, and then press the [START] key ( ). The copy will be delivered to the paper output tray - Sharp MX-B201D | MX-B201D Operation Guide - Page 24
sheet of paper. This function also helps conserve paper. tray can only be used when making one-sided copies from twosided originals. When performing automatic two-sided copying of one-sided originals, the orientation of the copied image can be selected according to the binding position of the paper - Sharp MX-B201D | MX-B201D Operation Guide - Page 25
paper image, press the [ ] key. 5 Replace the original with the next original and close the RSPF, and then press the [START] key ( ). Repeat step 5 until all originals have been scanned. Copies will be output each time two originals have been scanned. When the number number of copies setting is - Sharp MX-B201D | MX-B201D Operation Guide - Page 26
selected: "8.5 x 14", "8.5 x 13", "8.5 x 11", "5.5 x 8.5", "A4", "B5","A5" ORIG. SIZE ENTER 5.5x8.5 5 Select the number of copies and any other settings, and then press the [START] key ( ). The copy will be delivered to the paper output tray. To cancel automatic two-sided copying, press the [CLEAR - Sharp MX-B201D | MX-B201D Operation Guide - Page 27
pages can be sorted into sets. The number of pages that can be scanned varies depending on the original type (photo, text, etc.) and the amount of memory allocated to the printer. The amount of memory allocated to the printer can be changed with "MEM. FOR PRINTER" in the user programs. (p.76 - Sharp MX-B201D | MX-B201D Operation Guide - Page 28
is disabled, the default output mode will be number of copies and any other settings, and then press the [START] key ( ). The copies are delivered to the paper output tray set of copies in the paper output tray for easy separation. The offset function can be changed with "OFFSET FUNCTION" in the user - Sharp MX-B201D | MX-B201D Operation Guide - Page 29
sheet of paper helps conserve paper. Pattern 1 Pattern 2 • An appropriate ratio setting will be paper size. • 2 IN 1 copying cannot be used in combination with the margin shift copying. • The 2 IN 1 layout pattern can be changed with "LAYOUT IN 2IN1" in the user programs (p.75). • The bypass tray - Sharp MX-B201D | MX-B201D Operation Guide - Page 30
] key. The following original sizes can be selected: "8.5 x 14", "8.5 x 13", "8.5 x 11", "5.5 x 8.5", "A4", "B5", "A5" ORIG. SIZE ENTER 5.5x8.5 5 Set the number of copies and any other settings, and then press the [START] key ( ). "[START] : NEXT SCAN [#] : START PRINT" appears and the original is - Sharp MX-B201D | MX-B201D Operation Guide - Page 31
be selected: "8.5 x 14", "8.5 x 13", "8.5 x 11", "5.5 x 8.5", "A4", "B5","A5" ORIG. SIZE ENTER 5.5x8.5 5 Select the number of copies and other settings, and press the [START] key ( ). The copy is delivered to the paper output tray. • To cancel 2 IN 1 copying, press the [CLEAR] key ( ). • To cancel - Sharp MX-B201D | MX-B201D Operation Guide - Page 32
paper approximately 10 mm. As shown below, LONG EDGE or SHORT EDGE can be selected. AB RSPF SHORT EDGE LONG EDGE AB AB Margin Margin Copy AB Document glass Original • This feature cannot be used with the 2 IN 1 feature. • The margin width can be changed with "MARGIN WIDTH" in the user - Sharp MX-B201D | MX-B201D Operation Guide - Page 33
For the margin position, see the previous page. MARGIN SHIFT LONG EDGE 5 Select the number of copies and other settings, and then press the [START] key ( ). The copy is delivered to the paper output tray. • To cancel margin shift copying, press the [CLEAR] key ( ). • To cancel margin shift, press - Sharp MX-B201D | MX-B201D Operation Guide - Page 34
A5R can only be used in bypass tray.) • The image may cut off even if using standard paper size. • In ID card copy mode, scan area and scan number (1 page) cannot be changed. Scan area is: X: 2-1/8" + 1/4" (54 + 5 mm) (margin), Y: 3-3/8" + 3/8" (86 + 10 mm) (top margin 1/4" (5 mm) and bottom margin - Sharp MX-B201D | MX-B201D Operation Guide - Page 35
of Windows, some screen images may be different from those in this manual. • This manual refers to the CD-ROM that accompanied the machine simply as "CD-ROM". SOFTWARE The CD-ROM that accompanies the machine contains the following software: MFP driver Printer driver The printer driver enables - Sharp MX-B201D | MX-B201D Operation Guide - Page 36
environment and usable software The following table shows the drivers and software that can be installed for each version of Windows and interface connection method. Cable Operating system USB Windows 2000/XP/Vista/7 MFP Driver Printer driver Scanner driver Button Manager Sharpdesk - Sharp MX-B201D | MX-B201D Operation Guide - Page 37
images may be different from those in this manual. • In the following explanations it is assumed that the mouse is configured for right hand operation. • The scanner feature only works when using a USB cable. • If an error message appears, follow the instructions on the screen to solve the problem - Sharp MX-B201D | MX-B201D Operation Guide - Page 38
. Follow the on-screen instructions. • If you are using Windows Vista/7 and a security warning window appears, be sure to click "Install this driver software anyway". • If you are running Windows 2000/XP and a warning message appears regarding the Windows logo test or digital signature, be sure to - Sharp MX-B201D | MX-B201D Operation Guide - Page 39
appears, be sure to click "Install this driver software anyway". • If you are running Windows 2000/XP and a warning message appears regarding the Windows logo test or digital signature, be sure to click "Continue Anyway" or "Yes". A message will appear instructing you to connect the machine to your - Sharp MX-B201D | MX-B201D Operation Guide - Page 40
this driver software anyway". • If you are running Windows 2000/XP and a warning message appears regarding the Windows logo test or digital signature, be sure to click "Continue Anyway" or "Yes". This completes the installation of the software. • If you installed Button Manager, set up Button - Sharp MX-B201D | MX-B201D Operation Guide - Page 41
THE SOFTWARE Using the machine as a shared printer If the machine will be used as a shared printer on a network, follow these steps to install the printer driver in the client computer. To configure the appropriate settings in the print server, see the operation manual or help file of your operating - Sharp MX-B201D | MX-B201D Operation Guide - Page 42
network printer that is shared and whether the machine is to be used as the default printer, make the selections and click the "Next" button. Follow the on-screen instructions. • If you are using Windows Vista/7 and a security warning window appears, be sure to click "Install this driver software - Sharp MX-B201D | MX-B201D Operation Guide - Page 43
, click "Control Panel", click "Printers and Other Hardware", and then click "Scanners and Cameras". On Windows Vista/7, click the "Start" button, select "Control Panel" and click "Hardware and Sound", and then click "Scanners and Cameras". 2 Click the "SHARP MX-XXXX" icon and select "Properties - Sharp MX-B201D | MX-B201D Operation Guide - Page 44
scan menu (1 through 6). The scan settings for each of scan menu 1 through 6 can be changed with the setting window of Button Manager. For the factory default settings of the scan menu and the procedures for configuring Button Manager settings, see "Button Manager Settings" in the Online Manual. 43 - Sharp MX-B201D | MX-B201D Operation Guide - Page 45
THE SOFTWARE Windows 2000 1 Click the "Start" button, select "Settings", and then click "Control Panel". 2 Double-click the "Scanners and Cameras" icon. 3 Select "SHARP MX-XXXX" and click the "Properties" button. 4 In the "Properties" screen, click the "Events" tab. 5 Select "SC1:" from the "Scanner - Sharp MX-B201D | MX-B201D Operation Guide - Page 46
THE SOFTWARE 6 Select "Sharp Button settings for each of scan menus 1 through 6 can be changed with the setting window of Button Manager. For the factory default settings of the scan menu and the procedures for configuring Button Manager settings, see "Button Manager Settings" in the Online Manual - Sharp MX-B201D | MX-B201D Operation Guide - Page 47
auto clear time varies with a user program setting. See "USER PROGRAMS" (p.74). • Preheat mode and auto power shut-off mode will be cancelled when printing is started. • If the paper size specified from the software application is larger than the paper size in the printer, part of the image that is - Sharp MX-B201D | MX-B201D Operation Guide - Page 48
printing, make sure that the correct size of paper for your document has been loaded in the software application. 3 Make sure that "SHARP MX-xxxx" is selected as the printer. If you need to change any print settings, click the "Preferences" button to open the printer driver setup screen. MX Windows - Sharp MX-B201D | MX-B201D Operation Guide - Page 49
button You can open the printer driver and change the printer driver settings from the Windows "Start" button. Settings adjusted in this way will be the initial settings when you print from an application. (If you change the settings from the printer driver setup screen at the time of printing, the - Sharp MX-B201D | MX-B201D Operation Guide - Page 50
that can be selected in the printer driver setup screen. When a restriction is in effect, an information icon ( ) will appear next to the setting. Click the icon to view an explanation of the restriction. 1 2 3 4 5 6 7 8 9 10 The settings and the image of the machine will vary depending - Sharp MX-B201D | MX-B201D Operation Guide - Page 51
procedure for printing and the steps for opening the printer driver, see "BASIC PRINTING" (p.47). Printing multiple pages on one page (N-Up Printing) This function can be used to reduce the print image and print multiple pages on a single sheet of paper. This is convenient when you want to print - Sharp MX-B201D | MX-B201D Operation Guide - Page 52
Click the "Main" tab in the printer driver setup screen. 2 Select the number of pages per sheet. If you wish to print borderlines, check the "Border" box. 3 Select the order of the pages. Fitting the printed image to the paper (Fit To Paper Size) The printer driver can adjust the size of the printed - Sharp MX-B201D | MX-B201D Operation Guide - Page 53
paper (Fit To Paper Size) ABCD Rotating the print image 180 degrees (Rotate 180 degrees) The feature rotates the image 180 degrees so that it can be printed correctly on paper that can only be loaded in one orientation (such as envelopes). ABCD 1 Click the "Main" tab in the printer driver setup - Sharp MX-B201D | MX-B201D Operation Guide - Page 54
" is selected. 1 Click the "Paper" tab in the printer driver setup screen. 2 Select "Zoom" and click the "Settings" button. The actual paper size to be used for printing can be selected from the pop-up menu. 3 Select the zoom ratio. Directly enter a number or click the button to change the ratio in - Sharp MX-B201D | MX-B201D Operation Guide - Page 55
faint can be printed in black. (Raster data such as bitmap images cannot be adjusted.) This allows you to bring out color text and lines that are faint and difficult to see. ABCD ABCD 1 Click the "Advanced" tab in the printer driver setup screen. 2 Check the "Text To Black" box and/or the "Vector - Sharp MX-B201D | MX-B201D Operation Guide - Page 56
be used for simple corrections when you do not have image editing software installed on your computer. 1 Click the "Advanced" tab in the printer driver setup screen. 2 Click the "Image Adjustment" button. 3 Adjust the image settings. To adjust a setting, drag the slide bar or click the or button. 55 - Sharp MX-B201D | MX-B201D Operation Guide - Page 57
the printed image as a watermark. The size, density, and angle of the watermark text can be adjusted. The text can be selected from a pre-stored list, or entered to create an original watermark. 1 Click the "Watermarks" tab in the printer driver setup screen. 2 Select the watermark settings. Select - Sharp MX-B201D | MX-B201D Operation Guide - Page 58
Paper orientation Printing result 2-Sided (Book) 2-Sided (Tablet) Portrait Landscape 2-Sided (Book) 2-Sided (Tablet) The pages are printed so that they can be bound at the side. The pages are printed so that they can be bound at the top. 1 Click the "Main" tab in the printer driver setup - Sharp MX-B201D | MX-B201D Operation Guide - Page 59
name makes it easy to select those settings the next time you need to use them. Saving settings at the time of printing (User Settings) Settings can be saved from any tab of the printer driver properties window. Settings configured on each tab are listed at the time of saving, allowing you to check - Sharp MX-B201D | MX-B201D Operation Guide - Page 60
icon The status icons appear to alert you to printer errors. Nothing appears when printing is taking place normally. The icons are explained below. Follow the instructions in the status window to solve the problem. Icon Print Status An error has occurred that requires immediate attention. An - Sharp MX-B201D | MX-B201D Operation Guide - Page 61
Tablet) 1-Sided Image Orientation Paper Size Portrait/ 20 characters each - *1 Will be reduced to letter size or the specified size before printing. *2 This initial setting may vary depending on your operating user programs. For information on each setting, see Help in the printer driver setup - Sharp MX-B201D | MX-B201D Operation Guide - Page 62
's operation panel, you must first install Button Manager and establish the appropriate settings in the Control Panel. For details, see "SETTING UP BUTTON MANAGER" (p.42). *2 TWAIN is an international interface standard for scanners and other image acquisition devices. By installing a TWAIN driver - Sharp MX-B201D | MX-B201D Operation Guide - Page 63
the same as for copying. See "NORMAL COPYING" (p.17). Scanner mode cannot be used at the following times: • A misfeed has occurred (paper misfeed or original misfeed in the RSPF). • The user programs are being used. • The tray paper size is being set. • The machine is being used in copy mode. • The - Sharp MX-B201D | MX-B201D Operation Guide - Page 64
with Button Manager starts. If you want only Button Manager to start in this case, set up Button Manager for use in Windows as explained in "SETTING UP BUTTON MANAGER" (p.42). • If step 4 is performed with the "Show TWAIN setting screen when scanning" checkbox selected in the Scan Button Destination - Sharp MX-B201D | MX-B201D Operation Guide - Page 65
Once installed, Button Manager normally runs in the background in the Windows operating system. If you need to change Button Manager settings, follow the steps below. For details on Button Manager settings, see Button Manager Help. "Outline of Button Manager" (p.65) 1 Right-click the Button Manager - Sharp MX-B201D | MX-B201D Operation Guide - Page 66
as a scan menu on the machine. To view Help for a setting, click the button in the upper right-hand corner of the window and then click the setting. To begin scanning using the machine's operation panel, settings must be established in the Control Panel after Button Manager is installed. For - Sharp MX-B201D | MX-B201D Operation Guide - Page 67
key ( ) or [ ] key ( ) to enter SC1 to SC6 mode. SCAN USING: SC1 3 Place the original in the document feeder tray or on the document glass. 4 Press the [ ] key ( ) or [ ] key ( ) to select the desired Button Manager scan menu setting. The application numbers are initially as follows. SCAN USING - Sharp MX-B201D | MX-B201D Operation Guide - Page 68
) • Depending on your system, "SHARP MFP TWAIN Y 1.0 (32-32)" and "WIA-SHARP MX-xxxx 1.0 (32-32)" may appear in the above "Select Source" screen. 4 Select the menu to acquire an image from the application's "File" menu. The scanner driver setup screen will appear. "Scanner driver settings" (p.69) 67 - Sharp MX-B201D | MX-B201D Operation Guide - Page 69
, see scanner driver Help. "Preview screen" (p.70) Scanning a large area at high resolution results in a large quantity of data and a prolonged scanning time. It is recommended that you set appropriate scanning preferences for the type of original being scanned, i.e., Monitor, Photo, FAX, or - Sharp MX-B201D | MX-B201D Operation Guide - Page 70
Standard)" screen lets you select the original type as well as monitor, photo, fax, or OCR according to the purpose of scanning. If you wish to change the default settings for these four buttons, or select custom settings such as the image type and resolution before scanning, switch to the "Custom - Sharp MX-B201D | MX-B201D Operation Guide - Page 71
initially specifying a scanning area, numbers can be entered to change that area relative to the top left corner as a fixed origin. 4 "Auto Scan Area Judgement" button Click when the preview screen is displayed to automatically set the scanning area to the entire preview image. Click the "Auto Scan - Sharp MX-B201D | MX-B201D Operation Guide - Page 72
method for accessing the menu to select the scanner depends upon the application. For more information, refer to the manual or the help file of your application. 3 Select the paper source and picture type, and click the "Preview" button. The preview image will appear. If you placed the original on - Sharp MX-B201D | MX-B201D Operation Guide - Page 73
" (p.17). 2 Click the "start" button, click "Control Panel", click "Printers and Other Hardware", and then click "Scanners and Cameras". Click the "SHARP MX-xxxx" icon and then click "Get pictures" in "Imaging Tasks". The "Scanner and Camera Wizard" will appear. 3 Click the "Next" button. 4 Select - Sharp MX-B201D | MX-B201D Operation Guide - Page 74
then click the "Next" button. If you are ready to end the session, click "Nothing. I'm finished working with these pictures". 7 Click the "Finish" button. The "Scanner and Camera Wizard" closes and the scanned image is saved in the specified folder. 73 - Sharp MX-B201D | MX-B201D Operation Guide - Page 75
user settings consist of the following items. To change the user program settings as explained in "SELECTING A SETTING FOR A USER PROGRAM" (p.79). Copy mode Program number Program name 1 AUTO CLEAR 2 PREHEAT MODE 3 AUTO SHUT-OFF Setting codes (factory default setting appears in bold) 1: 10 - Sharp MX-B201D | MX-B201D Operation Guide - Page 76
USER SETTINGS Program number Program name Setting codes (factory default setting appears in bold) Explanation 1: 5 MIN. 4 AUTO SHUT-OFF TIME 2: 30 MIN. 3: 60 MIN. 4: 120 MIN. 5: 240 MIN. • This function automatically switches the machine to a state that consumes even less power than - Sharp MX-B201D | MX-B201D Operation Guide - Page 77
USER SETTINGS Program number Program name Setting codes (factory default setting appears in bold) Explanation 13 MEM. FOR PRINTER 1: 30% 2: 40% 3: 50% 4: 60% 5: 70% • Use this to change the proportion of machine memory used for printer mode. 14 AUTO KEY REPEAT 1: ON 2: OFF • Use this - Sharp MX-B201D | MX-B201D Operation Guide - Page 78
USER SETTINGS Program number Program name Setting codes (factory default setting appears in bold) Explanation 20 LANGUAGE 1: AMERICAN ENGLISH 2: ENGLISH 3: FRENCH 4: SPANISH • This is used to set the 5: BRAZILIAN language used in the display. PORTUGUESE 6: ------ : : 21 RESET - Sharp MX-B201D | MX-B201D Operation Guide - Page 79
USER SETTINGS Print mode Program number Program name Setting codes (factory default setting appears in bold) Explanation 1 FORCED OUTPUT 1: ON 2: OFF • When this function is enabled, printing in printer mode will automatically continue using a different size of paper if the specified size - Sharp MX-B201D | MX-B201D Operation Guide - Page 80
can also select a program by directly entering the program number with the numeric keys. 3 Press the [ ] key ( ) or [ ] key ( ) to change the setting of the selected item. See "USER PROGRAM" (p.74 to p.78) for the program code. USER PROGRAM 2:PREHEAT MODE PREHEAT MODE 2:1 MIN • If you mistakenly - Sharp MX-B201D | MX-B201D Operation Guide - Page 81
key is pressed, and a base setting beep that sounds when a setting is the same as the base setting (base settings are explained below). The base setting beep is initially disabled. If you wish to enable the base setting beep, see "SOUND AT DEFAULT" on page 76. If you wish to change the volume of the - Sharp MX-B201D | MX-B201D Operation Guide - Page 82
the password (default is : "00000"). Changing password 3 Press the [ ] key ( ) or [ ] key ( ) to select "1: PASSWORD CHANGE" and then press the [OK] key. Use the numeric keys to enter a new five-digit password. This password allows you to disable access to the Account Control settings by all users - Sharp MX-B201D | MX-B201D Operation Guide - Page 83
[OK] key. 5 Auditing Mode is disabled by default. When Auditing Mode is enabled, a count is kept of the number of pages output by each account (up to 15 accounts can be established). To use the machine, the 5-digit account number programmed for the user's account must be entered (p.83). 5 6 82 - Sharp MX-B201D | MX-B201D Operation Guide - Page 84
and then program the new account. ACC.# CONTROL 1: ENTER ACCOUNT # 2 Use the numeric keys to enter a five-digit account number (00000 to 99999). 3 The key operator code cannot be used a an account number. 3 Press the [OK] key. If you enter an account number that has already been programmed in step - Sharp MX-B201D | MX-B201D Operation Guide - Page 85
you will return to step 2. Enter a different number. 4 If you wish to change another account number, repeat steps 2 and 3. 5 To exit, press the [C] key repeatedly. • When entering an account number, the [OK] key will not be accepted unless 5 digits have been entered. • If you press the [C] key - Sharp MX-B201D | MX-B201D Operation Guide - Page 86
TOTAL PER ACCOUNT" appears, and then press the [OK] key. 2 This program is used to display the page counts of each account. ACC. CONTROL SET 2:TOTAL PER ACCOUNT Pages that are copied for maintenance of the machine are counted to the "OTHER" account. Resetting account 2 After pressing the [C] key - Sharp MX-B201D | MX-B201D Operation Guide - Page 87
ACCOUNT #:----- 1 Enter your five-digit account number with the numeric keys. 2 When a valid account number is entered, the number of copies already made by that account appears for several seconds on the initial screen. ACC. CONTROL SET 2:TOTAL PER ACCOUNT If you enter an incorrect number, press - Sharp MX-B201D | MX-B201D Operation Guide - Page 88
Chapter 10 TROUBLESHOOTING AND MAINTENANCE Problems related to general use of the machine, the copy function, and software setup are explained here. Be sure to check the problem carefully before calling for service, as many problems can be solved by the user. If you are unable to solve the problem - Sharp MX-B201D | MX-B201D Operation Guide - Page 89
if you attempt to change a user program setting while a copy or print job is in progress. 74 There is no paper for printing. Press the NO XXXX SIZE TRAY [MODE SELECT] key to switch to printer mode and follow the instructions in the - display. ("XXXX" indicates paper size) An original remains - Sharp MX-B201D | MX-B201D Operation Guide - Page 90
TROUBLESHOOTING THE MACHINE/COPYING The following problems are related to the general operation of the machine and copying. Problem The machine does not operate press the [ ] key ( ) or [ ] key ( ) to manually select an appropriate exposure. → If the copy is too light or too dark 10 21 76 17, 18 89 - Sharp MX-B201D | MX-B201D Operation Guide - Page 91
is suitable for the original and the copy paper. The size of paper loaded in the tray was changed without changing the tray's paper size setting. → Be sure to change the tray's paper size setting whenever you change the size of paper loaded in the tray. The paper is outside of the specified size and - Sharp MX-B201D | MX-B201D Operation Guide - Page 92
the stack does not exceed the line. Some sheets of paper stick together. → Fan the paper well before loading it. The guides on the bypass tray do not match the width of the paper. → Adjust the guides to match the width of the paper. The bypass tray extension is not opened. → When loading a large - Sharp MX-B201D | MX-B201D Operation Guide - Page 93
TROUBLESHOOTING AND MAINTENANCE Problem Cause and solution Paper size for a paper tray cannot be set. Copying or printing is performed. → Set the paper size after copying or printing is complete. The machine has stopped temporarily due to running out of paper or a misfeed. → Load paper or remove - Sharp MX-B201D | MX-B201D Operation Guide - Page 94
"Printer and Faxes". 100 In Windows 2000, click the "Start" button, select "Settings" and then click "Printers". 2 If the "SHARP MX-xxxx" printer driver icon is shown but you still cannot print, the printer driver may not have been installed correctly. In this case, delete the software and - Sharp MX-B201D | MX-B201D Operation Guide - Page 95
to the printer function can be changed in the user program "MEM. FOR PRINTER". Printing is slow. Simultaneous use of two or more application software programs. → Start printing after quitting all unused application software programs. The printed image is light and uneven. The paper is loaded - Sharp MX-B201D | MX-B201D Operation Guide - Page 96
TROUBLESHOOTING AND MAINTENANCE Problem Cause and solution The paper loaded in the tray is not the same size as that specified in the printer driver. → Check if the "Paper Size" options suit the size of the paper loaded in the tray. → If the "Fit To Paper Size" setting is activated, make sure - Sharp MX-B201D | MX-B201D Operation Guide - Page 97
TROUBLESHOOTING AND MAINTENANCE Problem suitable resolution. → Make sure that the resolution setting in the - scanner driver is appropriate for the original. You have not button on the "Image" tab of the "Professional" screen. The brightness and contrast settings are not suitable. - Sharp MX-B201D | MX-B201D Operation Guide - Page 98
TROUBLESHOOTING AND MAINTENANCE Problem Unable to scan the image. Scanner transfer speed is slow. Cause and solution If scanning is not possible, shut down your computer, turn off the machine's power switch, and unplug the - Sharp MX-B201D | MX-B201D Operation Guide - Page 99
PROBLEMS DURING SETUP OF THE SOFTWARE If the software does not install correctly, check the following items on your computer. To remove the software, see "Removing the software" (p.100). MFP driver cannot be installed (Windows 2000/XP) If the MFP driver cannot be installed in Windows 2000/XP, follow - Sharp MX-B201D | MX-B201D Operation Guide - Page 100
and Maintenance". • On Windows 2000, click the "Start" button, select "Settings", and then click "Control click the "Device Manager" button. • On Windows Vista/7, click the "Device Manager", and if you must check your computer manual for USB troubleshooting or contact your computer manufacturer. - Sharp MX-B201D | MX-B201D Operation Guide - Page 101
Programs". • On Windows Vista/7, click the "Uninstall a program". • On Windows 2000, double-click the "Add/Remove Programs" icon. 3 Select "SHARP MX-B201 Series MFP Driver" and Button Manager from the list, and remove the software. For more information, refer to your operating manual or to the help - Sharp MX-B201D | MX-B201D Operation Guide - Page 102
RSPF" (p.104). 1 Open the bypass tray, and then open the side cover. 2 3 Check the misfeed location. Remove the misfed paper following the instructions for each location in the illustration below. If the error indicator blinks, proceed to "A: Misfeed in the paper feed area" (p.102). If the misfed - Sharp MX-B201D | MX-B201D Operation Guide - Page 103
TROUBLESHOOTING AND MAINTENANCE A: Misfeed in the paper feed area 1 Gently remove the misfed paper from the paper feed area as shown in the illustration. If the error indicator blinks and the misfed paper is not visible in the paper feed area, pull out the paper tray and remove the misfed paper. If - Sharp MX-B201D | MX-B201D Operation Guide - Page 104
Do not touch the surface of the drum (green portion) of the drum cartridge when removing the misfed paper. Doing so may cause smudges on copies. • Do not remove the misfed paper from above the fusing unit. Unfixed toner on the paper may stain the paper transport area, resulting in smudges on copies - Sharp MX-B201D | MX-B201D Operation Guide - Page 105
the RSPF and close the document feeder cover. Roller (X) (Y) 104 Open and close the RSPF to clear the error indicator. "RETURN X ORIGINAL(S) START TO RESUME" will appear in the display. Return the indicated number of pages to the document feeder tray. Press the [START] key ( ) to resume copying. - Sharp MX-B201D | MX-B201D Operation Guide - Page 106
is continued while the indicator is lit, copies will gradually become lighter until the toner runs out. When the toner runs out, the machine will stop operating, the error indicator will blink, and "REPLACE THE TONER CARTRIDGE" will appear in the display. Follow the procedure below to replace the - Sharp MX-B201D | MX-B201D Operation Guide - Page 107
the cartridge, remove the toner seal. Shutter 4 or 5 times Toner seal Grasp the toner cartridge as shown in the illustration. Do not hold the cartridge by the shutter. Be sure to only shake the cartridge before the toner seal is removed. 5 Gently insert the toner cartridge along the guides until - Sharp MX-B201D | MX-B201D Operation Guide - Page 108
may be damaged. Even after a new toner cartridge is installed, the start ( ) indicator may not light up, indicating copying cannot be restarted (toner is not sufficiently fed). In this case, open and close the side cover. The copier will feed toner again approximately 2 minutes and then copying can - Sharp MX-B201D | MX-B201D Operation Guide - Page 109
the printer function Total number of sent and received faxes Total number of sent faxes Total number of scans The remaining number of pages that can be printed with the toner cartridge is displayed. * When the optional Facsimile Expansion Kit is installed. MAINTENANCE REQUIRED When the error - Sharp MX-B201D | MX-B201D Operation Guide - Page 110
MACHINE Proper care is essential in order to get clean, sharp copies. Be sure to take a few minutes to clean side of the RSPF Stains on the glass, RSPF scanning window, cover or RSPF roller will also be copied. Wipe the glass, RSPF scanning window, cover and RSPF roller with a soft, clean cloth. - Sharp MX-B201D | MX-B201D Operation Guide - Page 111
open button. 3 Take the charger cleaner out by holding the tab. Set the charger cleaner onto the right end of the transfer charger, gently slide the cleaner to the left end, and then remove it. Repeat this operation two or three times. Slide the charger cleaner from the right end to the left - Sharp MX-B201D | MX-B201D Operation Guide - Page 112
Expansion Kit (MX-FX12) Network Expansion Kit (MX-NB11) 250-sheet paper feed unit (MX-CS10) FACSIMILE EXPANSION KIT (MX-FX12) This allows the machine to be used as a facsimile machine. NETWORK EXPANSION KIT (MX-NB11) This allows the machine to be used as a network printer/network scanner. 111 - Sharp MX-B201D | MX-B201D Operation Guide - Page 113
250-SHEET PAPER FEED UNIT (MX-CS10) The paper feed unit provide the convenience of increased paper capacity for the unit and a greater choice of paper size readily available for copying. The procedures for loading paper in the paper tray of paper feed unit, changing the paper size, and selecting the - Sharp MX-B201D | MX-B201D Operation Guide - Page 114
2 Click "Control Panel", select "Printer and Other Hardware", and then click "Printer and Faxes". • On Windows Vista/7, click "Control Panel", and then click "Printer". • On Windows 2000, select "Setting" and click "Printers". 3 Click the "SHARP MX-XXXX" printer driver icon and from the "File" menu - Sharp MX-B201D | MX-B201D Operation Guide - Page 115
MX-B201D OPERATION GUIDE MX-B201D
-
 1
1 -
 2
2 -
 3
3 -
 4
4 -
 5
5 -
 6
6 -
 7
7 -
8
-
9
-
10
-
11
-
12
-
13
-
14
-
15
-
16
-
17
-
18
-
19
-
20
-
21
-
22
-
23
-
24
-
25
-
26
-
27
-
28
-
29
-
30
-
31
-
32
-
33
-
34
-
35
-
36
-
37
-
38
-
39
-
40
-
41
-
42
-
43
-
44
-
45
-
46
-
47
-
48
-
49
-
50
-
51
-
52
-
53
-
54
-
55
-
56
-
57
-
58
-
59
-
60
-
61
-
62
-
63
-
64
-
65
-
66
-
67
-
68
-
69
-
70
-
71
-
72
-
73
-
74
-
75
-
76
-
77
-
78
-
79
-
80
-
81
-
82
-
83
-
84
-
85
-
86
-
87
-
88
-
89
-
90
-
91
-
92
-
93
-
94
-
95
-
96
-
97
-
98
-
99
-
100
-
101
-
102
-
103
-
104
-
105
-
106
-
107
-
108
-
109
-
110
-
111
-
112
-
113
-
114
-
115
 |
 |

DIGITAL MULTIFUNCTIONAL
SYSTEM
OPERATION GUIDE
MX-B201D
MODEL