Sony Ericsson T290a User Guide - Page 43
GPRS and GSM, Add Profile
 |
View all Sony Ericsson T290a manuals
Add to My Manuals
Save this manual to your list of manuals |
Page 43 highlights
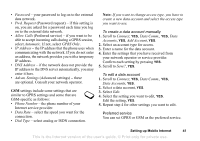
To select preferred mode • Scroll to Connect, YES, Data Comm., YES Pref. Service and select GPRS and GSM or GSM Only. Note: If you have chosen GPRS and GSM for your preferred service and you are not connected to the GSM network, you can see the status of GPRS coverage and connection. Press the upper or lower side volume key from standby to enter the Status menu and then scroll to GPRS. WAP profile settings The WAP settings are stored in a WAP profile. In most cases you only need to use one profile to access the Internet. Tip: If there are no data account or WAP profile settings in your phone, you can enter data account settings when you enter WAP profile settings. See Web Services, YES, Options, YES, WAP Profiles, YES, Add Profile, YES, Enter a name, YES, Connect Using, YES, Add Account, YES. To enter WAP profile settings manually 1. Make sure you have a data account set up between your phone and the Internet server, as described in "Data account settings" on page 40. 2. Scroll to Web Services, YES, Options, YES, WAP Profiles, YES. 3. Select Add Profile to add a new profile or select an existing profile that you want to edit, YES. When selecting Add Profile enter a name for the profile, YES, Connect Using, YES, select the data account to be used, YES and enter the IP Address, YES. A list appears. Scroll to Save?, YES. When selecting an existing profile, you can do the following: • Rename - Change the name of the profile. • Connect Using - Select data account. • IP Address - WAP gateway server address. • Advanced - More profile settings, see below. • Delete - Remove the profile. 42 Setting up Mobile Internet This is the Internet version of the user's guide. © Print only for private use.
-
 1
1 -
2
-
3
-
4
-
5
-
6
-
7
-
8
-
9
-
10
-
11
-
12
-
13
-
14
-
15
-
16
-
17
-
18
-
19
-
20
-
21
-
22
-
23
-
24
-
25
-
26
-
27
-
28
-
29
-
30
-
31
-
32
-
33
-
34
-
35
-
36
-
37
-
 38
38 -
 39
39 -
 40
40 -
 41
41 -
 42
42 -
 43
43 -
 44
44 -
 45
45 -
 46
46 -
 47
47 -
 48
48 -
49
-
50
-
51
-
52
-
53
-
54
-
55
-
56
-
57
-
58
-
59
-
60
-
61
-
62
-
63
-
64
-
65
-
66
-
67
-
68
-
69
-
70
-
71
-
72
-
73
-
74
-
75
-
76
-
77
-
78
-
79
-
80
-
81
-
82
-
83
-
84
-
85
-
86
 |
 |
