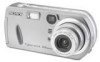
Sony DSC-P92 Operating Instructions (primary manual) - Page 78
Connecting the camera to your computer, Insert the Memory Stick
 |
View all Sony DSC-P92 manuals
Add to My Manuals
Save this manual to your list of manuals |
Page 78 highlights
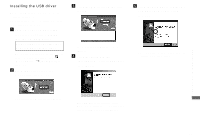
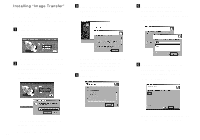
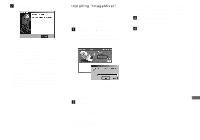
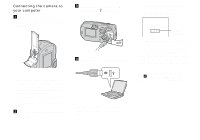
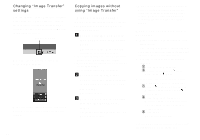
Connecting the camera to your computer a Insert the "Memory Stick" with the images you want to copy into the camera. • Be sure to use fully charged nickel-metal hydride batteries or the AC Adaptor (not supplied). When you copy images to your computer using weak batteries, copying may fail or the data may be corrupted if the camera shuts off due to weak batteries. • For further details on the AC Adaptor, see page 15. • For further details on the "Memory Stick," see page 19. b Turn on your computer and the camera. c Connect the supplied USB cable to the (USB) jack of the camera. d Connect the USB cable to your computer. • When using a desktop computer, connect the USB cable to the USB connector on the rear panel. • When using Windows XP, the AutoPlay wizard automatically appears on the desktop. Proceed to page 81. USB MODE NORMAL Access indicators* "USB MODE NORMAL" appears on the LCD screen of the camera. When a USB connection is established for the first time, your computer automatically runs the used program to recognize the camera. Wait for a while. * During communication, the access indicators turn red. • If "USB MODE NORMAL" does not appear in step 4, confirm that [USB Connect] is set to [Normal] in the SET UP settings (page 103). 78
-
 1
1 -
2
-
3
-
4
-
5
-
6
-
7
-
8
-
9
-
10
-
11
-
12
-
13
-
14
-
15
-
16
-
17
-
18
-
19
-
20
-
21
-
22
-
23
-
24
-
25
-
26
-
27
-
28
-
29
-
30
-
31
-
32
-
33
-
34
-
35
-
36
-
37
-
38
-
39
-
40
-
41
-
42
-
43
-
44
-
45
-
46
-
47
-
48
-
49
-
50
-
51
-
52
-
53
-
54
-
55
-
56
-
57
-
58
-
59
-
60
-
61
-
62
-
63
-
64
-
65
-
66
-
67
-
68
-
69
-
70
-
71
-
72
-
 73
73 -
 74
74 -
 75
75 -
 76
76 -
 77
77 -
 78
78 -
 79
79 -
 80
80 -
 81
81 -
 82
82 -
 83
83 -
84
-
85
-
86
-
87
-
88
-
89
-
90
-
91
-
92
-
93
-
94
-
95
-
96
-
97
-
98
-
99
-
100
-
101
-
102
-
103
-
104
-
105
-
106
-
107
-
108
-
109
-
110
-
111
-
112
-
113
-
114
-
115
-
116
 |
 |
