TP-Link TL-WR543G User Guide - Page 44
Wireless MAC Address Filtering, Delete All - repeater
 |
UPC - 845973051204
View all TP-Link TL-WR543G manuals
Add to My Manuals
Save this manual to your list of manuals |
Page 44 highlights
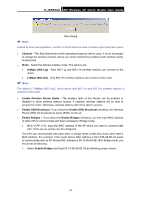
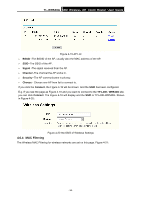
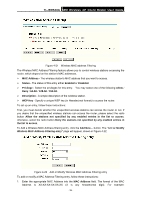
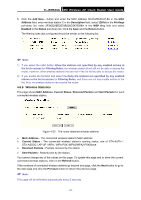
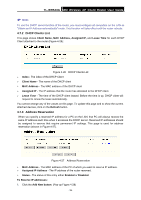
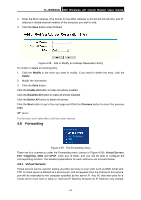
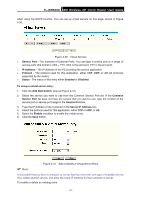
TL-WR543G 54M Wireless AP Client Router User Guide 00-0A-EB-B0-00-0B. 2. Enter a simple description of the wireless station in the Description field. For example: Wireless station A. 3. Privilege - Select the privileges for this entry, one of Allow / Deny / 64-bit / 128-bit / 152-bit. 4. WEP Key - If you select 64-bit, 128-bit or 152-bit in the Privilege field, enter any combination of hexadecimal digits (0-9, a-f, A-F) in the specified length. For example: 2F34D20BE2. 5. Status - Select Enabled or Disabled for this entry on the Status pull-down list. 6. Click the Save button to save this entry. To add additional entries, repeat steps 1-6. ) Note: When 64-bit, or 128-bit, or 152-bit is selected, WEP Key will be enabled. To modify or delete an existing entry: 1. Click the Modify in the entry you want to modify. If you want to delete the entry, click the Delete. 2. Modify the information. 3. Click the Save button. Click the Enable All button to make all entries enabled Click the Disabled All button to make all entries disabled. Click the Delete All button to delete all entries Click the Next button to go to the next page and click the Previous button to return to the previous page. For example: If you desire that the wireless station A with MAC address 00-0A-EB-00- 07-BE be able to access the router. The wireless station B with MAC address 00-0A-EB- 00-07-5F not be able to access the router, and the wireless station C with MAC address 00-0A-EB-00-07-8A be able to access the router when its WEP key is 2F34D20BE2E 54B326C5476586A, while all other wireless stations cannot access the router, you should configure the Wireless MAC Address Filtering list by following these steps: 1. Click the Enable button to enable this function. 2. Select the radio button: Deny the stations not specified by any enabled entries in the list to access for Filtering Rules. 3. Delete all or disable all entries if there are any entries already. 4. Click the Add New... button and enter the MAC address 00-0A-EB-00-07-BE in the MAC Address field, enter wireless station A in the Description field, select Allow in the Privilege pull-down list and select Enabled in the Status pull-down list. Click the Save and the Return button. 5. Click the Add New... button and enter the MAC address 00-0A-EB-00-07-5F in the MAC Address field, enter wireless station B in the Description field, select Deny in the Privilege pull-down list and select Enabled in the Status pull-down list. Click the Save and the Return button. - 36 -
-
 1
1 -
2
-
3
-
4
-
5
-
6
-
7
-
8
-
9
-
10
-
11
-
12
-
13
-
14
-
15
-
16
-
17
-
18
-
19
-
20
-
21
-
22
-
23
-
24
-
25
-
26
-
27
-
28
-
29
-
30
-
31
-
32
-
33
-
34
-
35
-
36
-
37
-
38
-
 39
39 -
 40
40 -
 41
41 -
 42
42 -
 43
43 -
 44
44 -
 45
45 -
 46
46 -
 47
47 -
 48
48 -
 49
49 -
50
-
51
-
52
-
53
-
54
-
55
-
56
-
57
-
58
-
59
-
60
-
61
-
62
-
63
-
64
-
65
-
66
-
67
-
68
-
69
-
70
-
71
-
72
-
73
-
74
-
75
-
76
-
77
-
78
-
79
-
80
-
81
-
82
-
83
 |
 |