TRENDnet TEW-751DR User's Guide - Page 16
PBC Software/Virtual Push Button, Wireless, Wi-Fi Protected Setup, Connect, Wireless Status
 |
View all TRENDnet TEW-751DR manuals
Add to My Manuals
Save this manual to your list of manuals |
Page 16 highlights
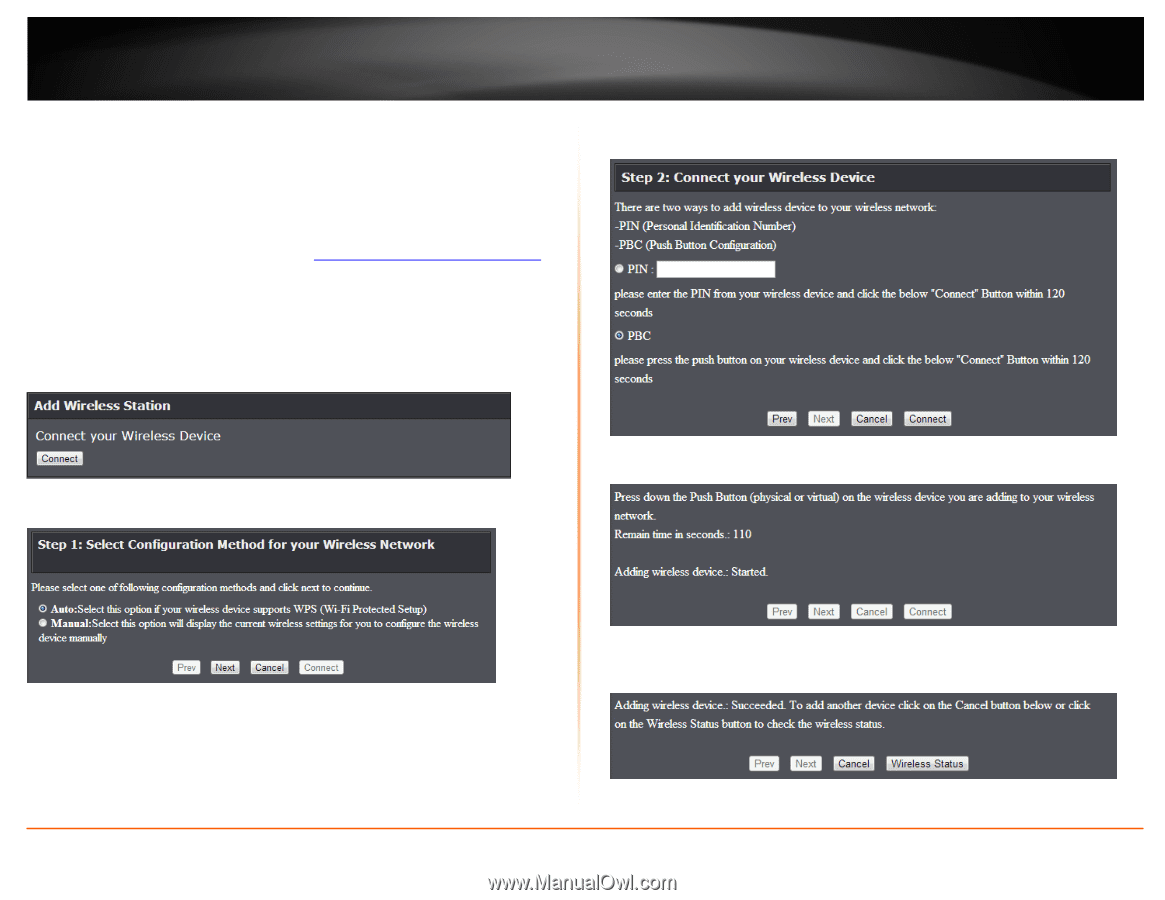
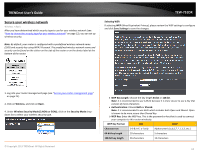
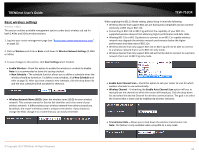
TRENDnet User's Guide PBC (Software/Virtual Push Button) Wireless > Wi-Fi Protected Setup In addition to the hardware push button located physically on your router, the router management page also has push button which is a software or virtual push button you can click to activate WPS on your router. 1. Log into your router management page (see "Access your router management page" on page 25). 2. Click on Wireless, and click on Wi-Fi Protected Setup. 3. To add a wireless device to your network, click the Connect button in the router management page. TEW-751DR 5. Select PBC and click Connect. Then push the WPS button on the wireless device (consult wireless device's User's Guide for length of time) you are connecting. 4. Make sure Auto is selected and click Next. 6. Wait for your router to finsh the WPS process. 7. If successful, you will receive the message below. Click on Wireless Status to view the information about the current wireless client devices connected to your router. © Copyright 2013 TRENDnet. All Rights Reserved. 16
-
 1
1 -
2
-
3
-
4
-
5
-
6
-
7
-
8
-
9
-
10
-
 11
11 -
 12
12 -
 13
13 -
 14
14 -
 15
15 -
 16
16 -
 17
17 -
 18
18 -
 19
19 -
 20
20 -
 21
21 -
22
-
23
-
24
-
25
-
26
-
27
-
28
-
29
-
30
-
31
-
32
-
33
-
34
-
35
-
36
-
37
-
38
-
39
-
40
-
41
-
42
-
43
-
44
-
45
-
46
-
47
-
48
-
49
-
50
-
51
-
52
-
53
-
54
-
55
-
56
-
57
-
58
-
59
-
60
-
61
 |
 |